THE VAN PROJECT - Kitchen (Part 1)
This is the eighth post in a series that serves as the primary documentation of how I purchased and converted a 2008 Dodge Sprinter Van to a full-time living space.
Outlines
The kitchen was one of the last, most complex, most important components of the van build. Nothing to me makes a home more than the ability to prep food you like to eat. The kitchen will be split into two posts since it’s so complex - this first post will focus on the immediate kitchen cabinet and core appliances, while a future one will focus on kitchen peripherals like the fridge, overhead cabinetry, and other finishing touches.
- Layout Considerations
- Backsplash
- Cabinet Construction
- …Countertop
- …Storage Ottoman
- Propane System
- Water System
- …Setup
- …Filling and Emptying
- Putting It Together
Layout
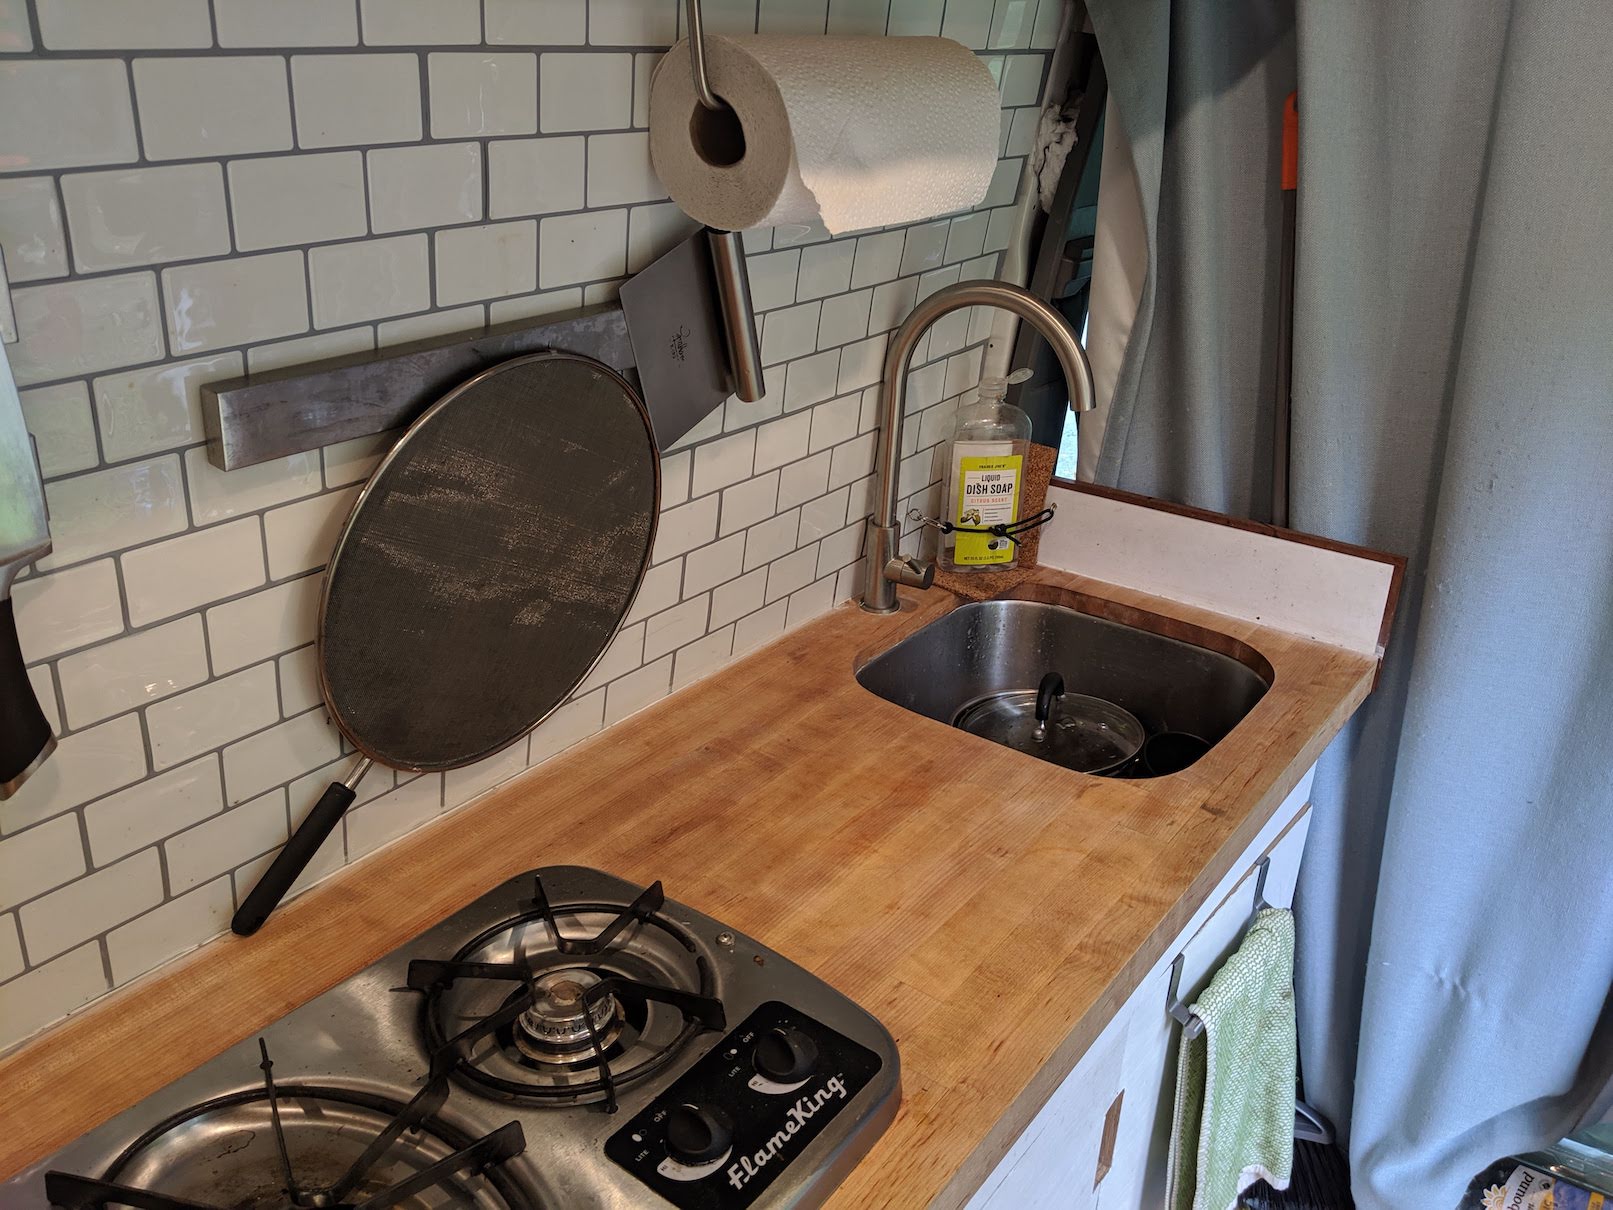
I first had to choose both the exact stove and sink model I wanted in the kitchen so that I would be able to design the kitchen cabinetry around these appliances to maximize space usage. I chose a drop-in stove that measured about 18.5” x 13” and a 14” undermount stainless steel sink along with a faucet that had a minimal base footprint of 2”. This would all have to fit in a countertop area measuring about 70” long by 18” wide.
I decided to place the sink at the far right end of the countertop/cabinet, as far away from the bed as possible to reduce potential splash contamination. The stove would go some distance closer to the bed, but ideally still further away if possible for the same reasons. After drawing multiple iterations I settled on a four-column cabinet design, with each cabinet area matching a countertop feature. Closest to the bed would be a large 21” countertop prep area and pantry cabinet. Next would be the stove, underneath which would be a slightly smaller 19” area. Next would be the narrowest 13” wide countertop prep area and narrow cabinet, perfectly sized for most pots and pans. Finally would be the sink area with the water tank system underneath.
This design allows two people to comfortably use the kitchen, since the sink and stove area provide some elbow room even if the actual countertop space measurements are underwhelming. Overall I am very satisfied - I don’t think there exists another layout in the given countertop area that is as easy to use and keeps food splashes away from the bed.
Backsplash
Although I hadn’t originally planned for it I decided to see if it was possible to install some kind of backsplash over the walls of the van behind the kitchen. Especially since the countertop I envisioned would not be built with a mini 4” backsplash, I figured it was worth investigating to see if the walls could be protected from water, kitchen splashes, and the like.
After reading some favorable reviews of faux-tile sticker backsplashes, I decided to give it a try. The stickers sound a bit tacky (hah), but they are much much cheaper and easier to work with than real tile. What I gave up in fine detail I gained in balance and stability (rigid, heavy tile is a terrible idea in a van).
The tile merely needs a rigid surface to adhere to. I considered thin, 1/8” plexiglass but after some measuring I realized that a sheet of 1/4” plywood would still be thin enough to fit everything in front of it. I cut a cheap sheet of ply, primed it to allow better adhesion, and went to work covering it with the sticker pack tiles.
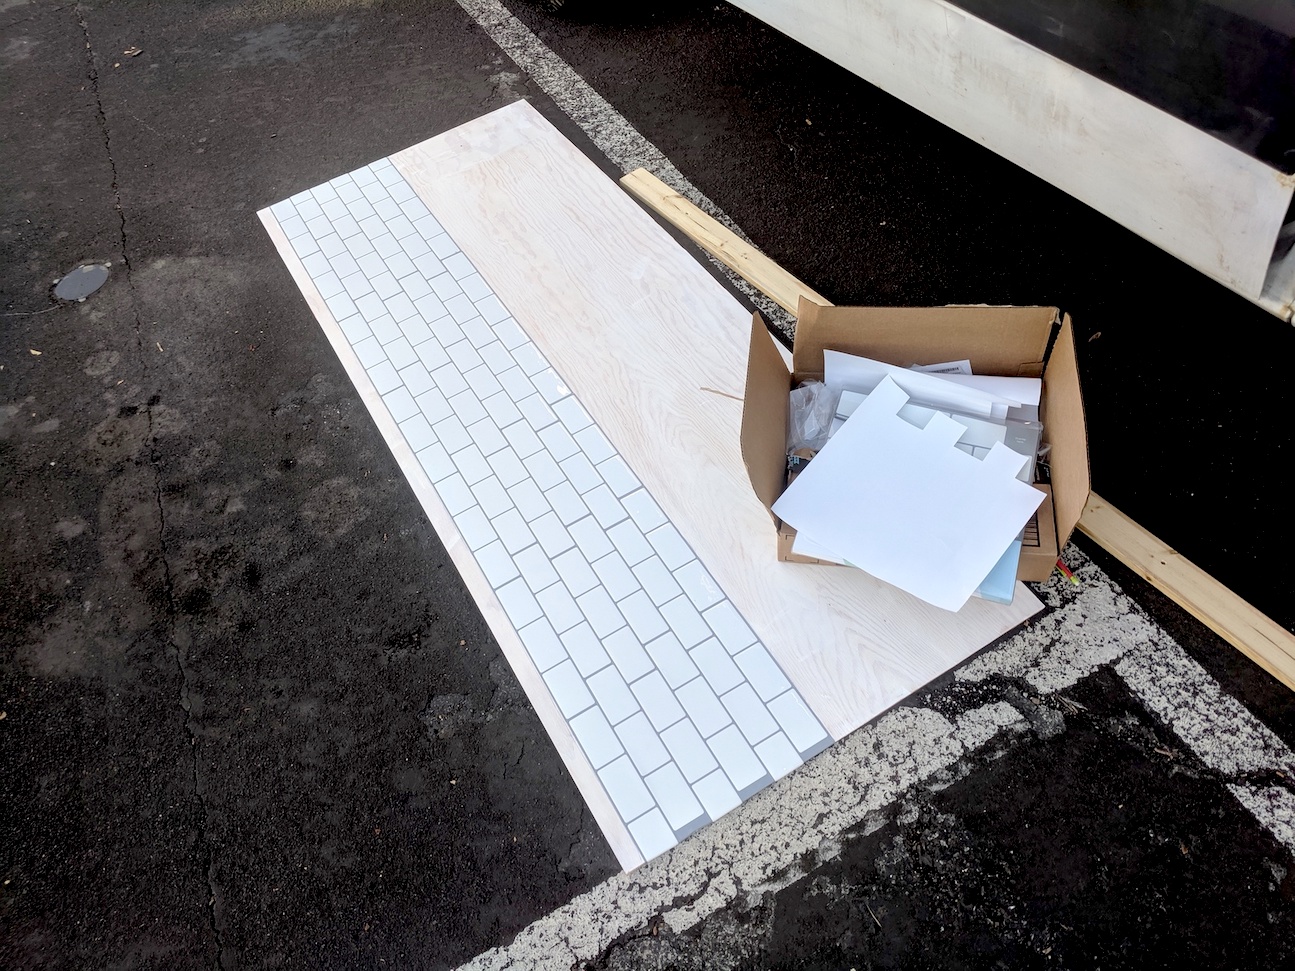 Sticking the tiles to the painted plywood
Once I was finished it was a simple matter to screw the plywood to the walls of the van.
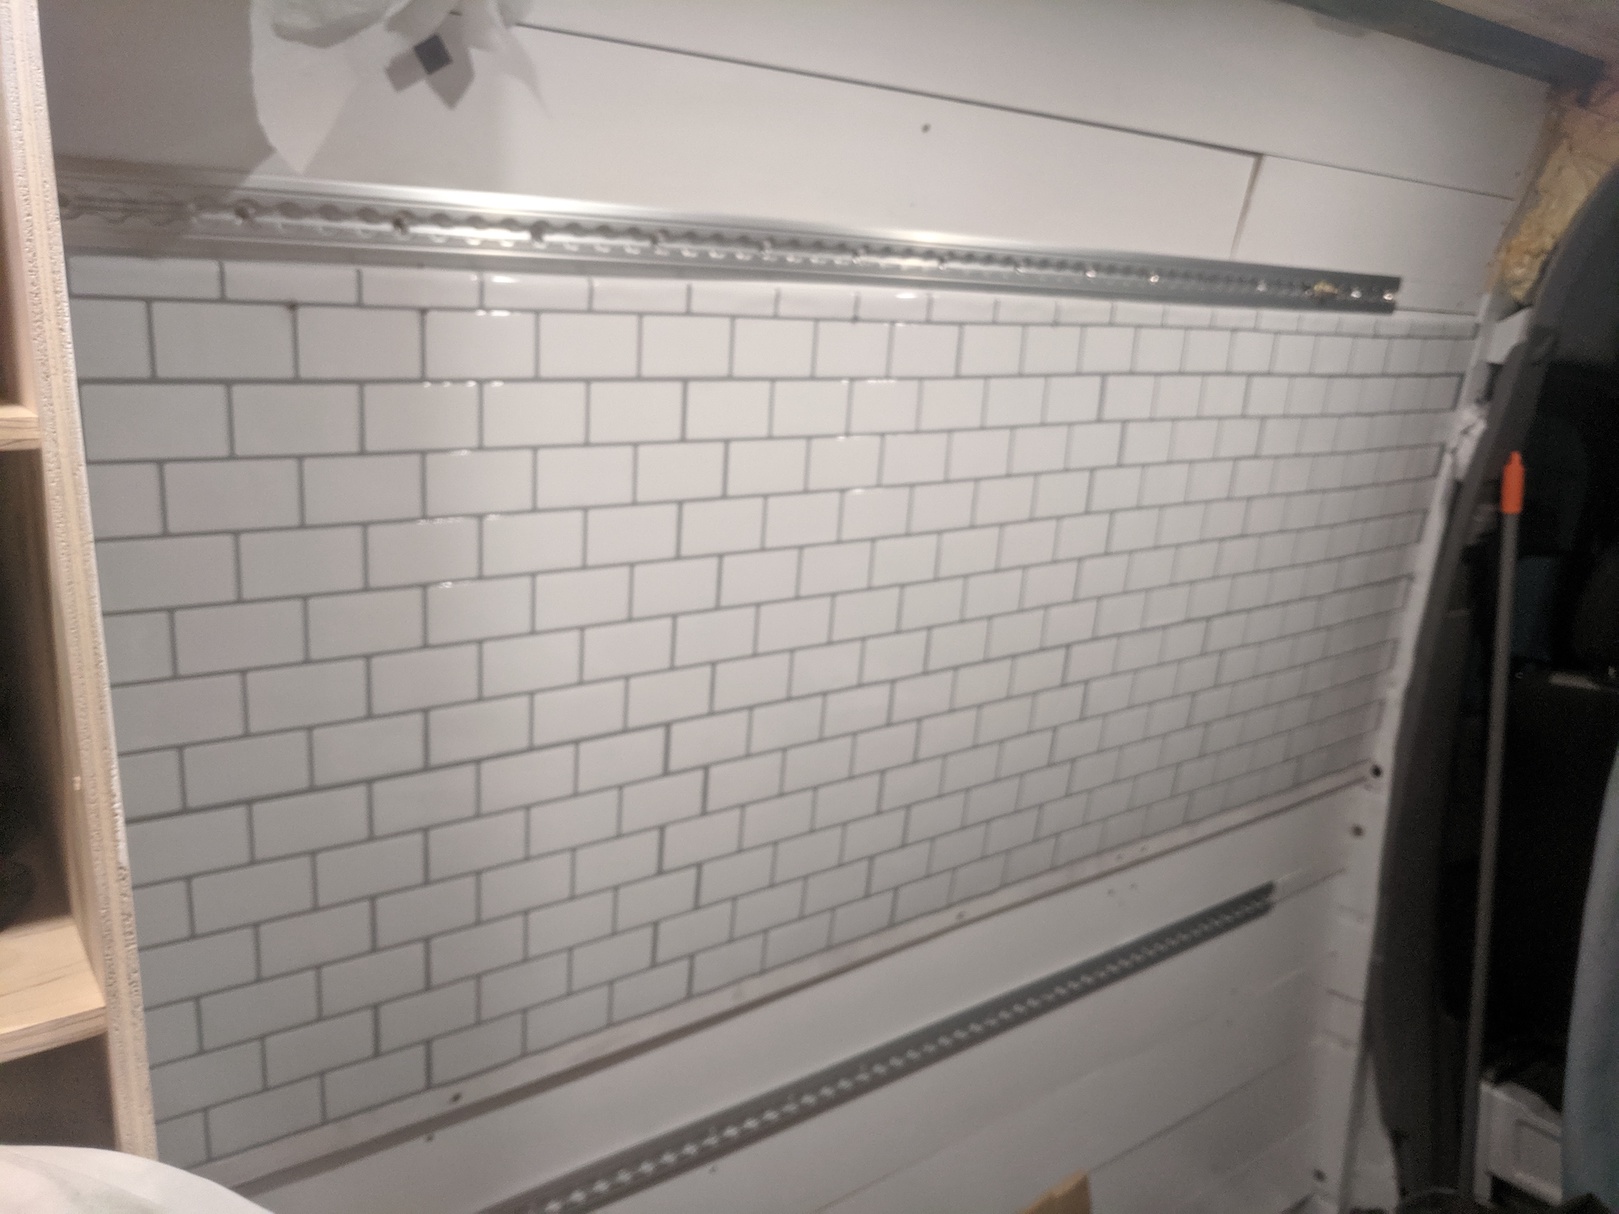 The backsplash mounted in the van
Cabinets
I used many similar techniques to build the kitchen cabinet as I used in the underbed storage system and bedside cabinet process. The cabinet frames are primarily constructed out of 1/2” birch plywood, with the shelves dadoed and glued into place. There are four drawers featured in the kitchen cabinet, two silverware-drawer height drawers for easy access flatware, and two deep drawers that are sized for propane and oils, vinegars, and spices.
I built two cabinet towers which would each be able to be installed separately in the van by connecting them via pocket screws to a single long stud that is itself bolted to the van wall L track system. Once the two towers were installed I planned to additionally overlay two more studs on top which would serve the multiple purposes of adding stability, connecting the cabinets together, and providing a surface that the countertop could eventually be attached to.
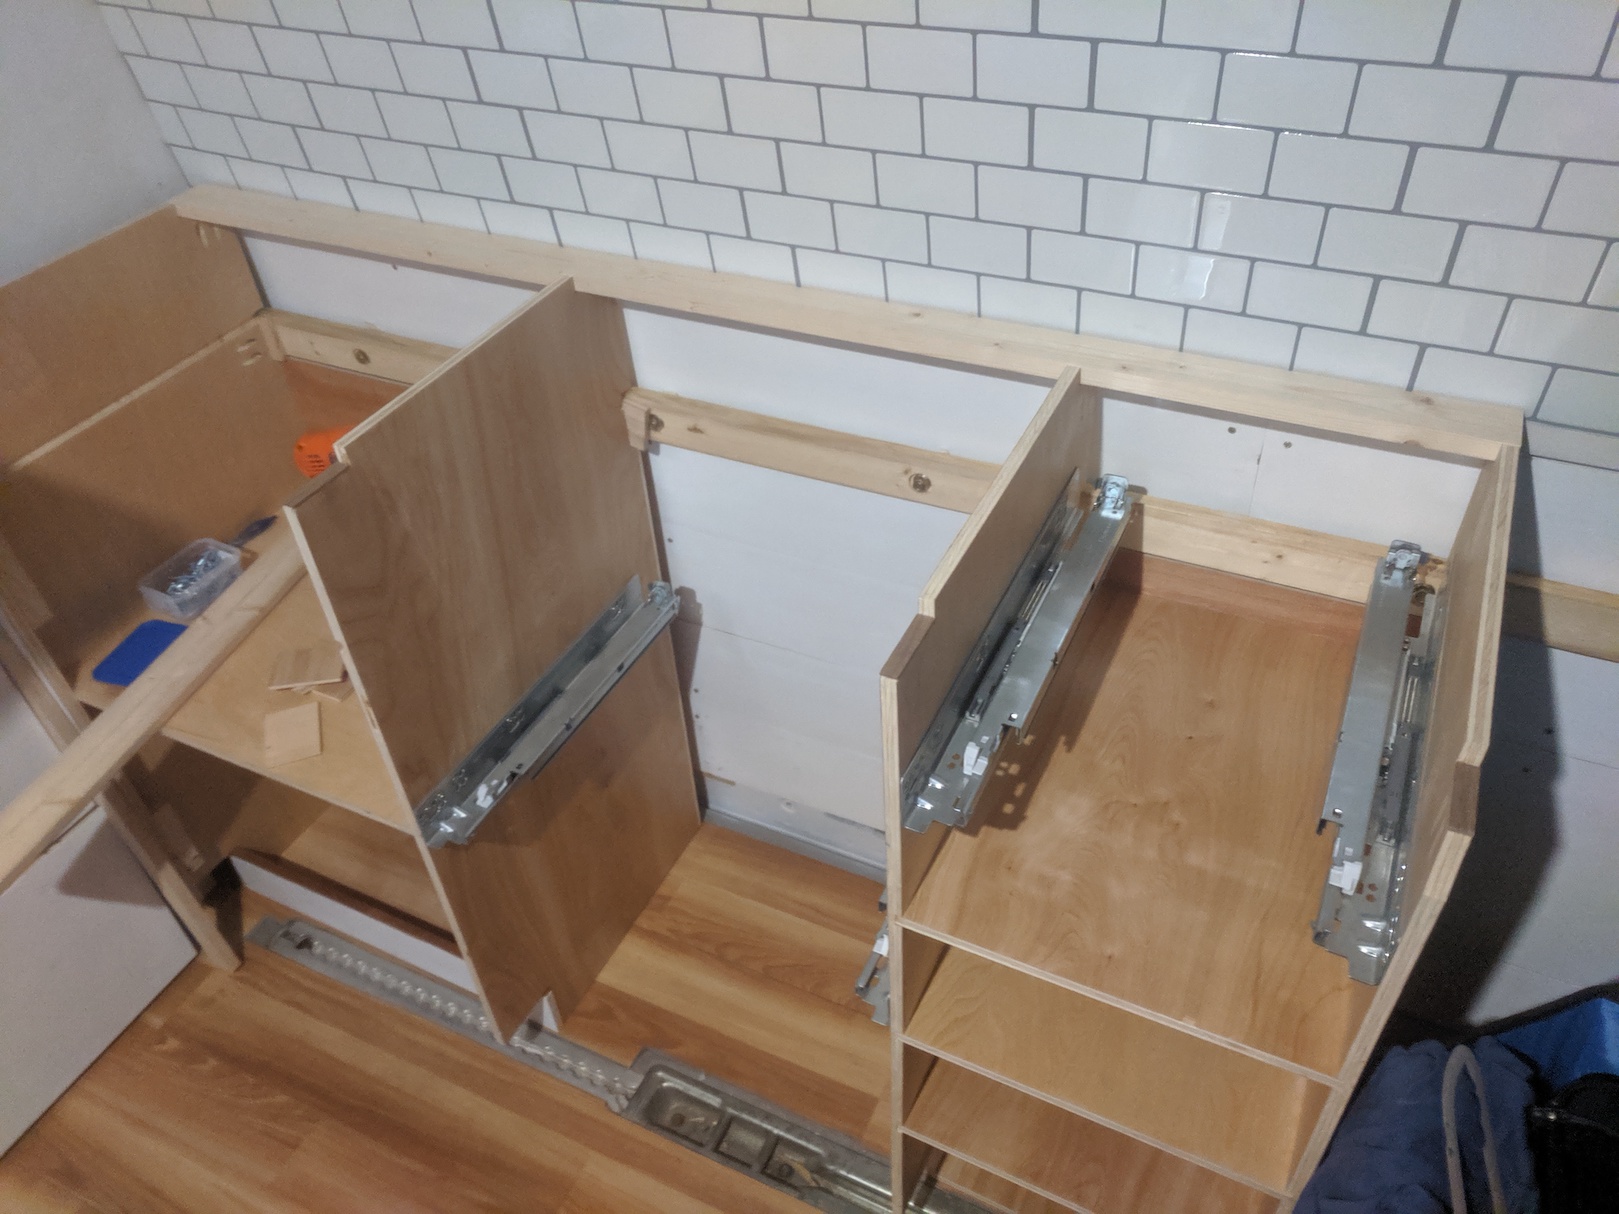 The cabinet bodies installed. Upper rear stud also installed, upper front stud not yet pictured
Countertop
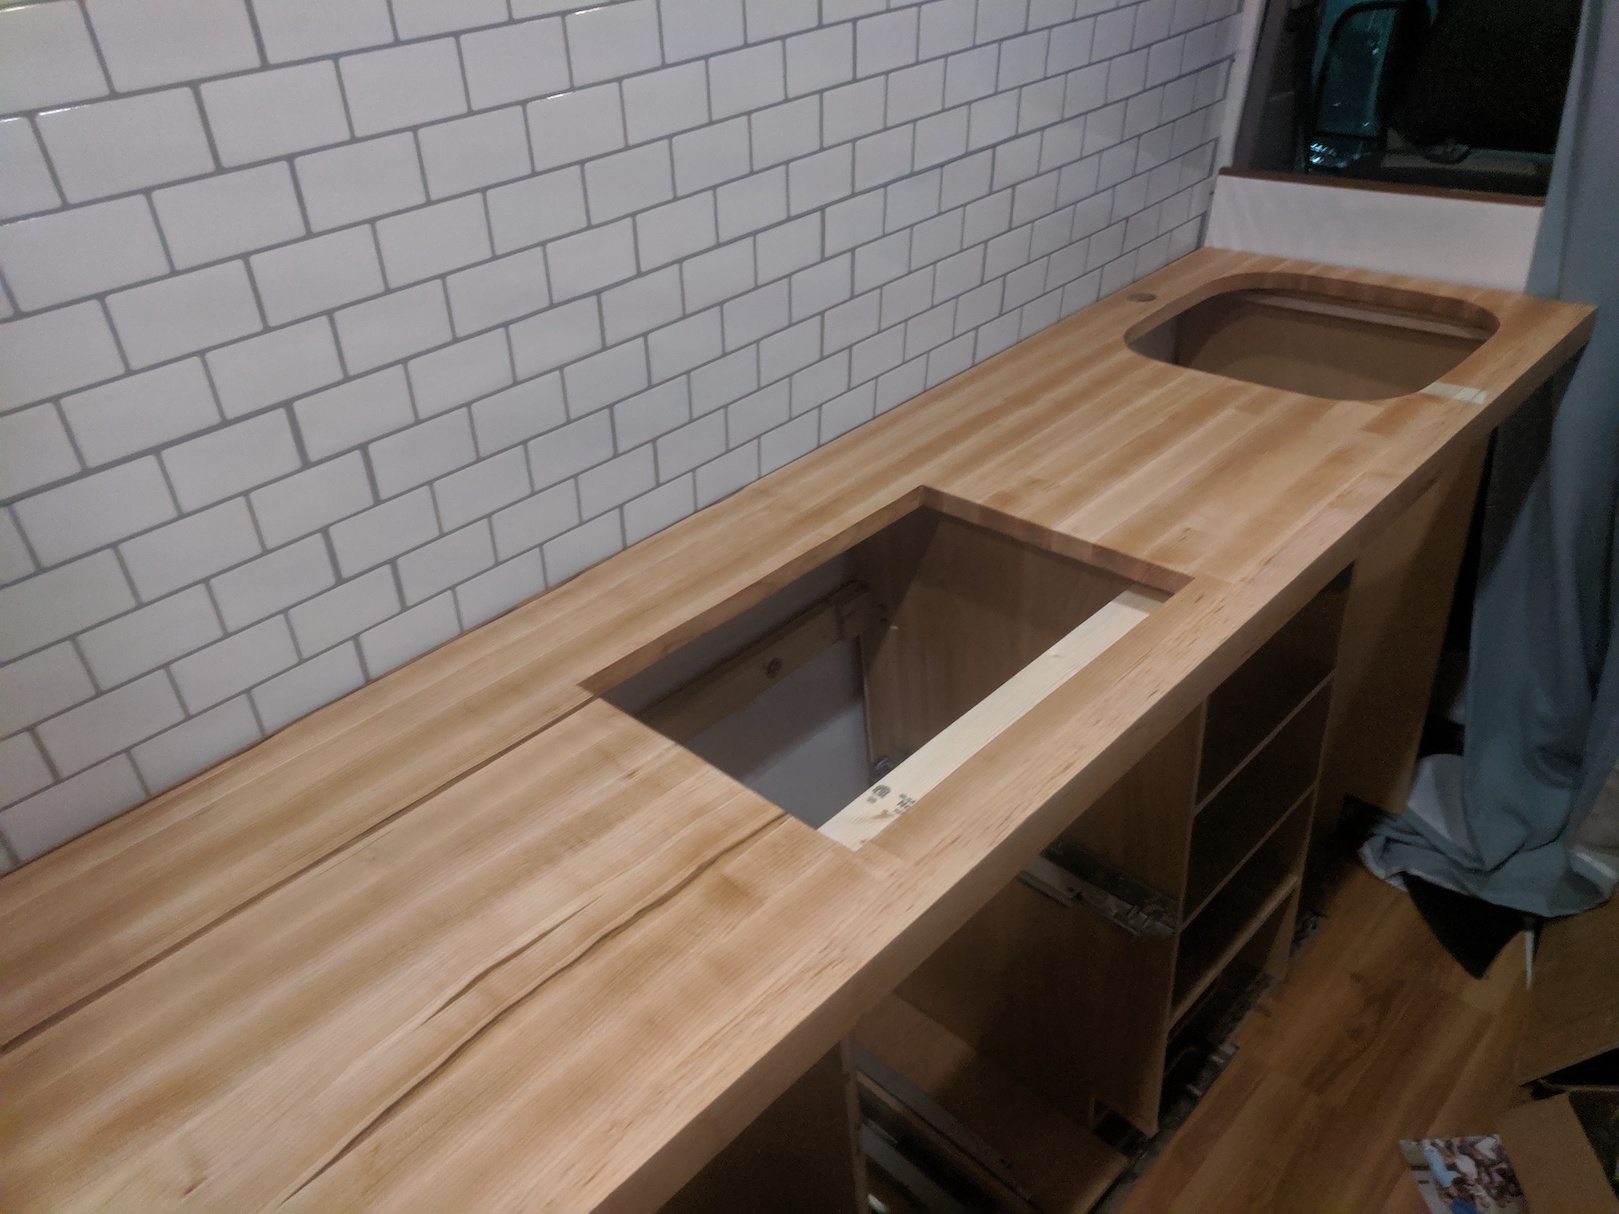
The maple butcher-block in the kitchen is one of my favorite features of the van. I used similar techniques as the pullout table - it is constructed from scratch, starting from a block of maple ripped down into strips, glued, sanded, and finished with mineral oil and butcher block conditioner.
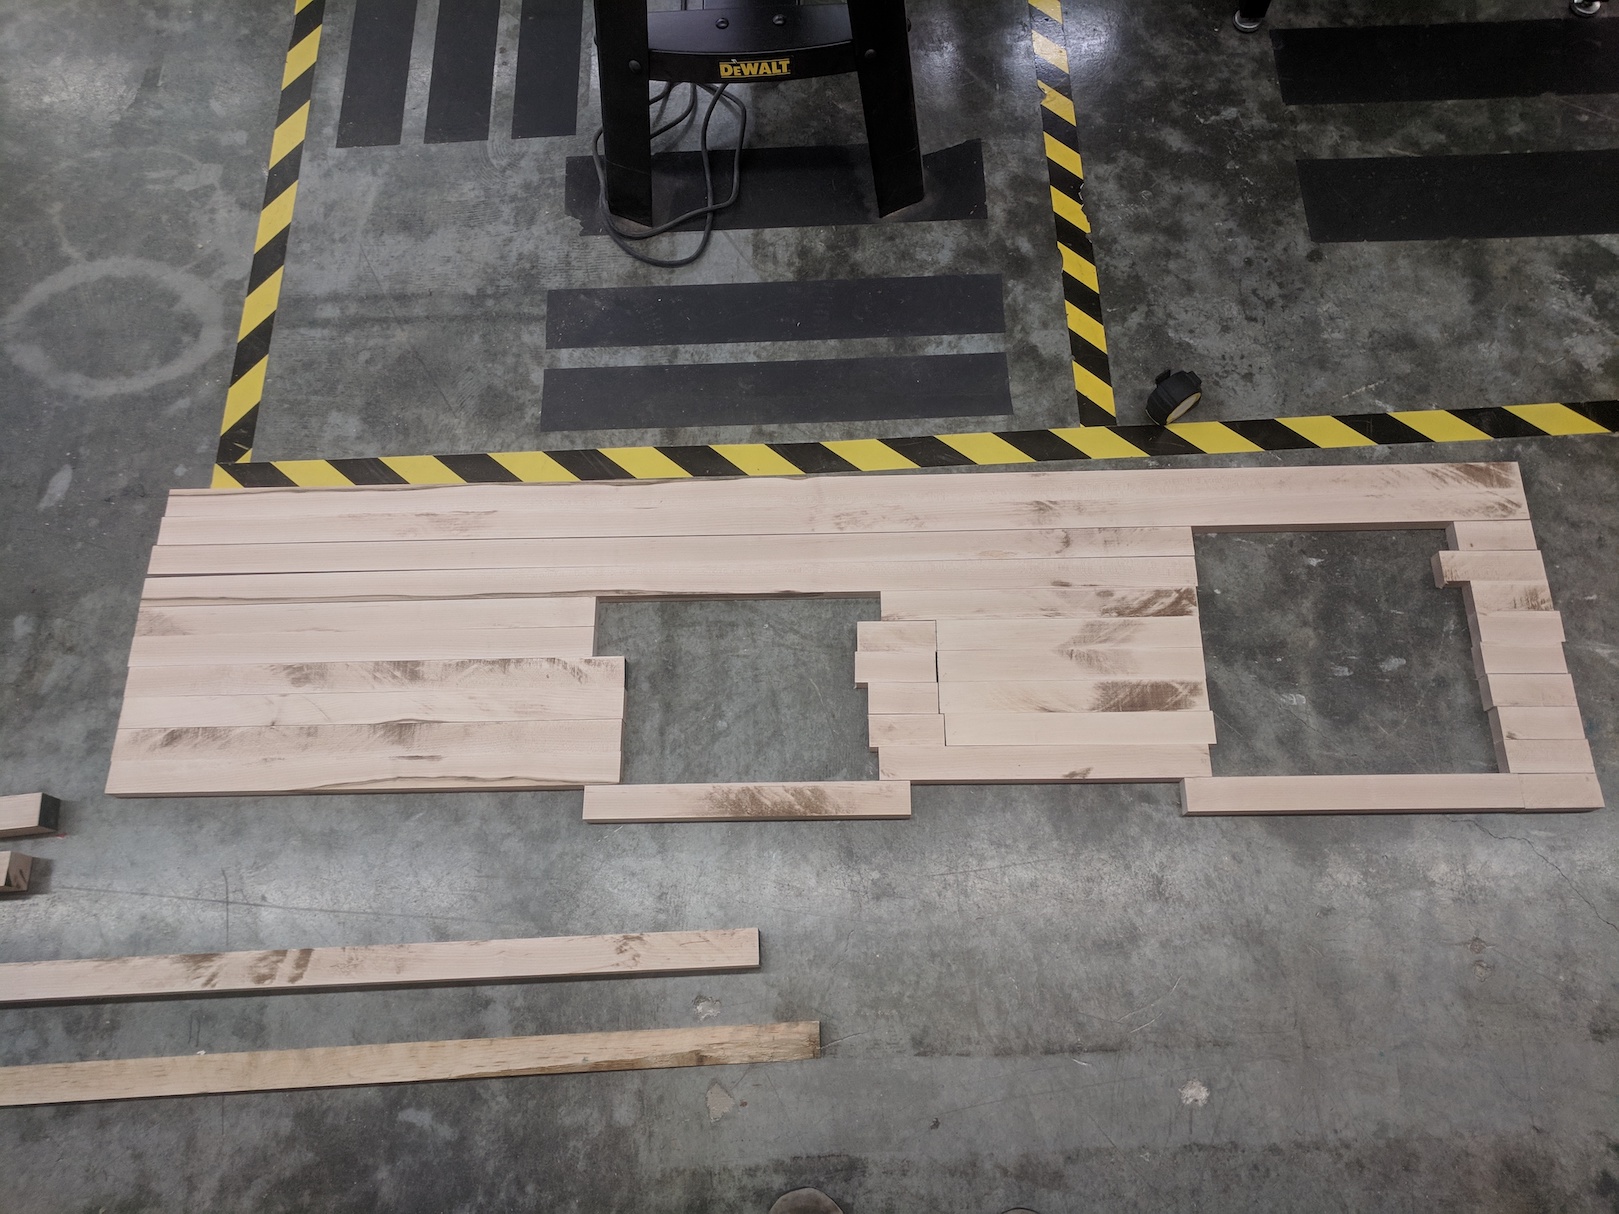 Laying out the maple strips for the countertop. I didn’t have enough wood to make a solid block, so I left holes where the sink and stove would be in the future
The holes for the sink and stove fit perfectly, something I was quite afraid of as I knew that a slip or measuring mistake here would basically ruin the entire thing up to this point.
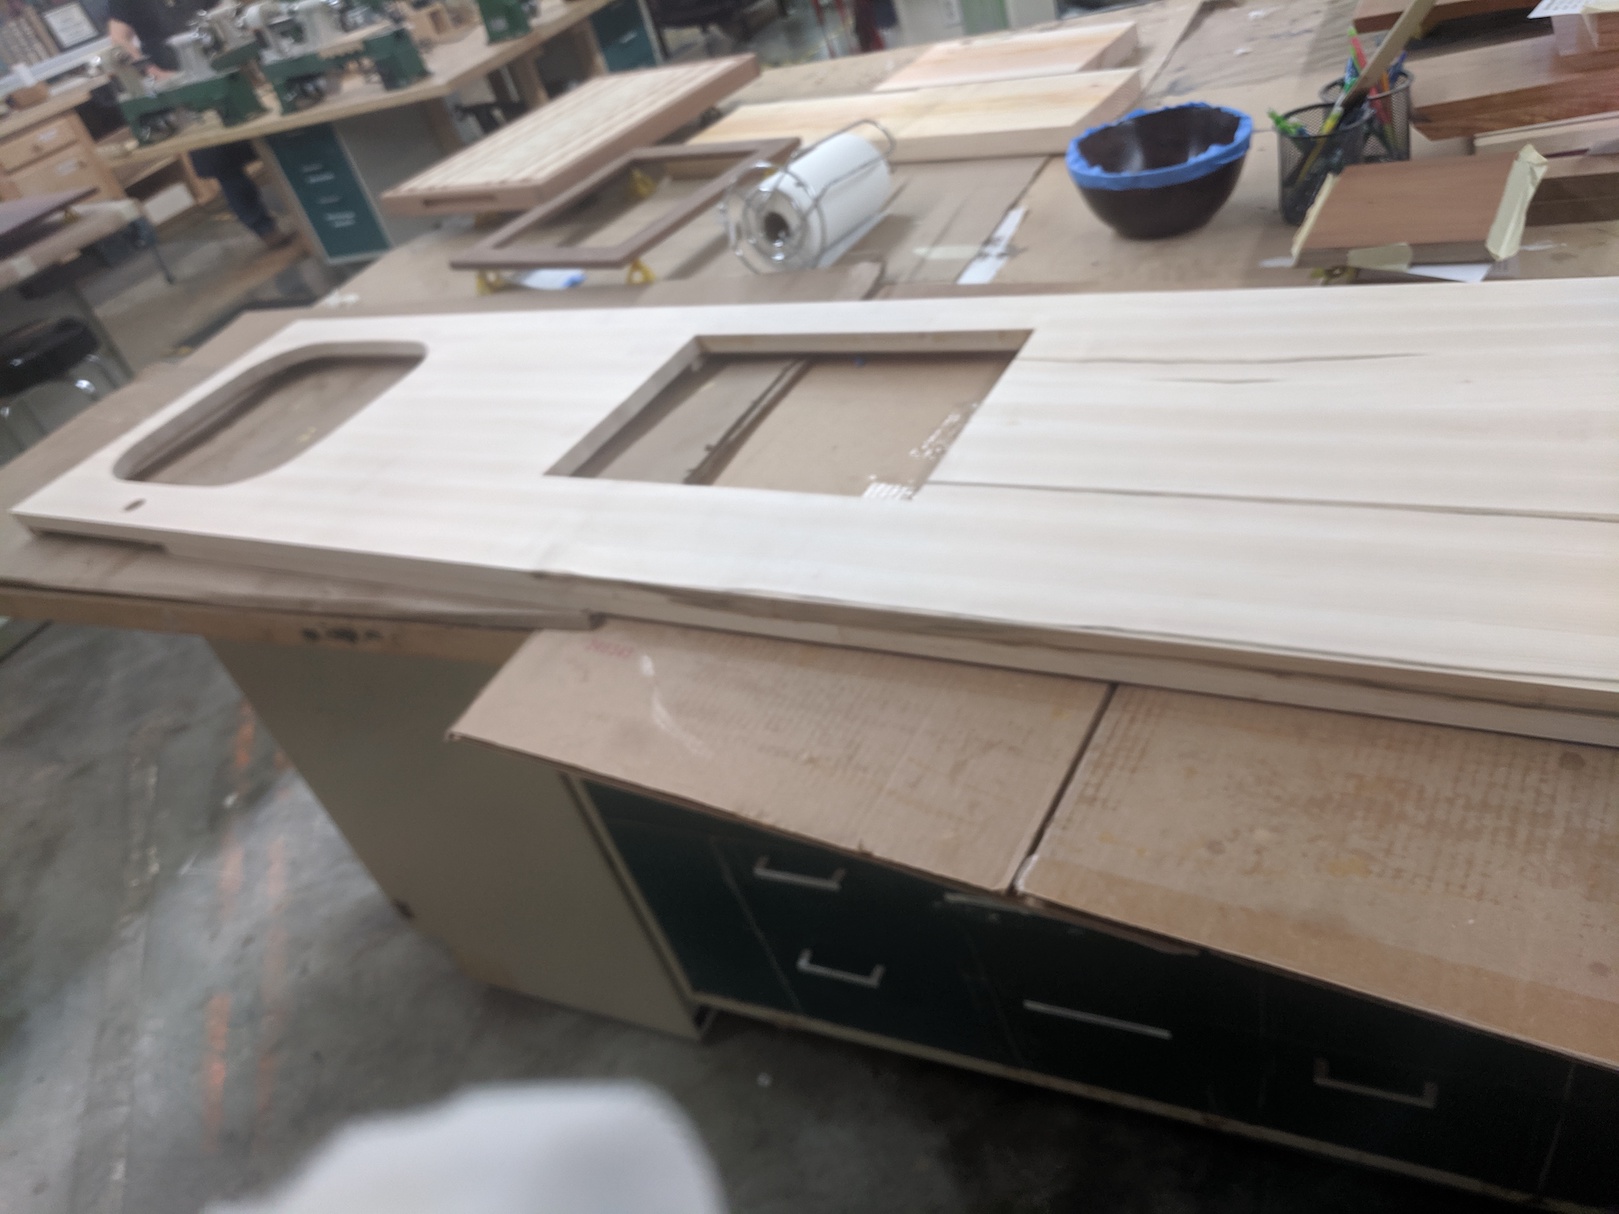 Countertop glued, sanded, and holes cut for sink and stove!
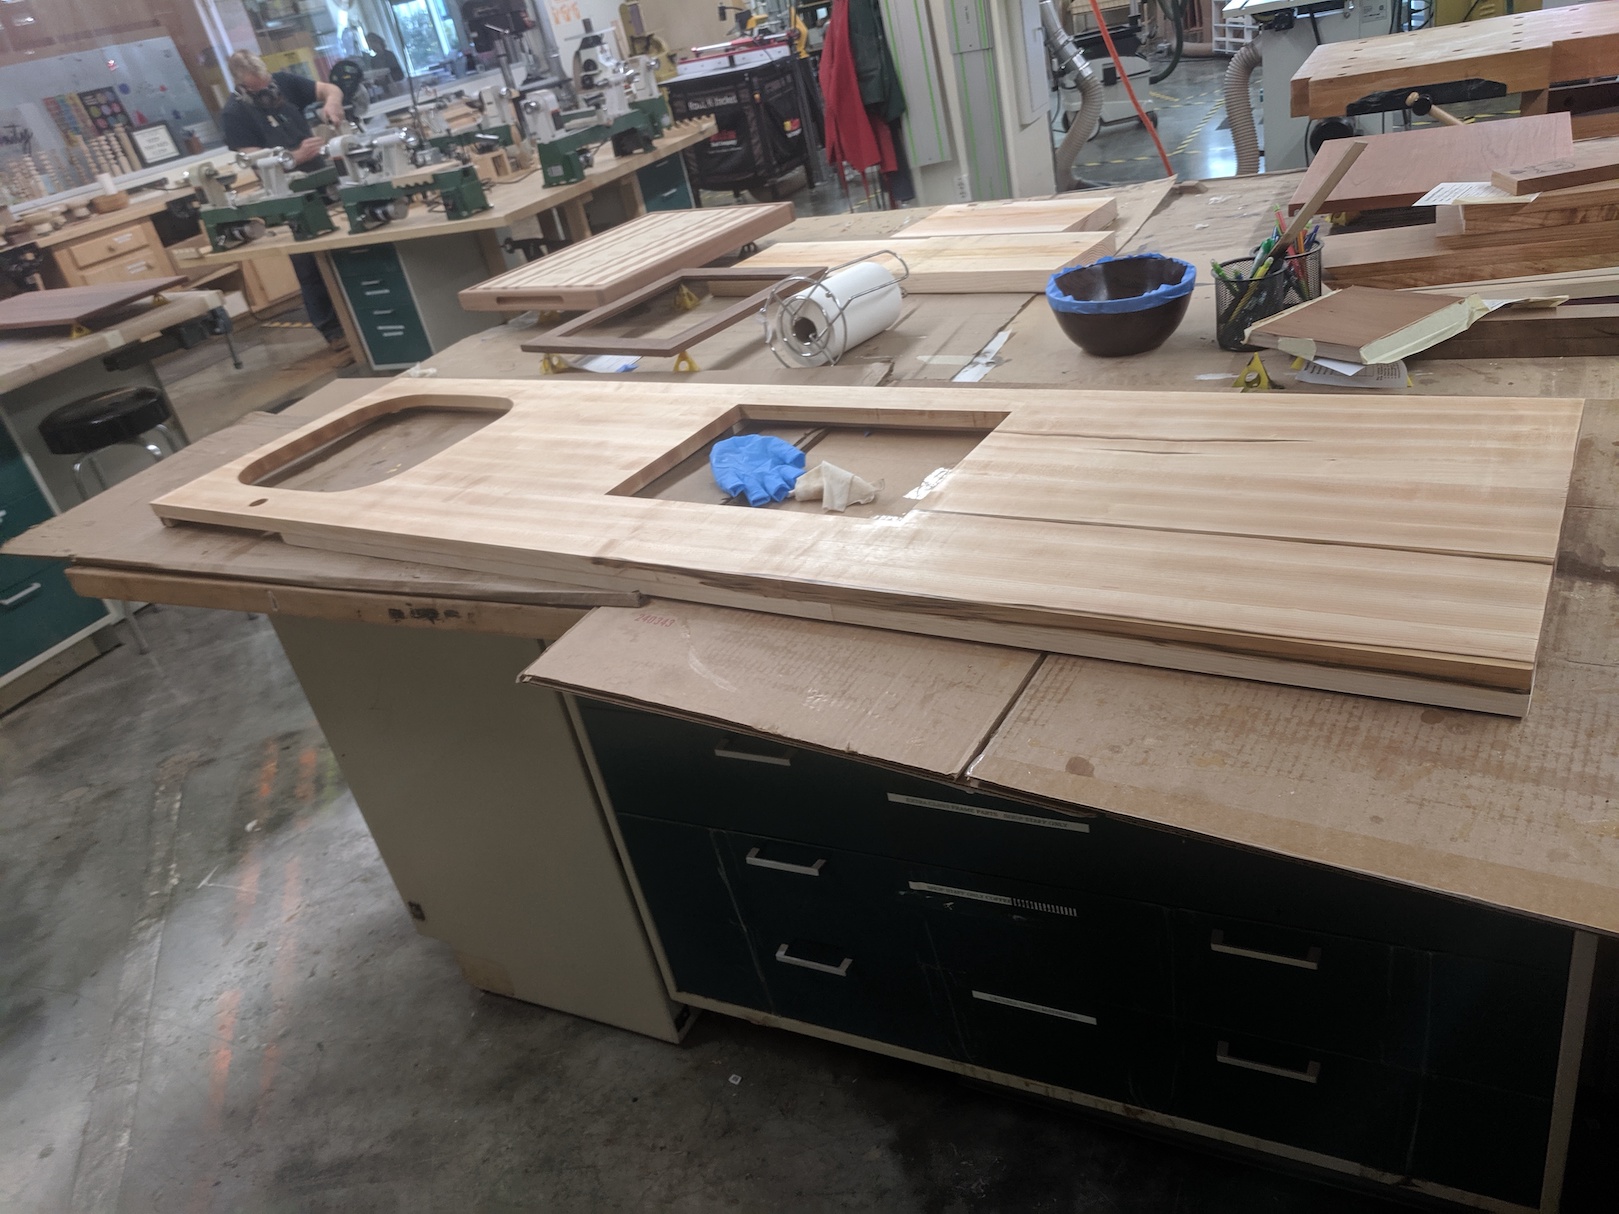 After a coat of conditioner
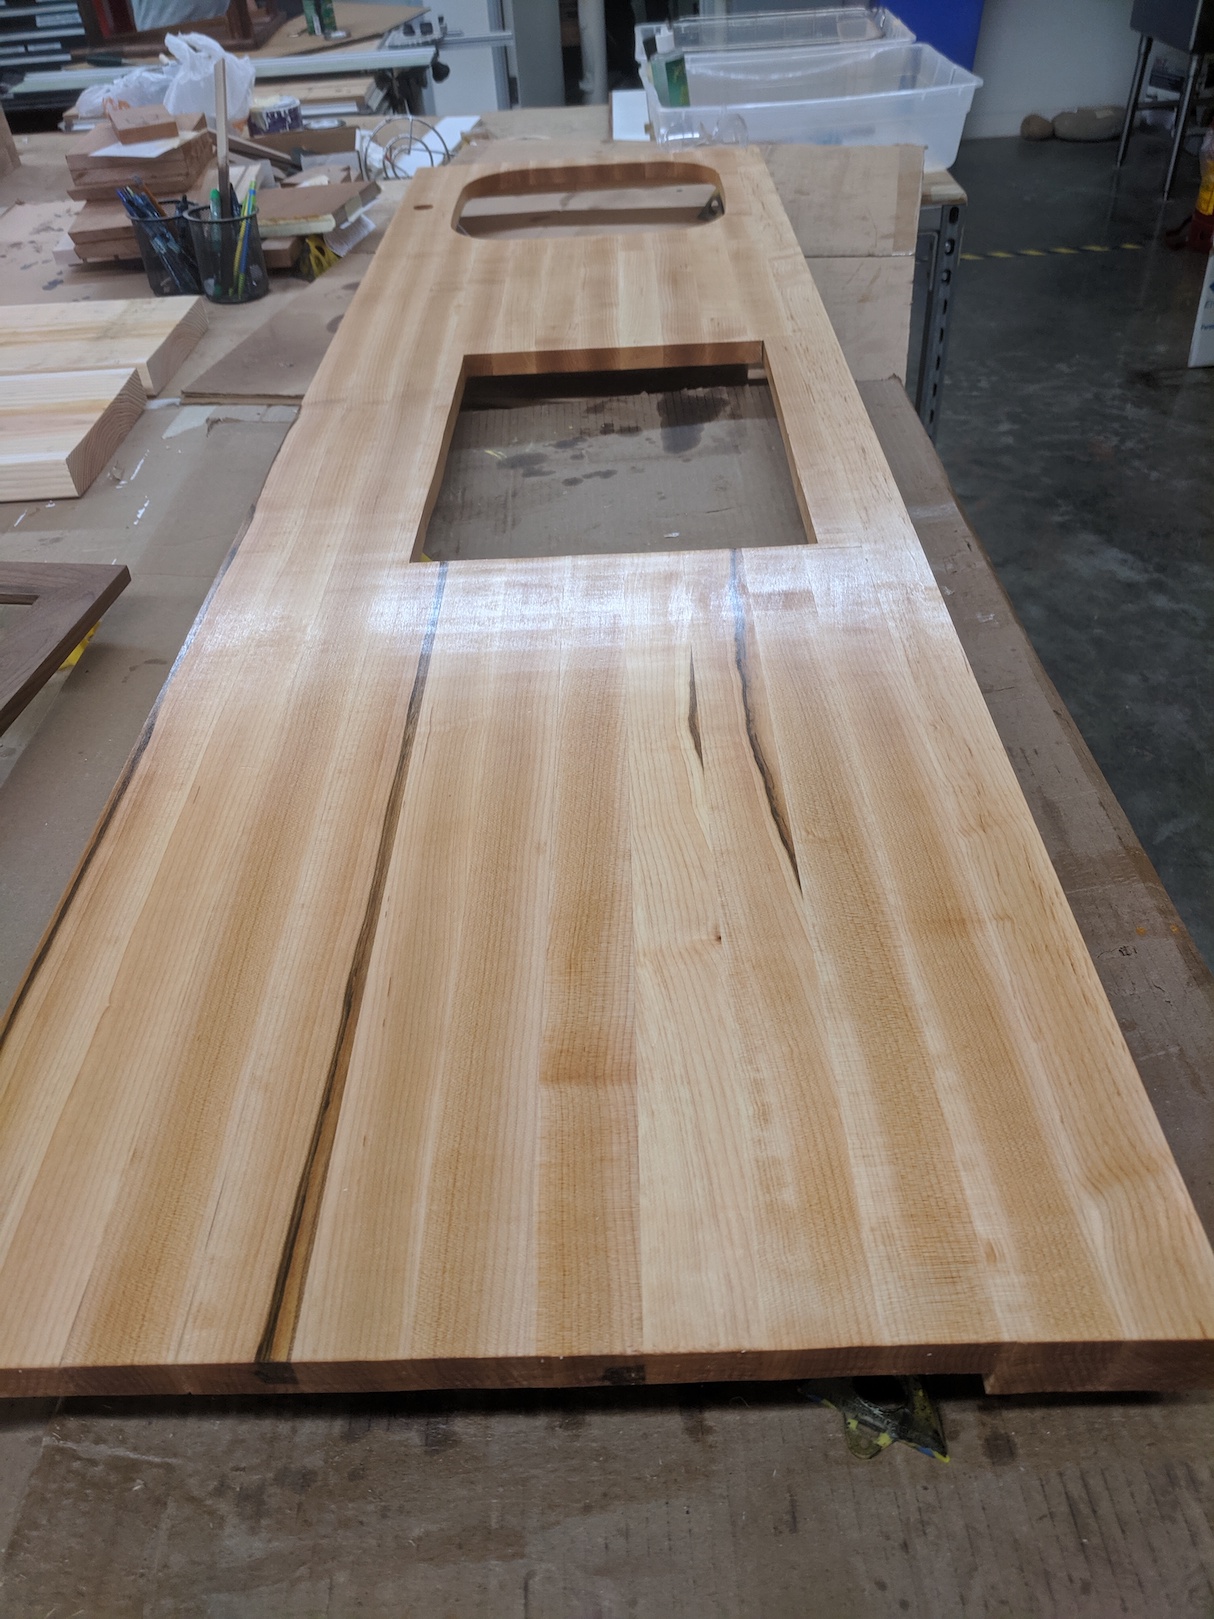 Shiny!
The butcher block finish on the countertop is food safe and hydrophobic, maximizing food prep area as well as ease of cleaning.
 Test fitting the countertop…
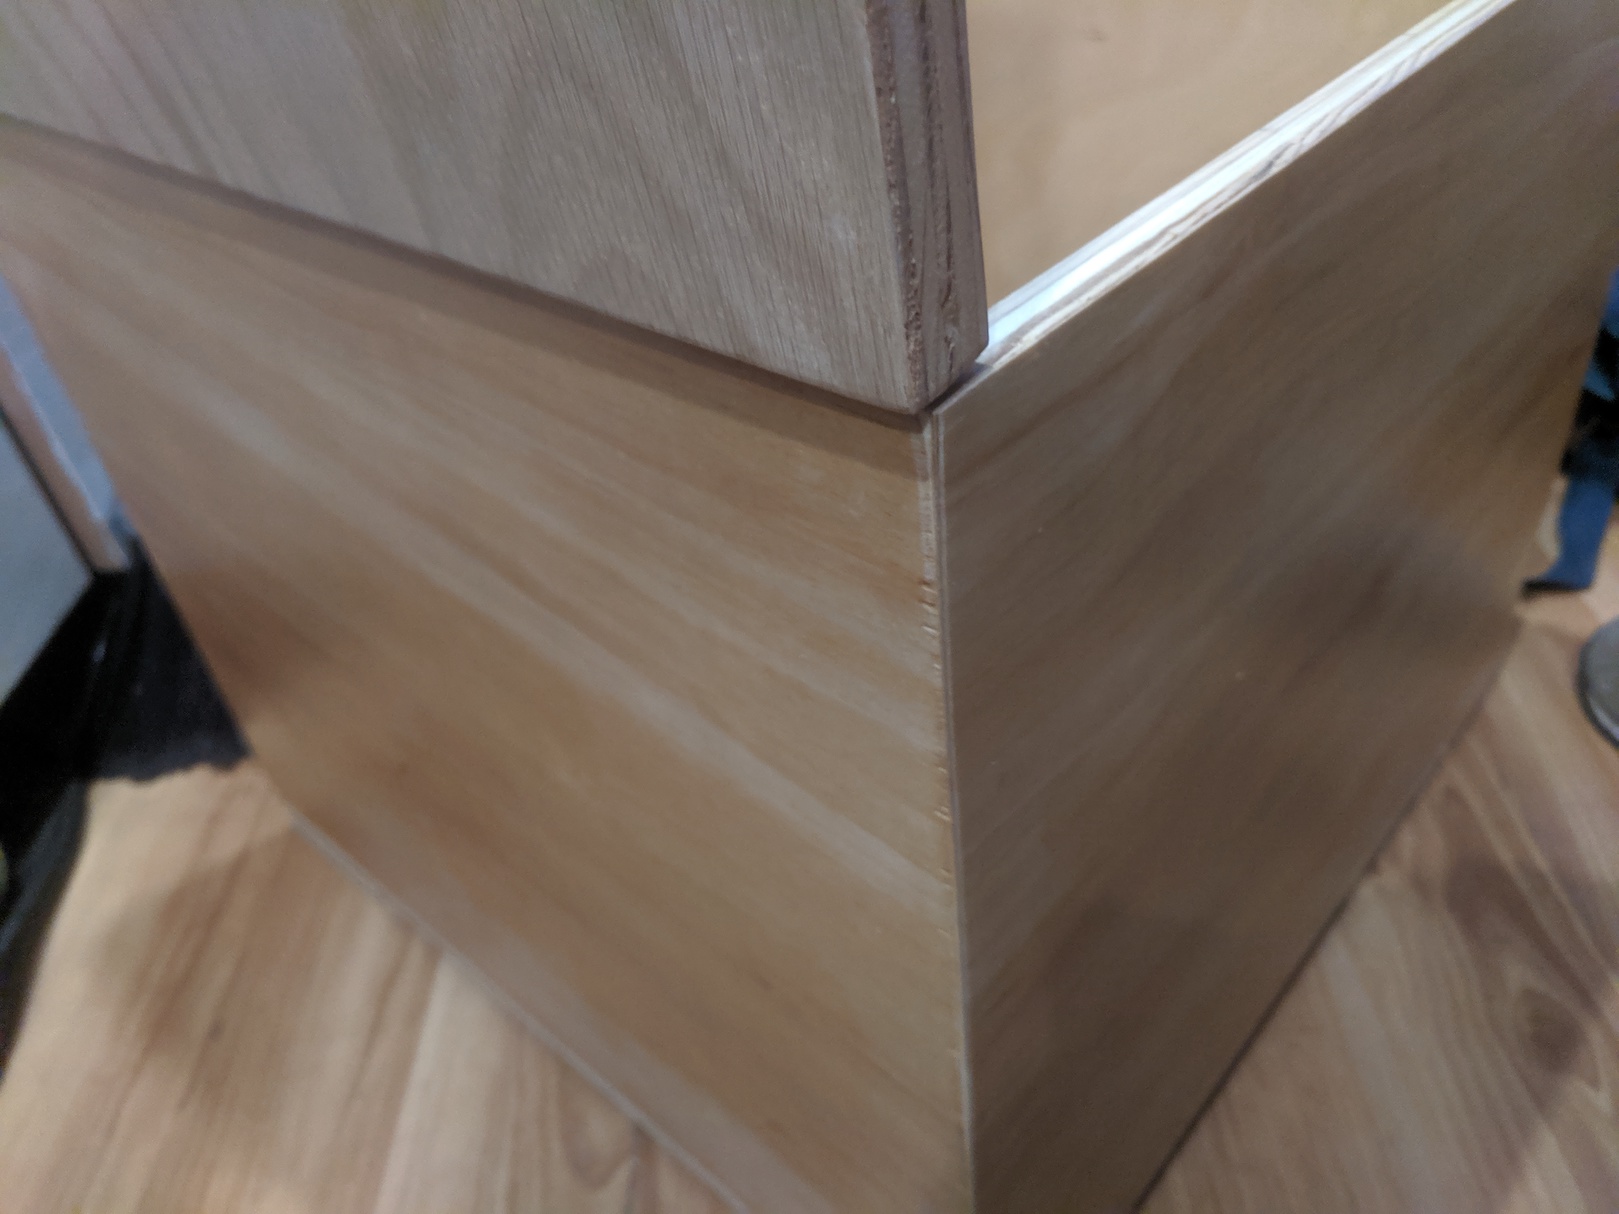
I used 3/4” plywood for the cabinet doors, which made the cabinet door hinge installation much easier than before
Storage Ottoman
One of my other favorite features of the cabinet storage system is the storage ottoman. At the bottom of the second column of cabinets I left approximately 18” cube space for this piece of furniture - a pull out storage box that doubles as an ottoman, thanks to its hinged lid and adhesive cushion.
 Open wide!
 Closeup of the mitered corners
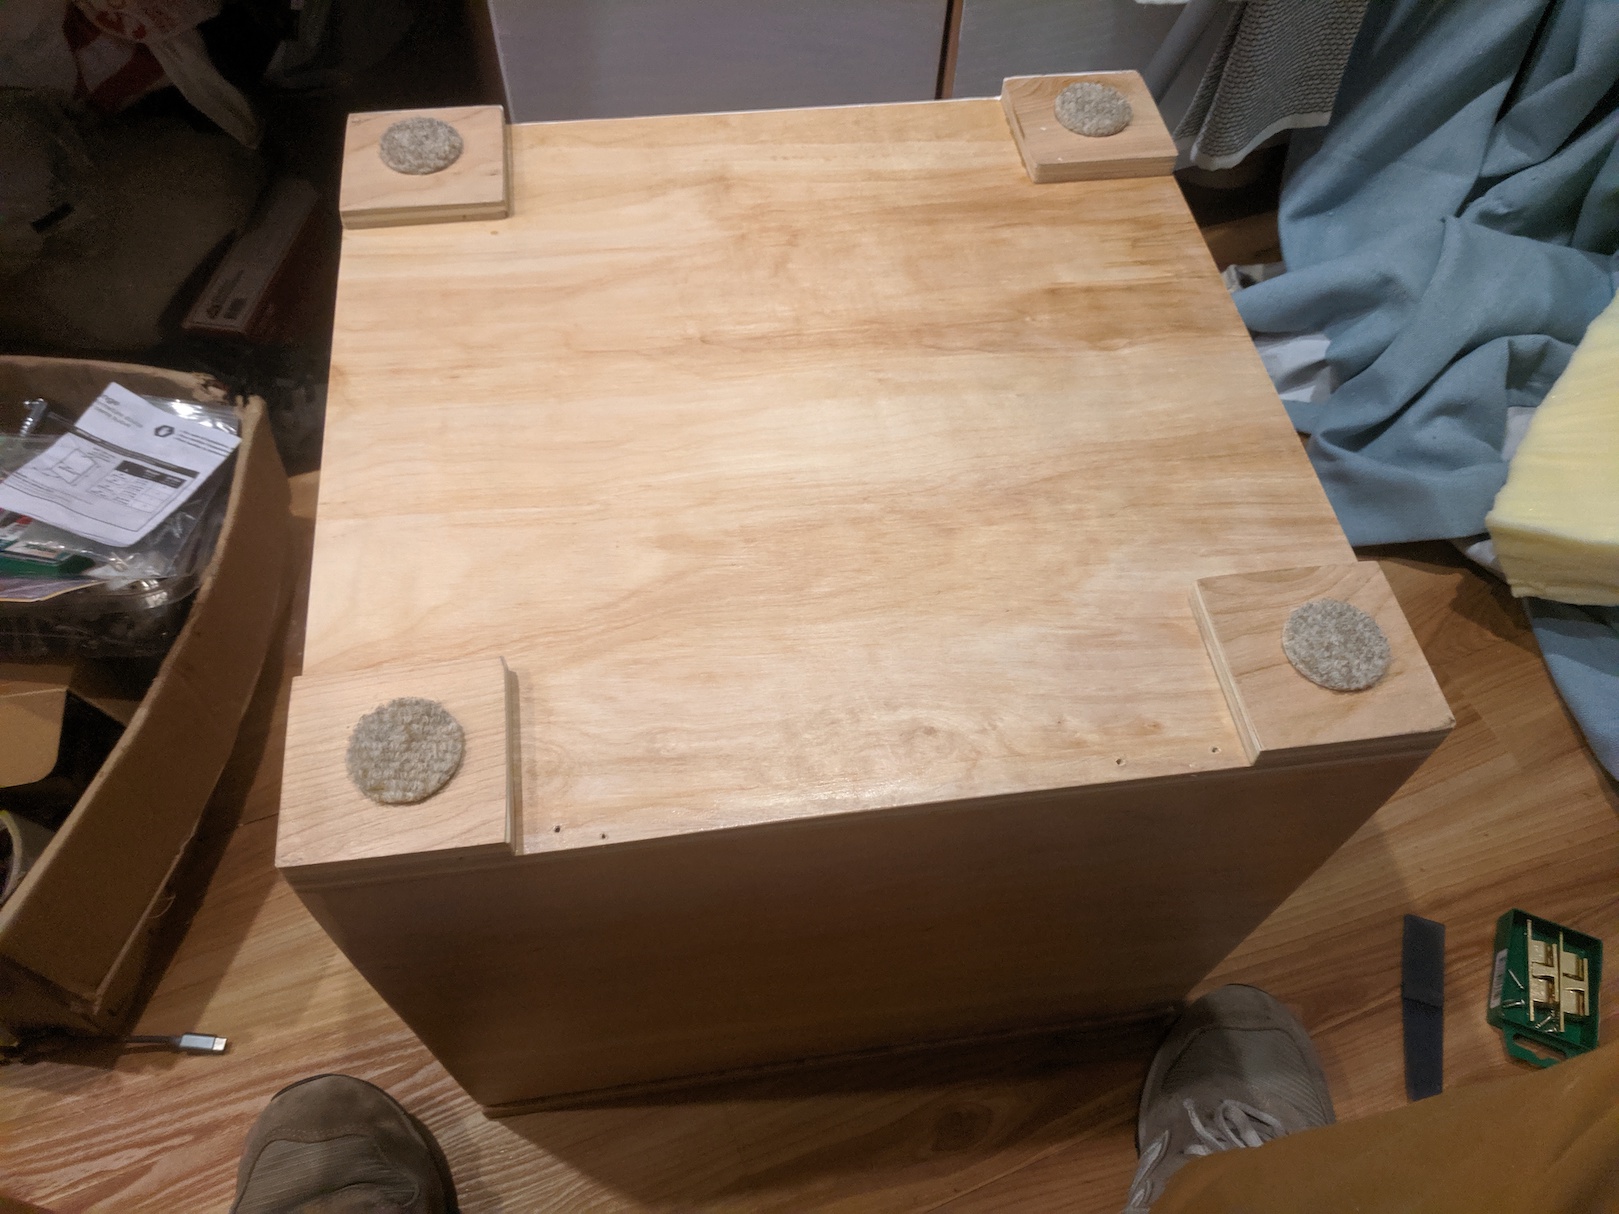 Felt pads on the feet for easy sliding

Water System
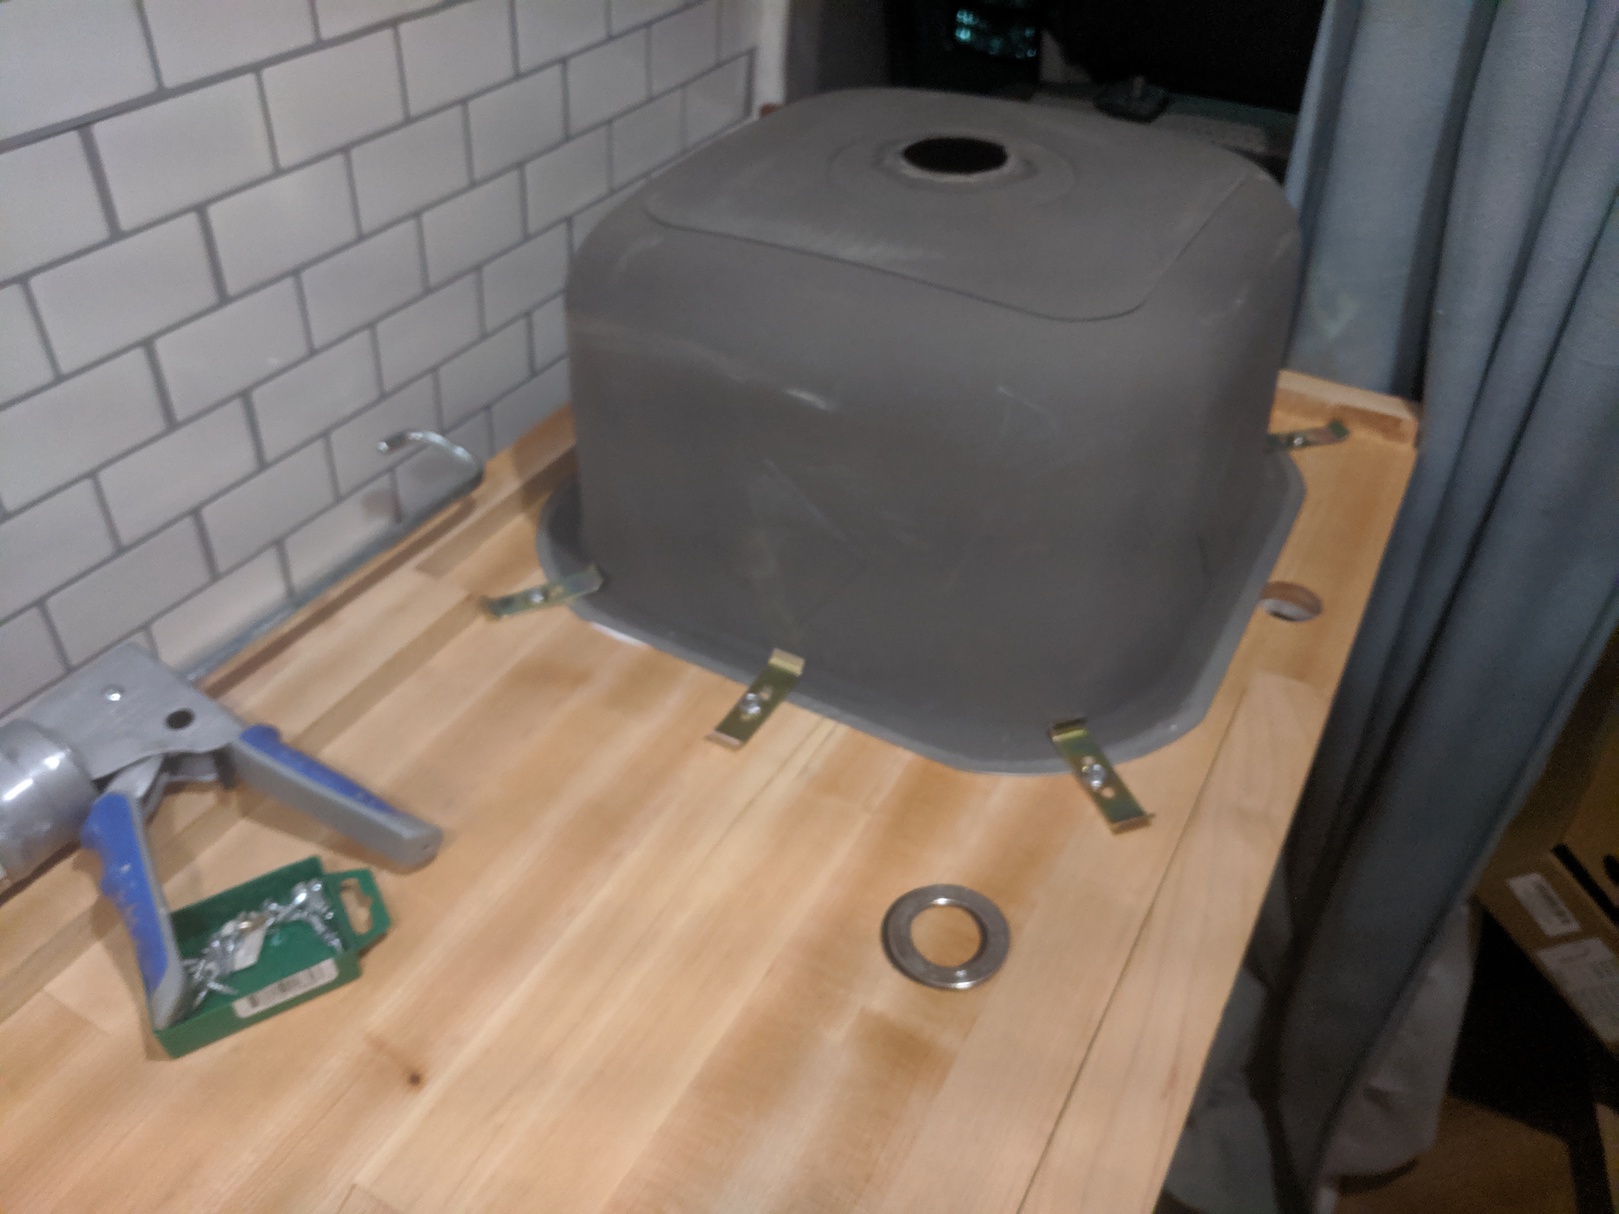 Mounting the sink
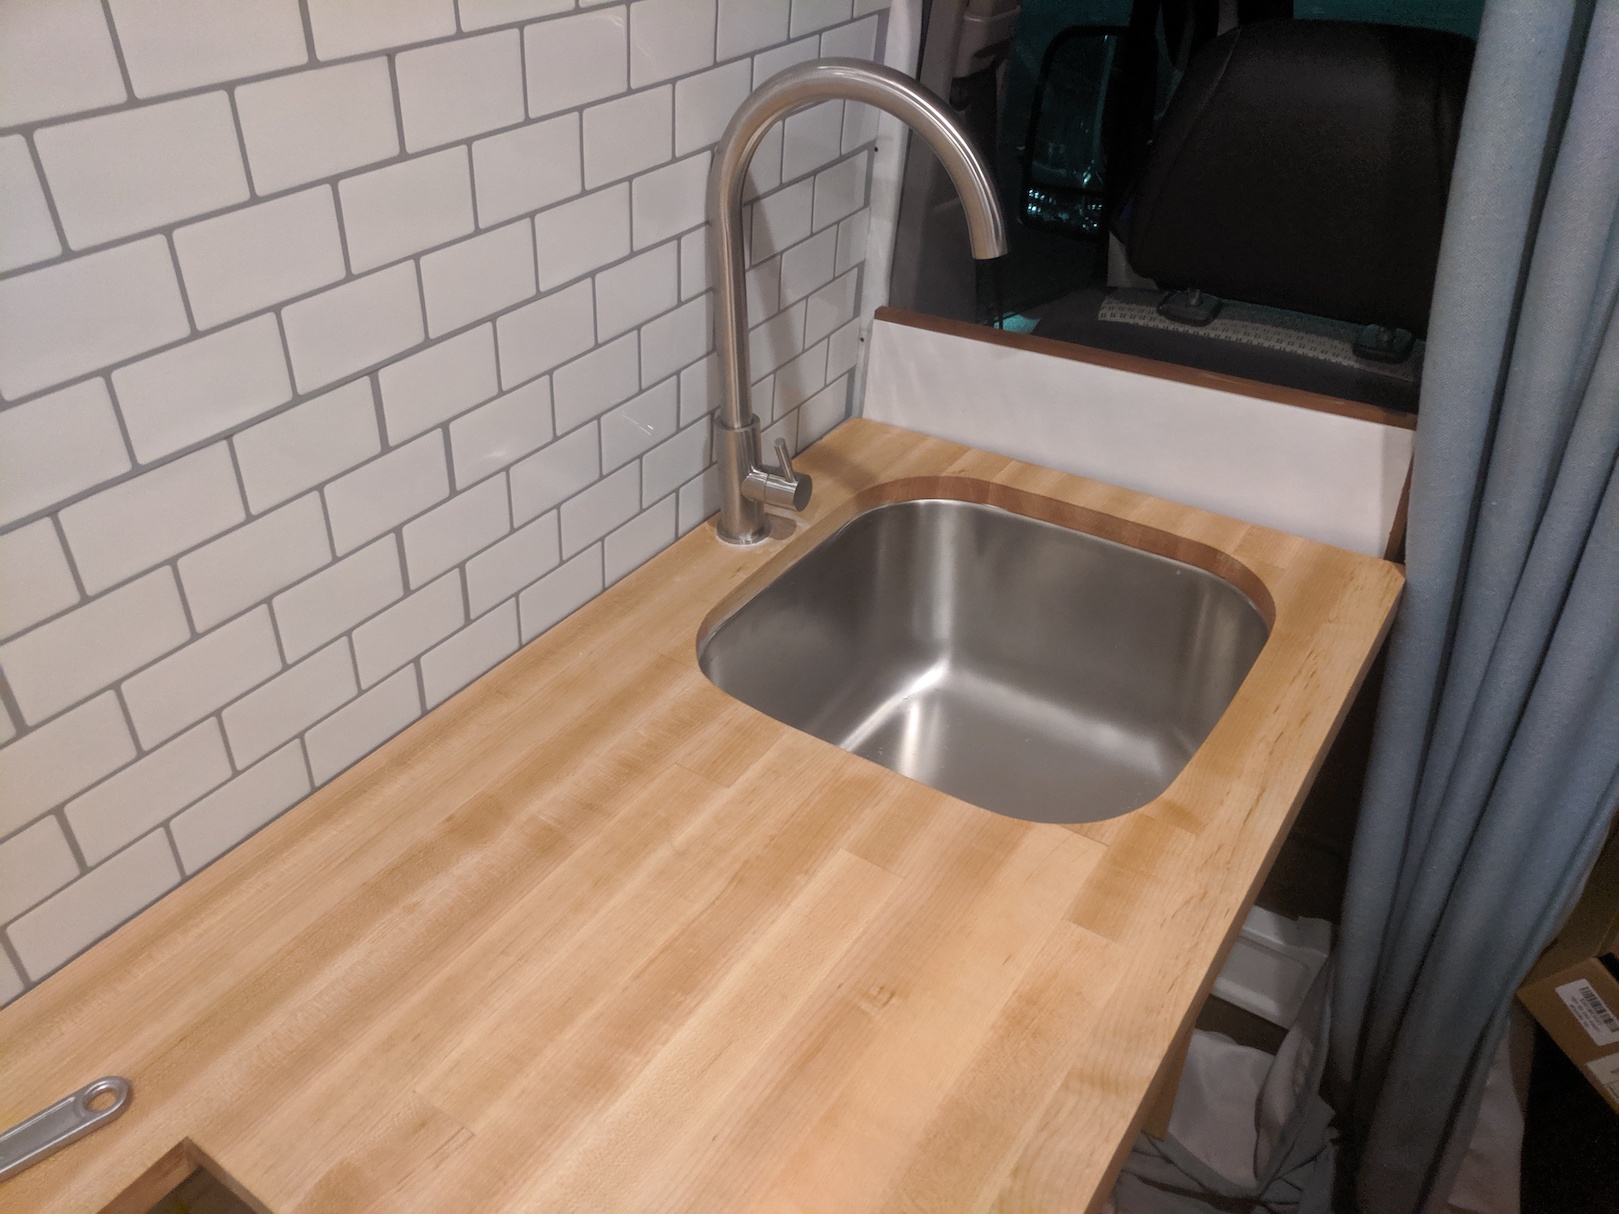 Sink mounted
The water system is composed of a few primary components - the freshwater tank, grey water tank, foot pump, sink and faucet. By far the most frustrating part of the water system was gathering all of the parts to fit together just (watertight) right.
Setup
 The calm before the storm?
The freshwater tank, as the name suggests, stores all the freshwater that eventually comes out of the faucet. Elena was able to find a ten gallon freshwater tank with just the right oddly narrow and tall dimensions to fit in the cabinet space dedicated to the water system. From the very bottom of the freshwater tank a PEX tube runs up, through an opening at the top, down toward the floor (thanks to two 90 degree elbow connectors), out toward the front of the cabinet and to a floor pump screwed into the floor. Working with PEX required a few upfront tools (cutter and crimp tool) but I have been really satisfied with how easy it was to work with - connections were fast to make once all the proper parts were in place. From the freshwater tank another length of PEX runs up toward the faucet where it connects to the braided faucet hose using a PEX to barbed hose connector.
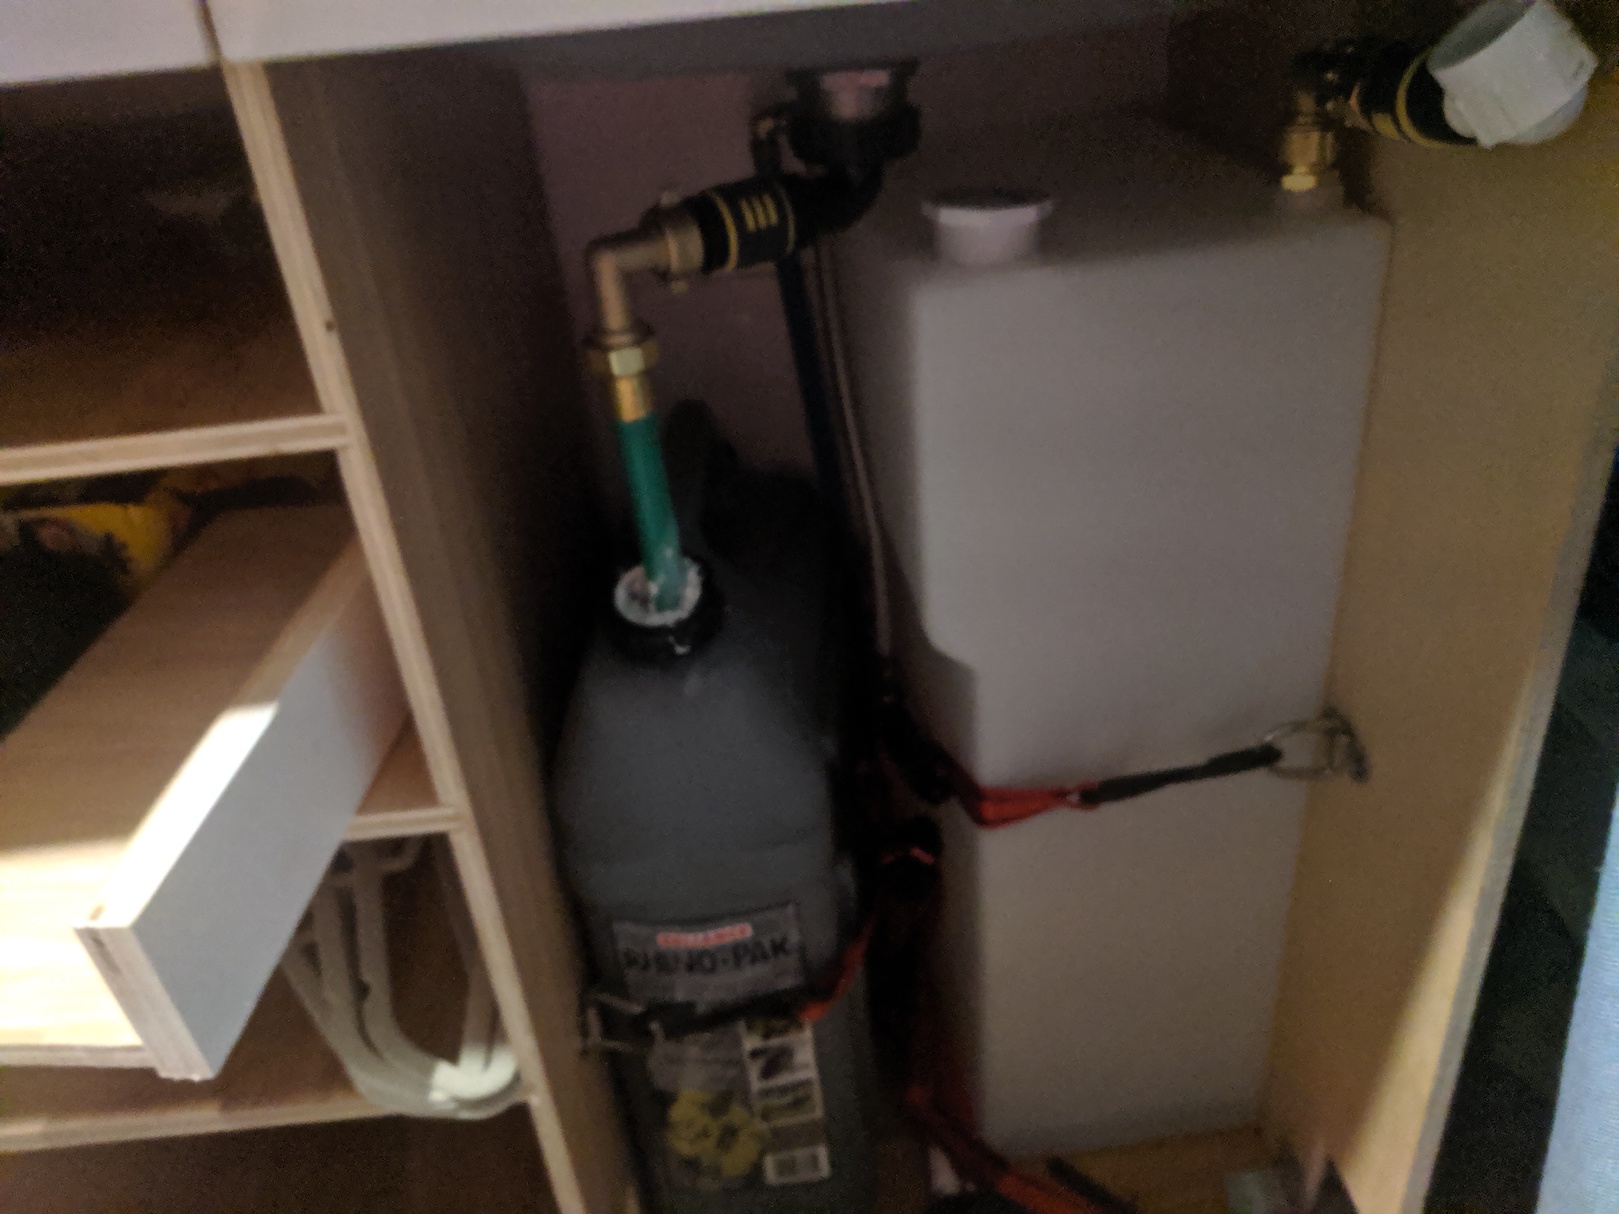
The gray water tank was slightly more frustrating. Although the tank itself was easy to find, the connection from the sink to the tank ended up providing quite a challenge. At first I opted for a popular van and RV drain - a piece of plastic that screws onto the drain (which itself is seated with plumbers putty and tightened in place with a very large hex ring). However, I found that it actually was a shape that blocked the freshwater tank from fitting underneath the cabinet! I eventually found a smaller profile drain connector, which I then simply used quick-connect hose attachment to run a garden hose piece into the grey water tank without any special sealing or connections.
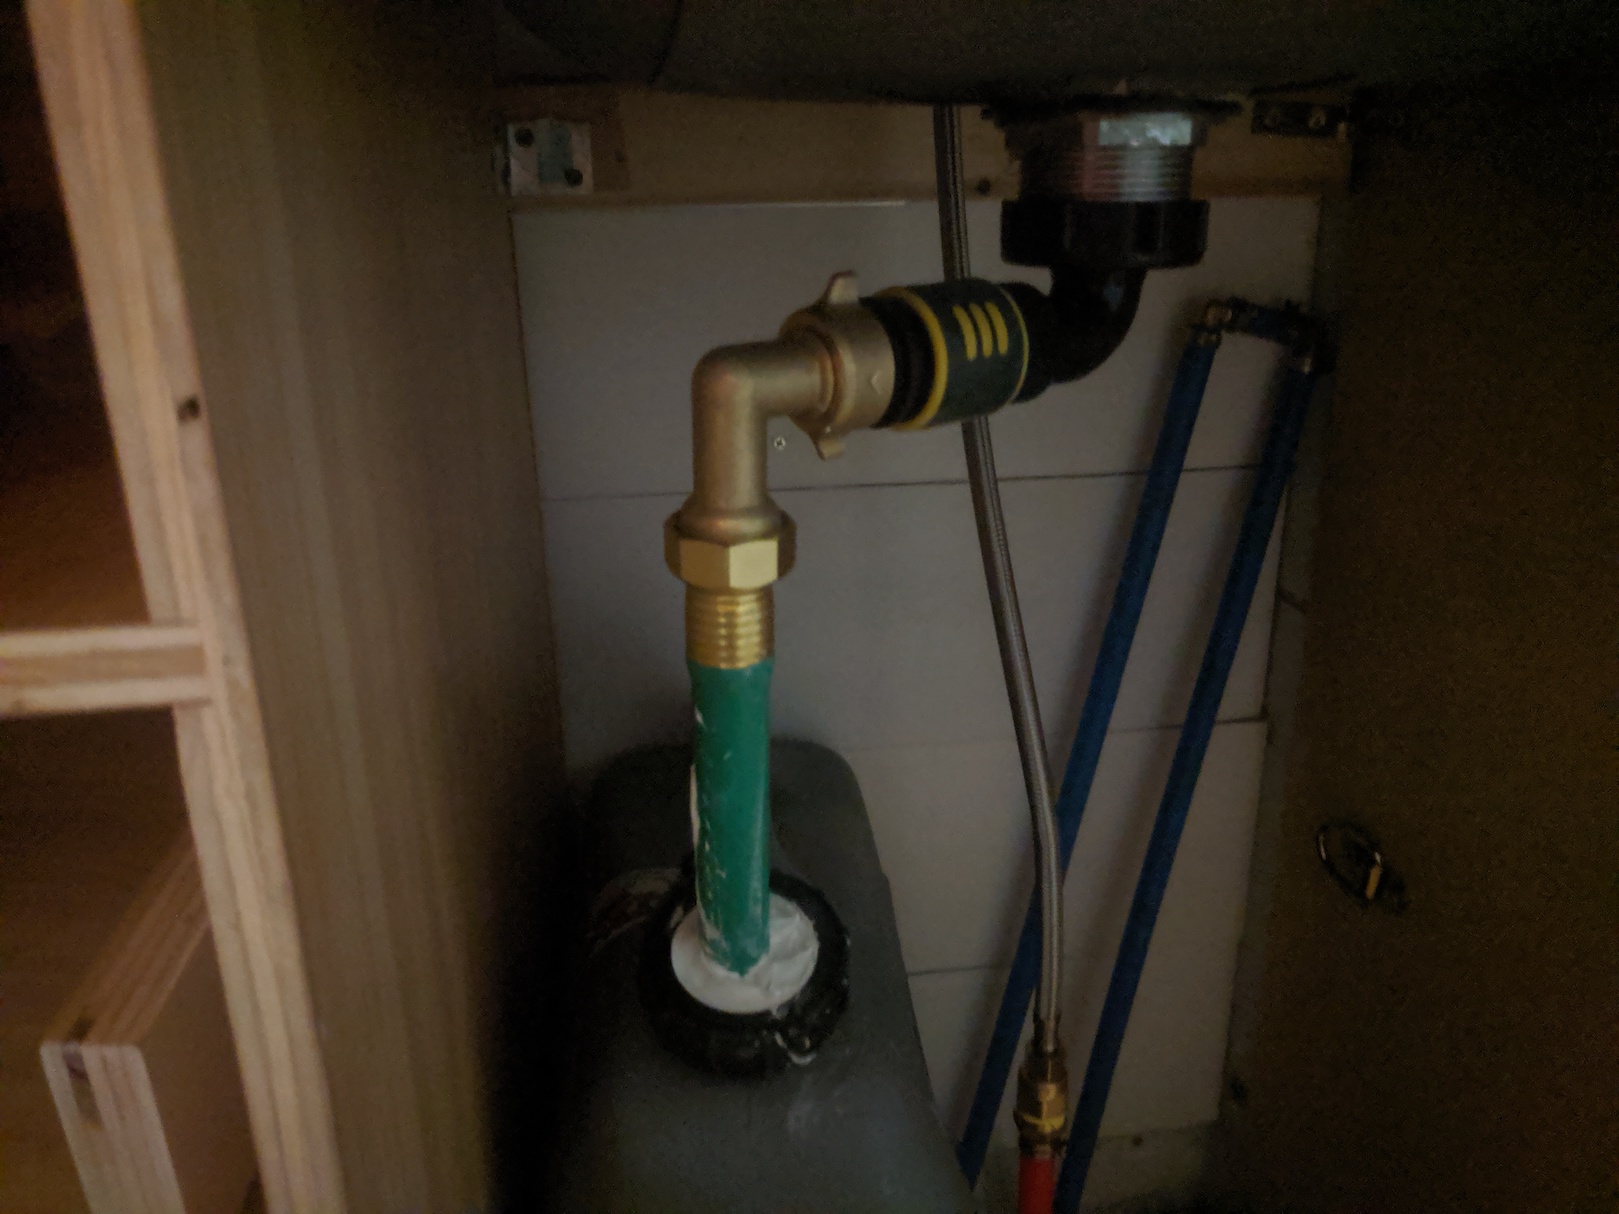 The final gray water connection
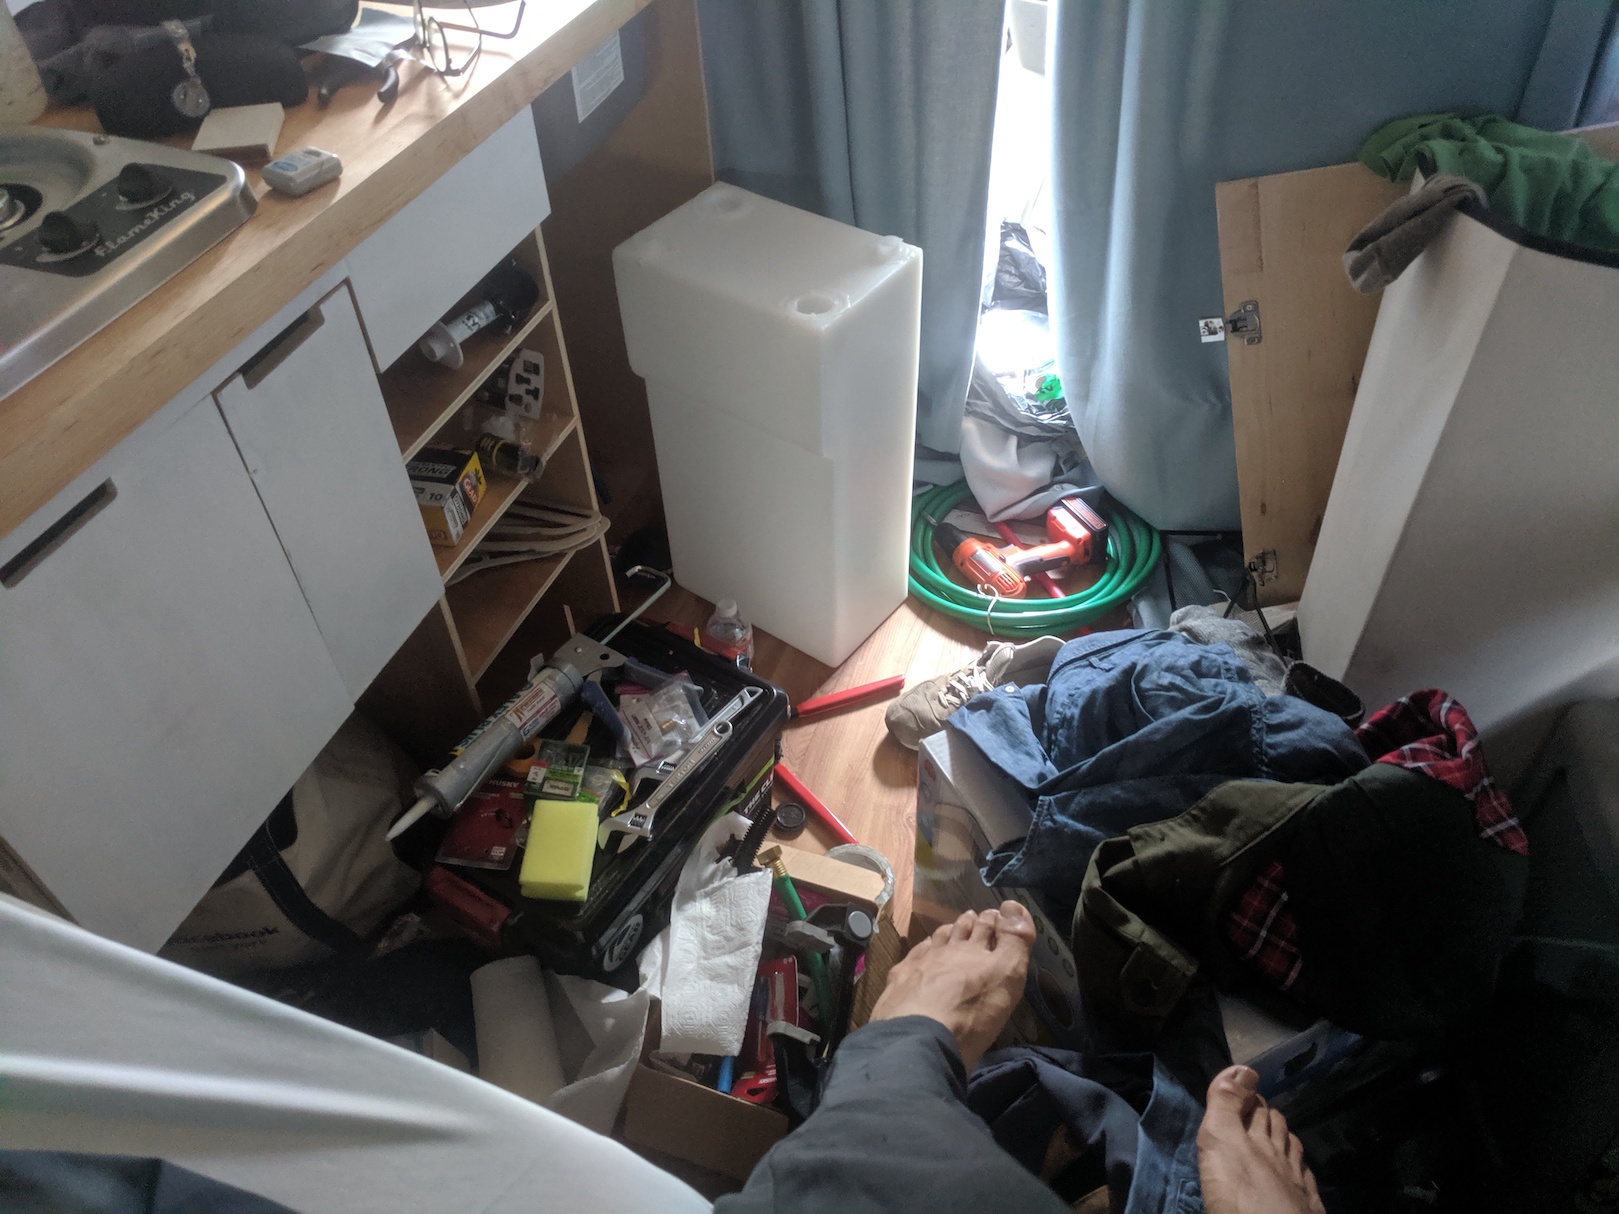
The final task was to put some D-rings in place in the cabinet so that I could tie down the water tanks, preventing them from jostling around too much while the van is in motion. I used some basic hardware from Home Depot and 1/4” bolts for this job.
Filling And Emptying
There are two main mechanisms for filling the freshwater tank. First is to connect a hose to a quick-connect mounted on a freshwater tank. With access to running water it’s trivial to fill the tank in just a few minutes. We learned the hard way though that special, potable-water grade hoses are made for this purpose that make the water taste much, much better and cause significantly less stomach discomfort compared to standard hoses. The second mechanism is a funnel, which allows me to fill the tank slowly with water bottles, which has come in handy multiple times in campsites without easily accessible water taps.
Emptying is as easy as it can be as well - the quick connect below the sink means it’s fast to free the grey water tank and then remove it to dump wherever is appropriate.
Propane System
I chose a slightly easier mechanism for powering the stove in contrast to many other van builds. Instead of keeping a large 20lb propane canister in the van and worrying about building a sealed, vented compartment for it I chose to simply power my stove with the much smaller 1lb disposable canisters. Although this choice is slightly less economical over the long term it allowed the propane compartment to be much simpler in its design and construction. It also allows me to drive without too much fear through long tunnels and over bridges where larger propane containers are technically illegal.
I only needed poly tape, one elbow fitting, a low-pressure regulator, and a converter to fit the QCC connection of the regulator the disposable propane canister head.
Be Very Careful With Propane
I’ve had very little trouble with this setup barring one, unfortunately notable incident: while typically it’s easy to disconnect the propane from the QCC converter, one morning I was having a little more trouble than usual. I noticed that while the connection between the canister and the QCC converter was quite solid, it was easy to turn the QCC connecter itself, unscrewing it from the LP regulator. As soon as I disconnected these two pieces however, I found myself with a literal propane hose jet in my hands. The high pressure gas stored inside of the canister was escaping through the QCC converter, which is normally connected to the low pressure regulator. This was very scary and I am lucky that there were no open flames or sparks at the time that could have turned the harmless (though smelly) gas into something much more explosive.
Putting It Together
 Stove and sink mounted
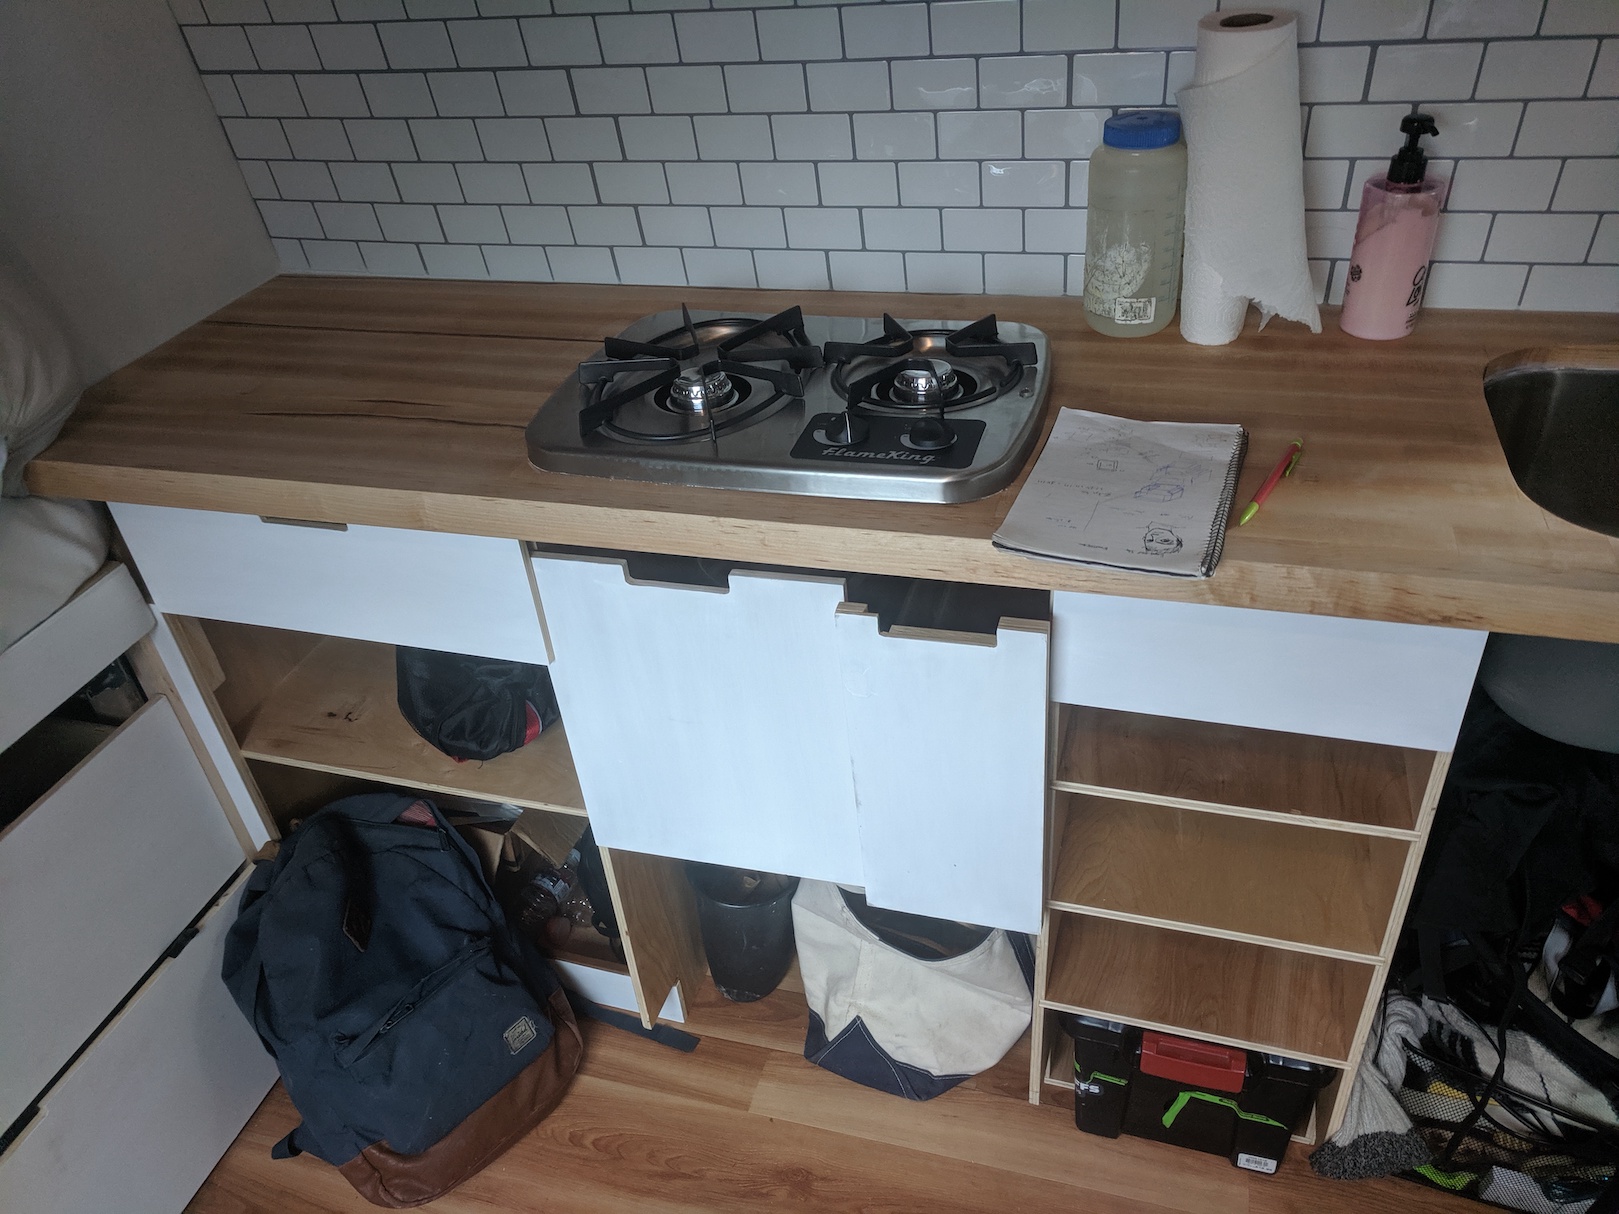 Countertop installed, cabinet fronts partially installed