THE VAN PROJECT - Storage, Table, Wardrobe
This is the sixth post in a series that serves as the primary documentation of how I purchased and converted a 2008 Dodge Sprinter Van to a full-time living space.
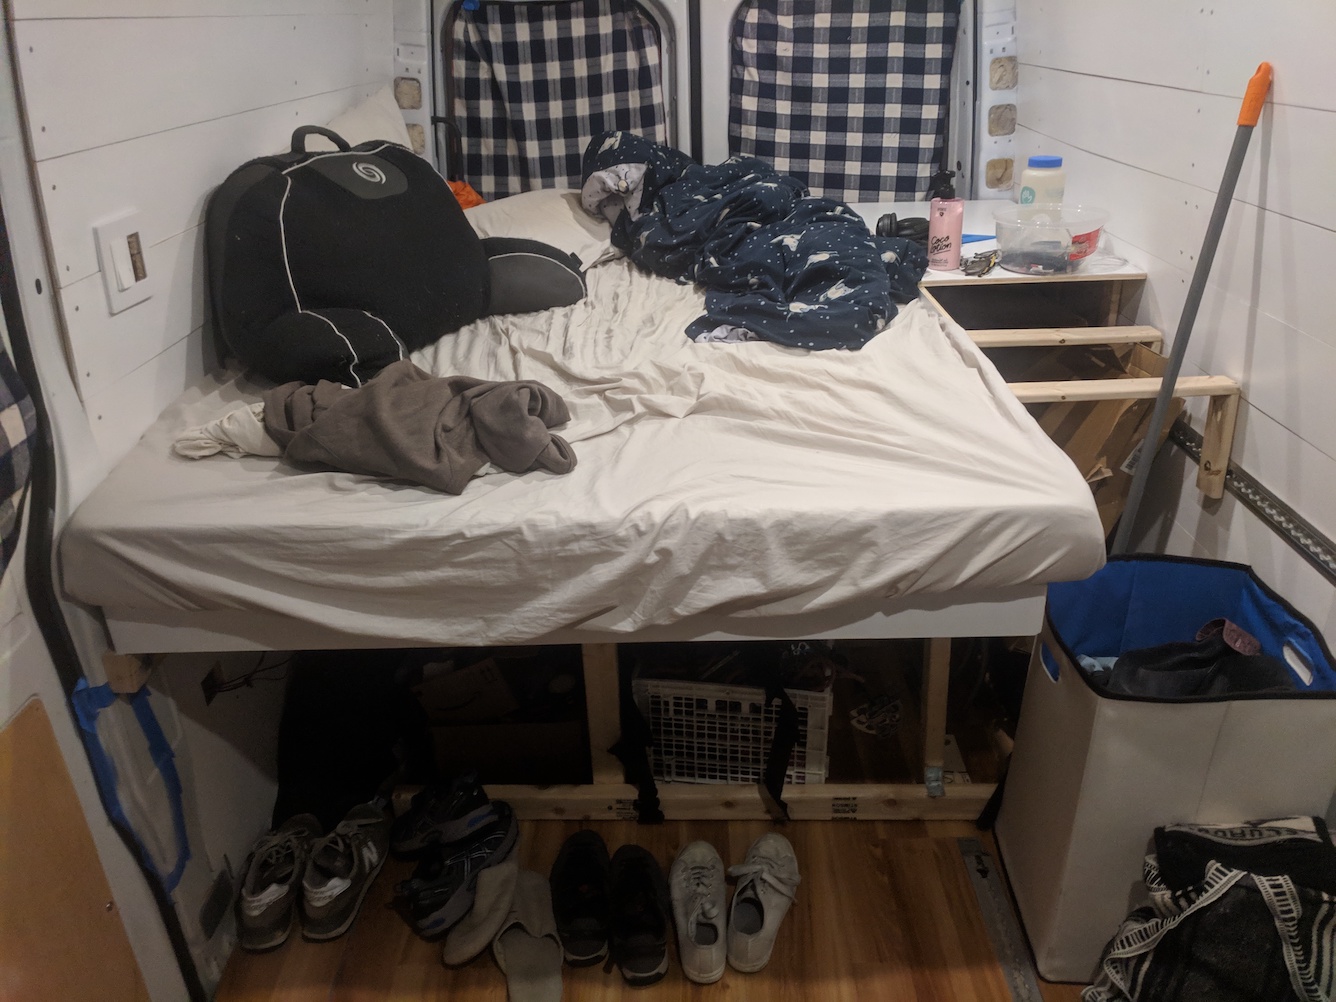
Underbed Storage
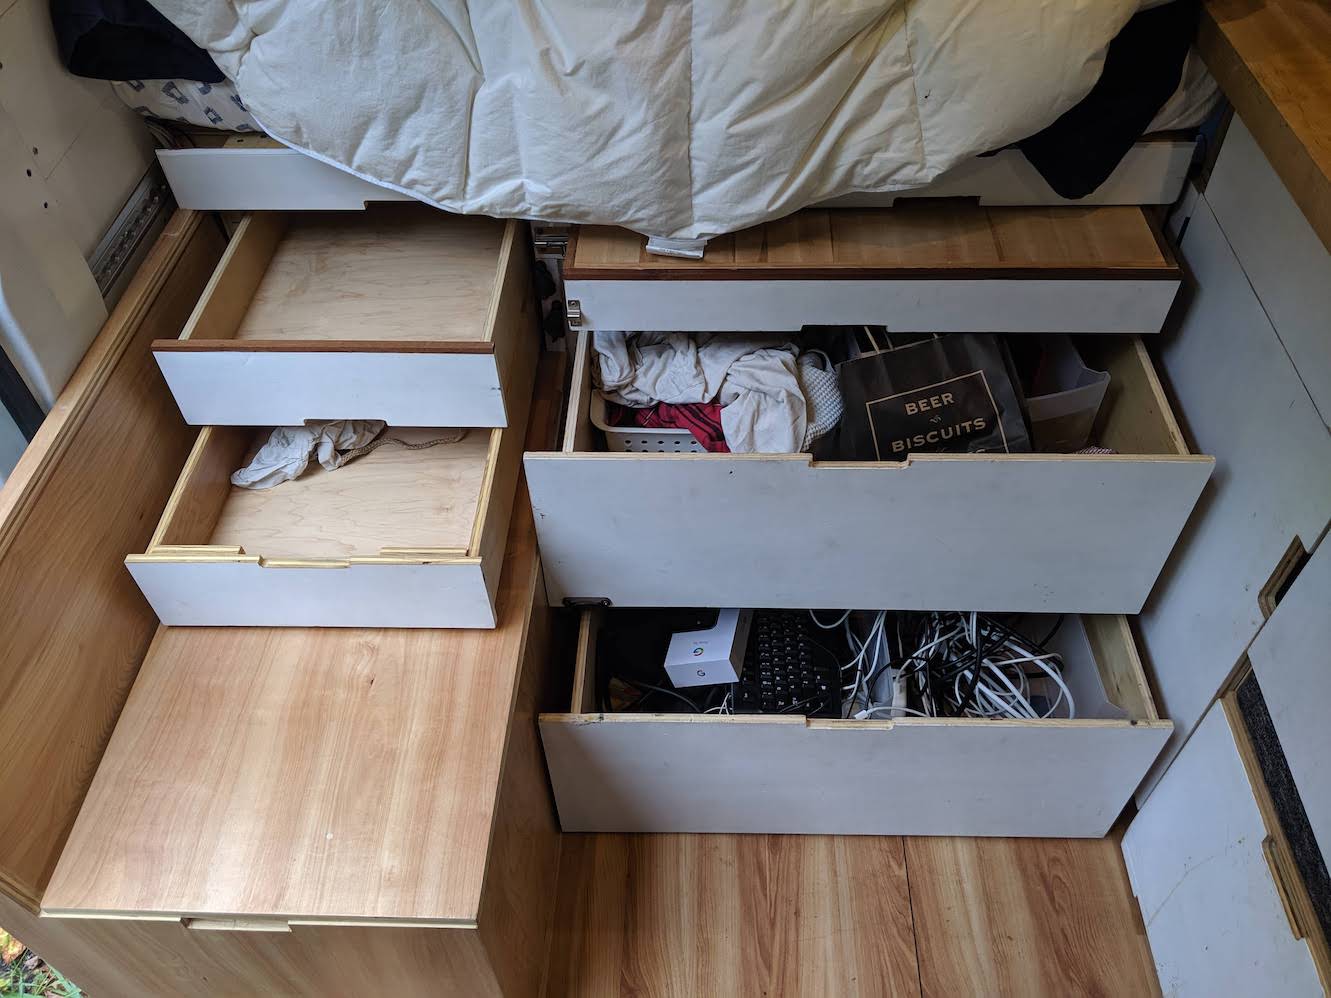
I chose to fit four drawers in the space underneath the bed, leaving space on the passenger side for the fridge box and the rear wheel well. Two drawers would be small (roughly 6” high and 12” wide) and two would be large (about 10” high and 27” wide). I used Blum 21” soft close undermount drawer slides for all of the drawers in the van.
I used 1/2” birch plywood for the drawer sides and front attachments, using a table saw to cut dado grooves in the sides to support the bottom and pocket holes to connect the rest of the pieces. I sanded the drawers using up through 220 grit sandpaper and then coated them in 3 coats of water based polyurethane. I then used a jigsaw to cut out handles for the front pieces, which I then painted with the same primer and paint used for the walls and attached to the drawer front with wood glue.
 The supporting structure to support the drawer slides
Once the drawer boxes were constructed it was incredibly frustrating to actually install them in the van. This was largely because I had installed the cabinet frame before installing the slides themselves. Measuring and ensuring the two slides for each drawer were level, evenly aligned in all dimensions without being able to manipulate the cabinet sides turned out to be very finicky. I had to redo it several times before the drawers slid smoothly and appeared to be visually aligned.
 The drawer boxes installed
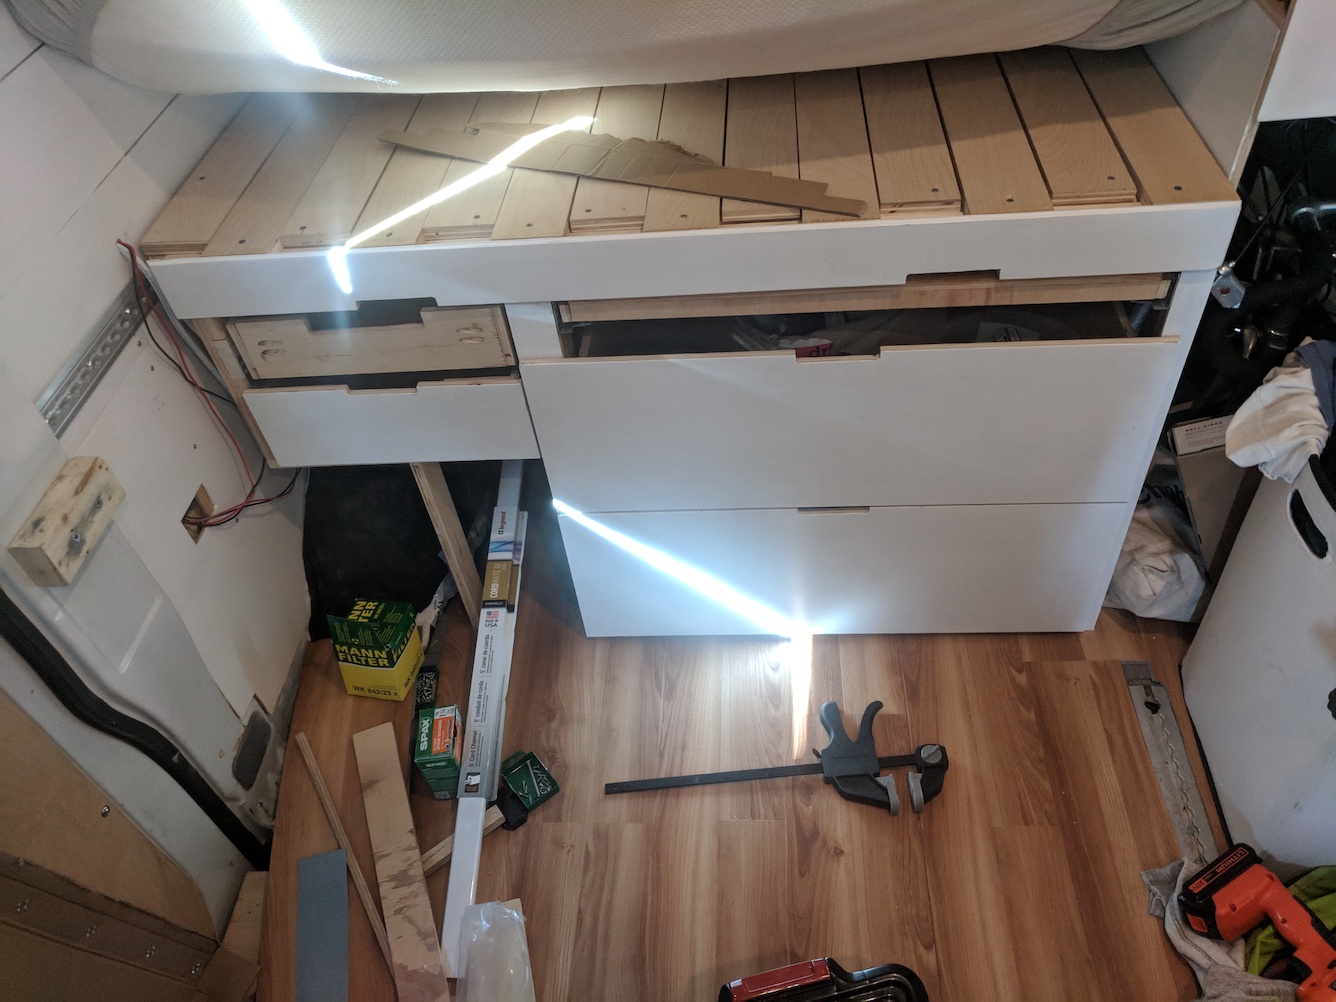 The drawer fronts partially installed
Pull Out Table
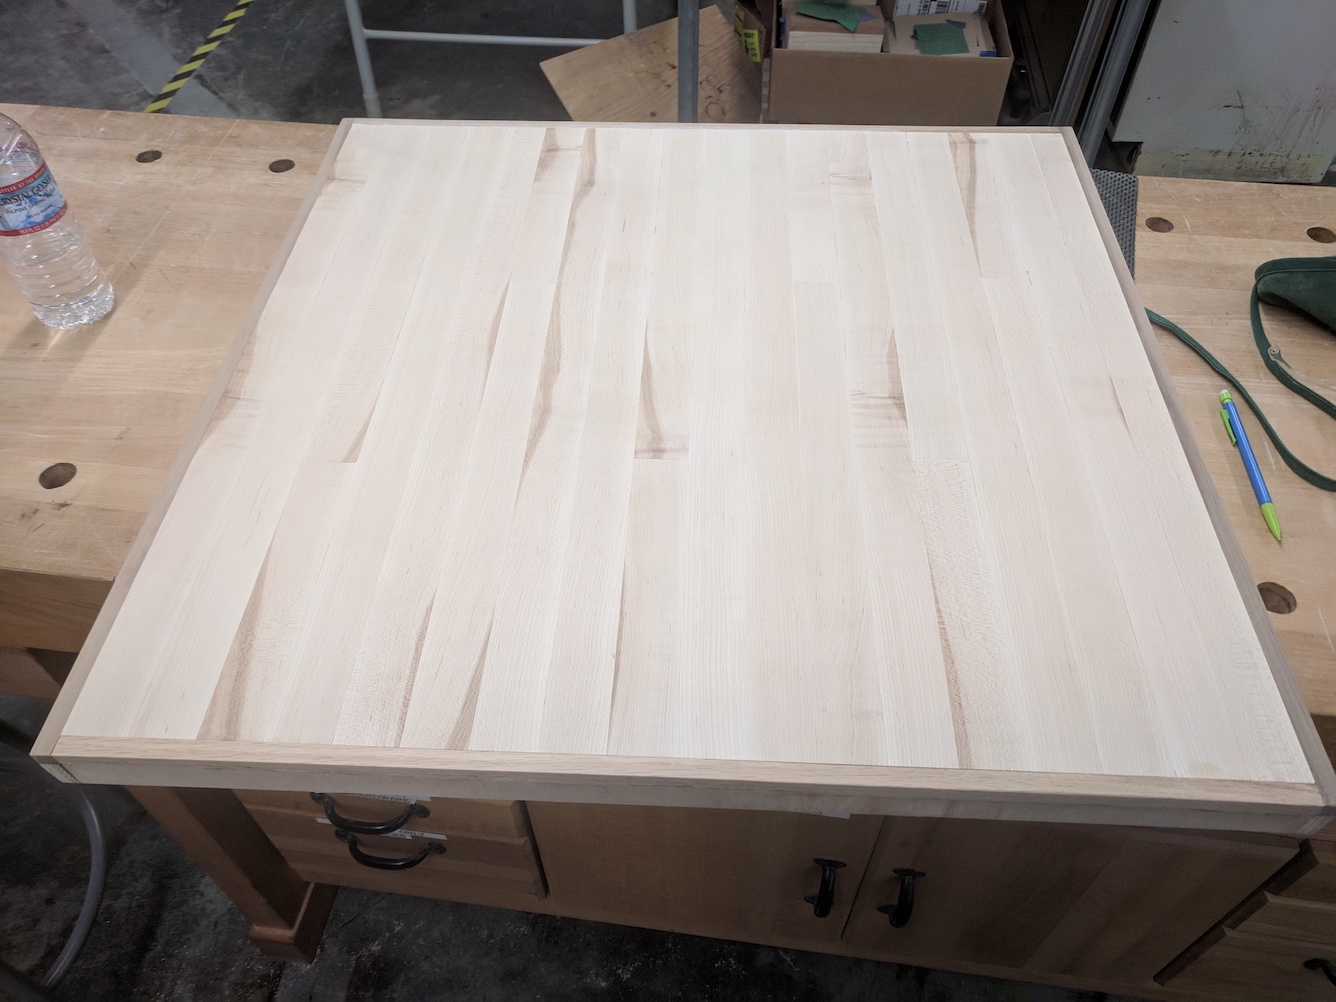
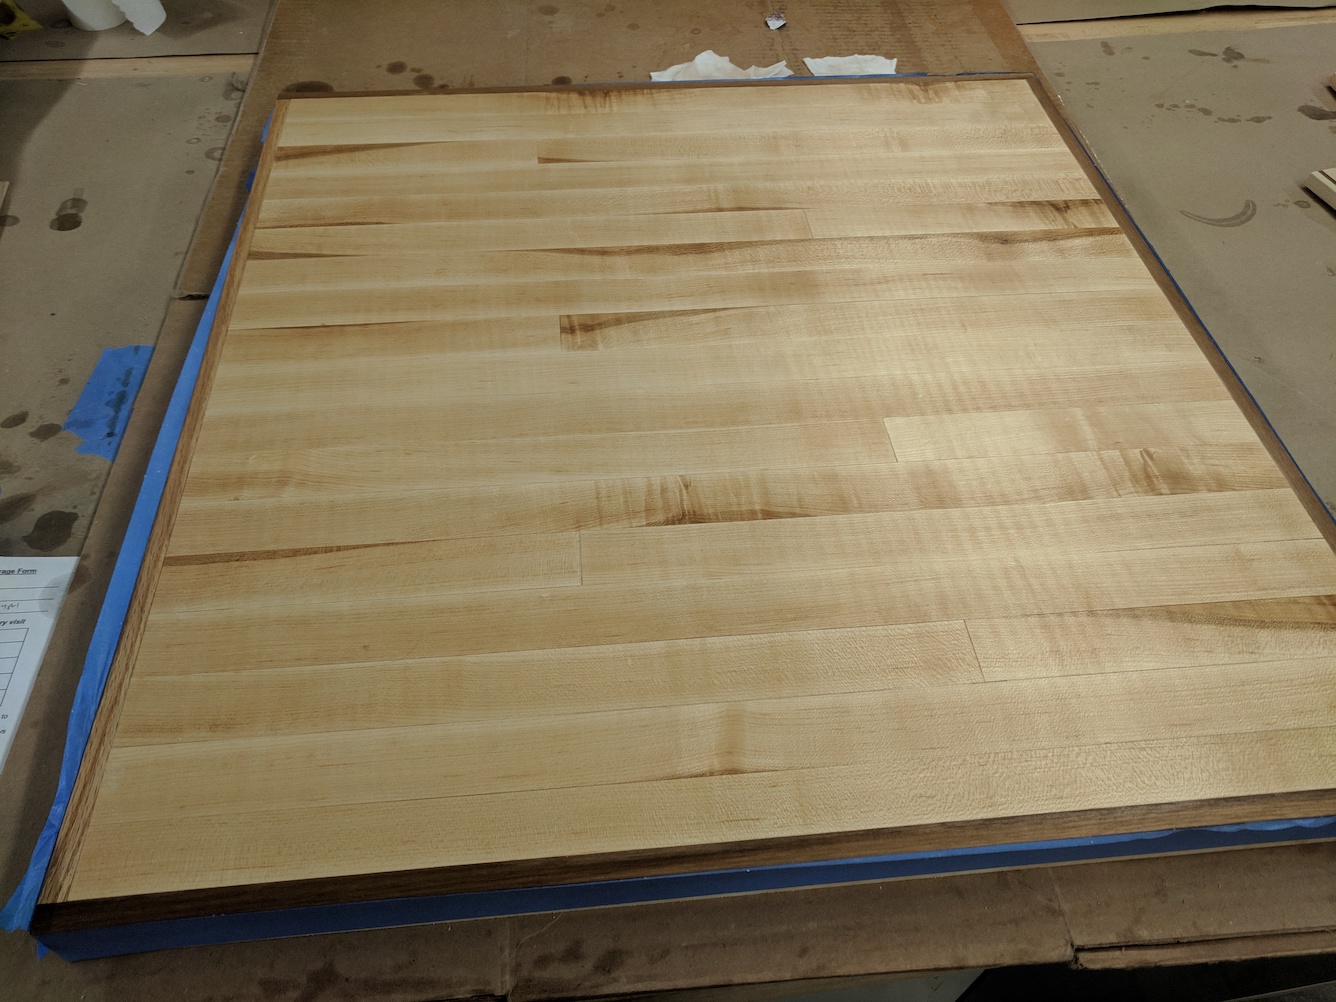
One of my favorite features of the underbed cabinet is the pull-out butcher block table. This table sits at about 27” and itself measures about 27” square, making it a perfect surface to eat or work on when paired with the bench or trash ottoman (to be documented in the future!)
The table is essentially a drawer whose body is a side-grain maple butcher block. I ripped the strips on a table saw and used Titebond III to glue the strips together before sanding it down, using through 320 grit sandpaper. The surface is finished with mineral oil and butcher block conditioner making it fully food safe.
 The glued and sanded table body
 After a few coats of mineral oil
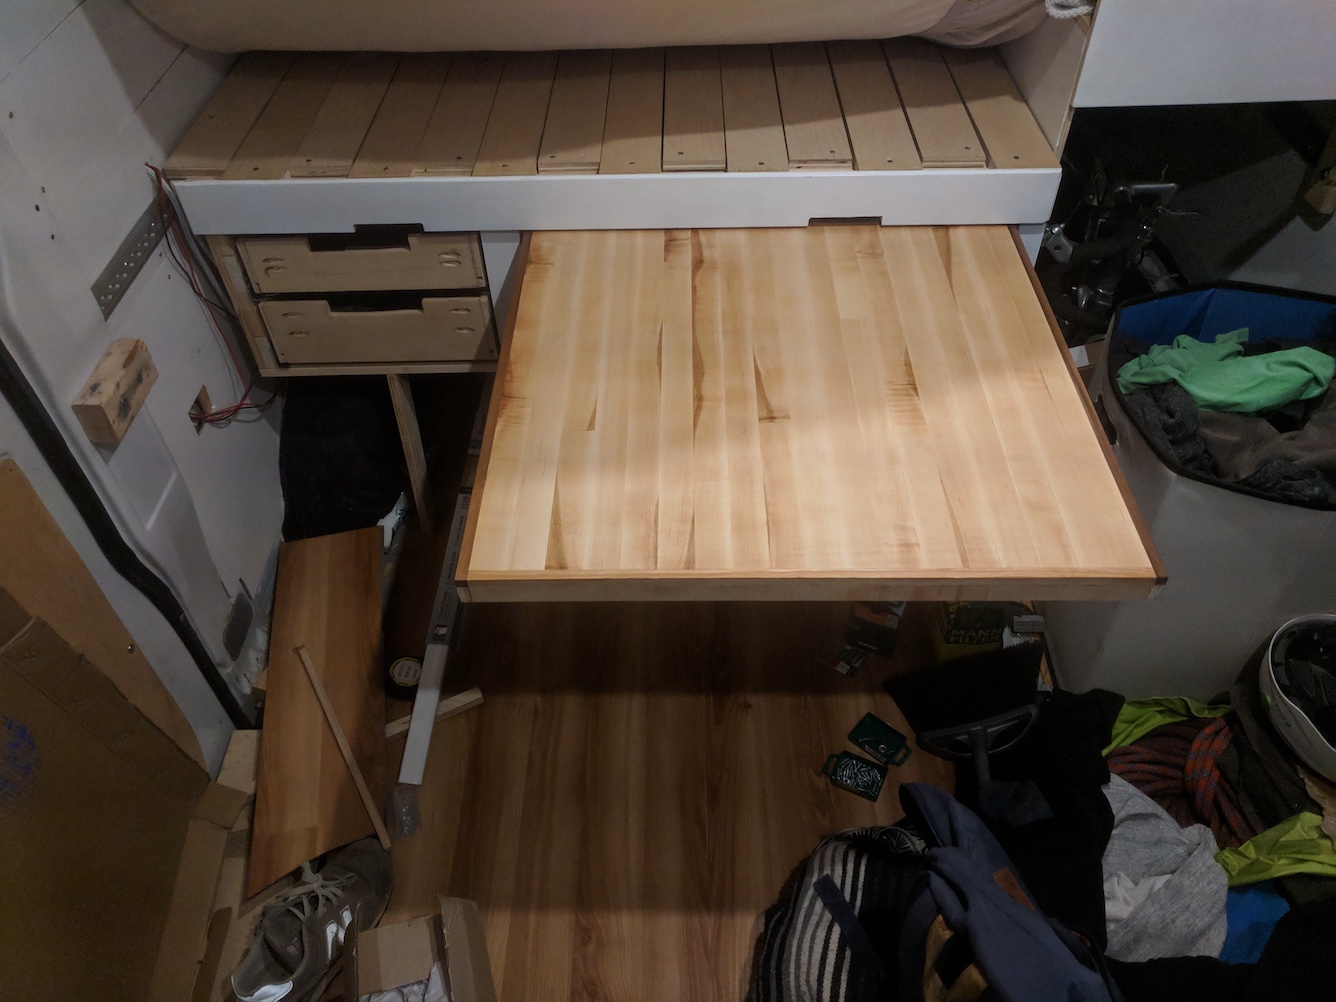 The table installed above the large drawers
The table also features foldable tapered maple legs that allow it to be completely stable when extended. The table and drawers are kept secure while the van is driving with brass sash locks and a sliding deadbolt.
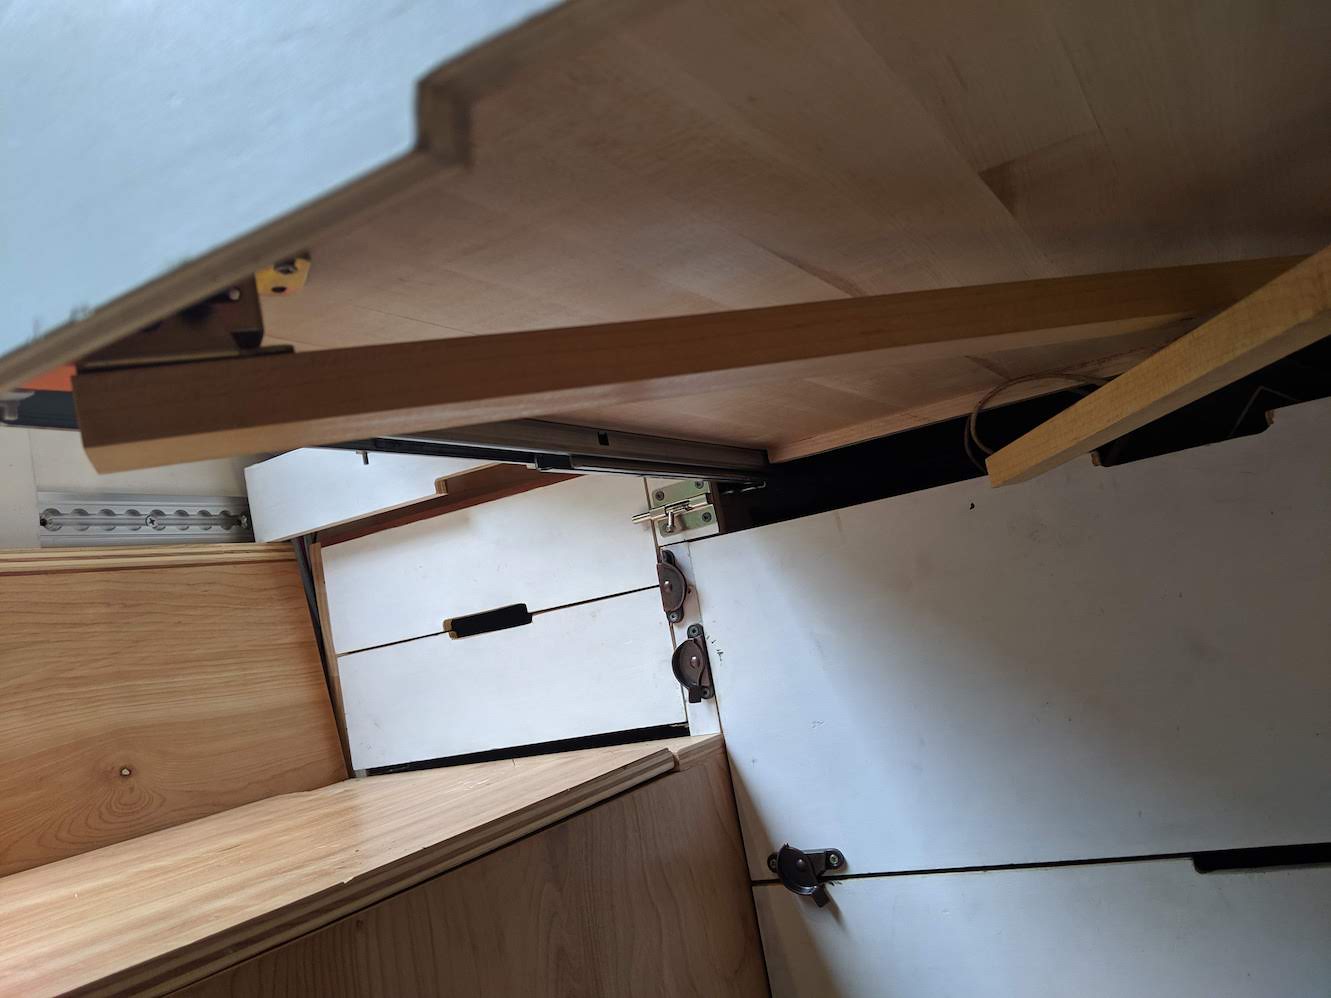 View of the folded table legs
 Close up of the extended table legs
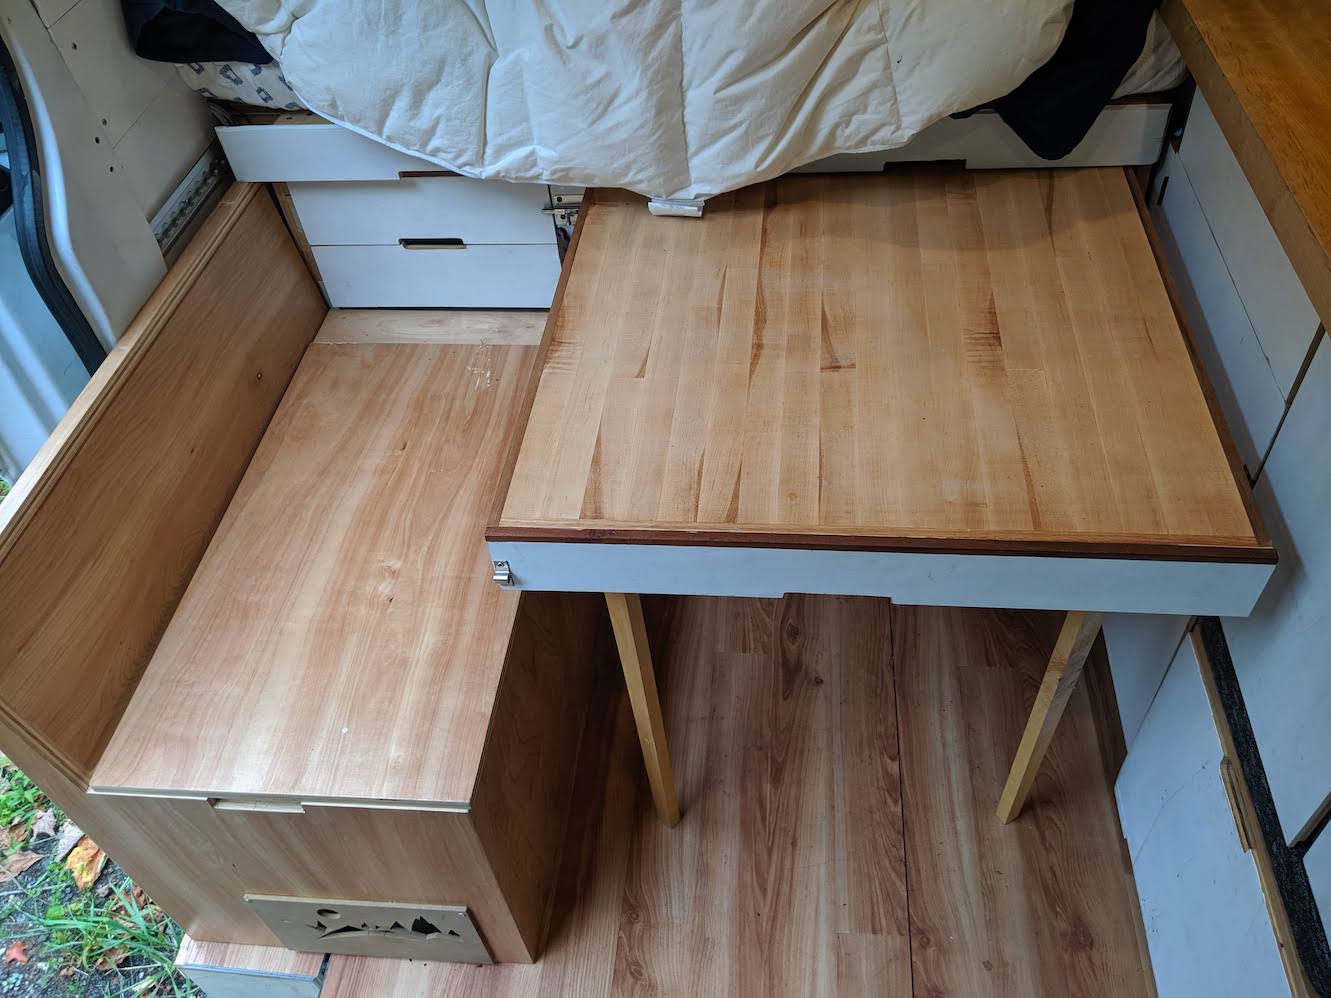 Table in extended mode
 Final underbed cabinet!
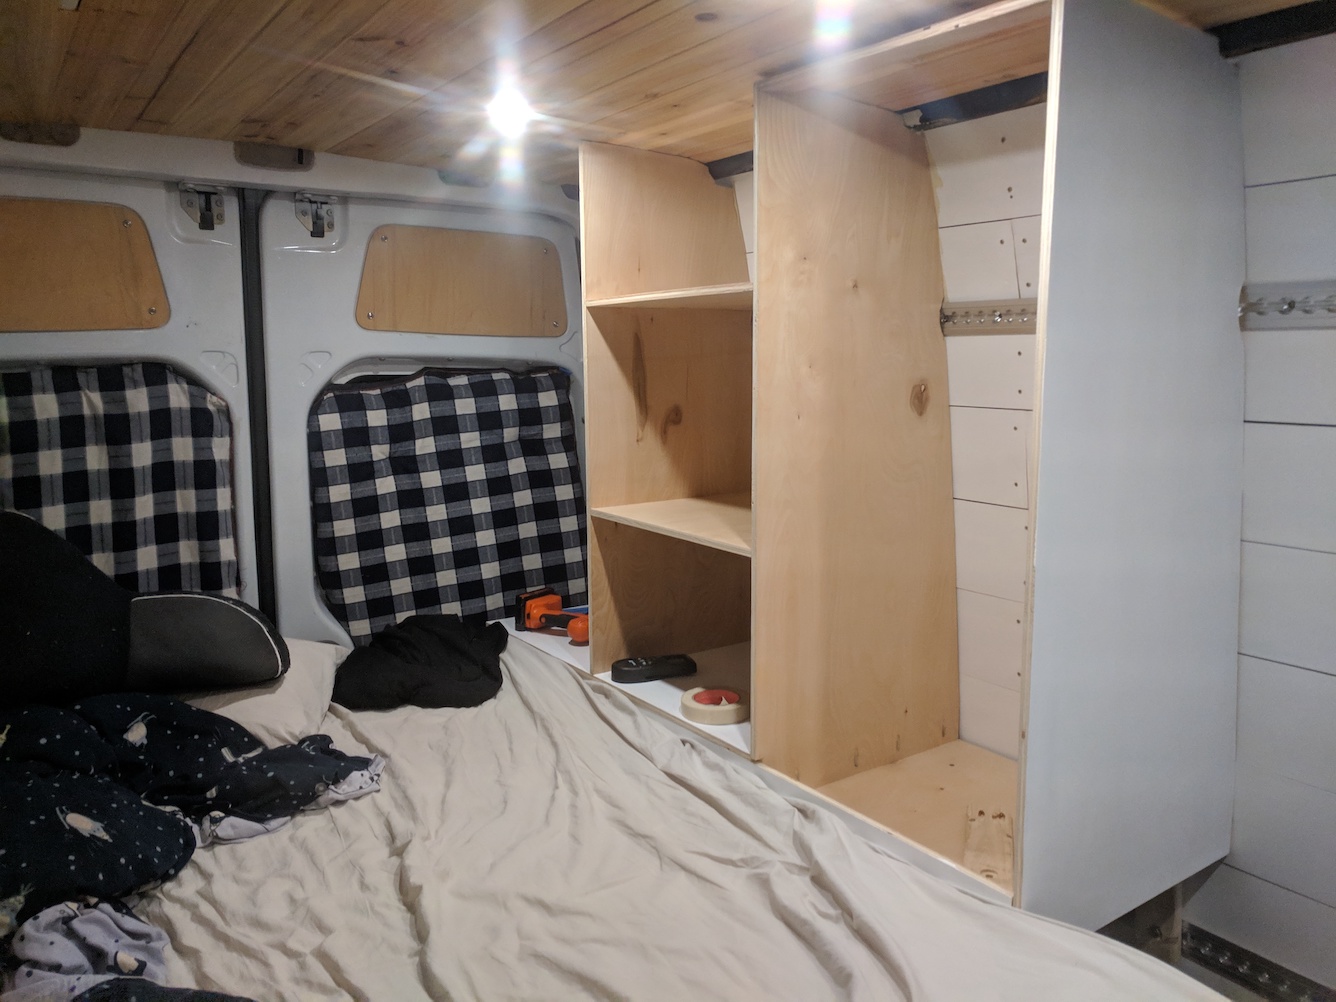
Bedside Wardrobe
I built two wardrobe columns on the side of the bed to provide even more additional storage space to put my clothes and other items. This was significantly easier than the drawer construction, mostly because cabinets don’t require nearly as much work as drawer boxes.
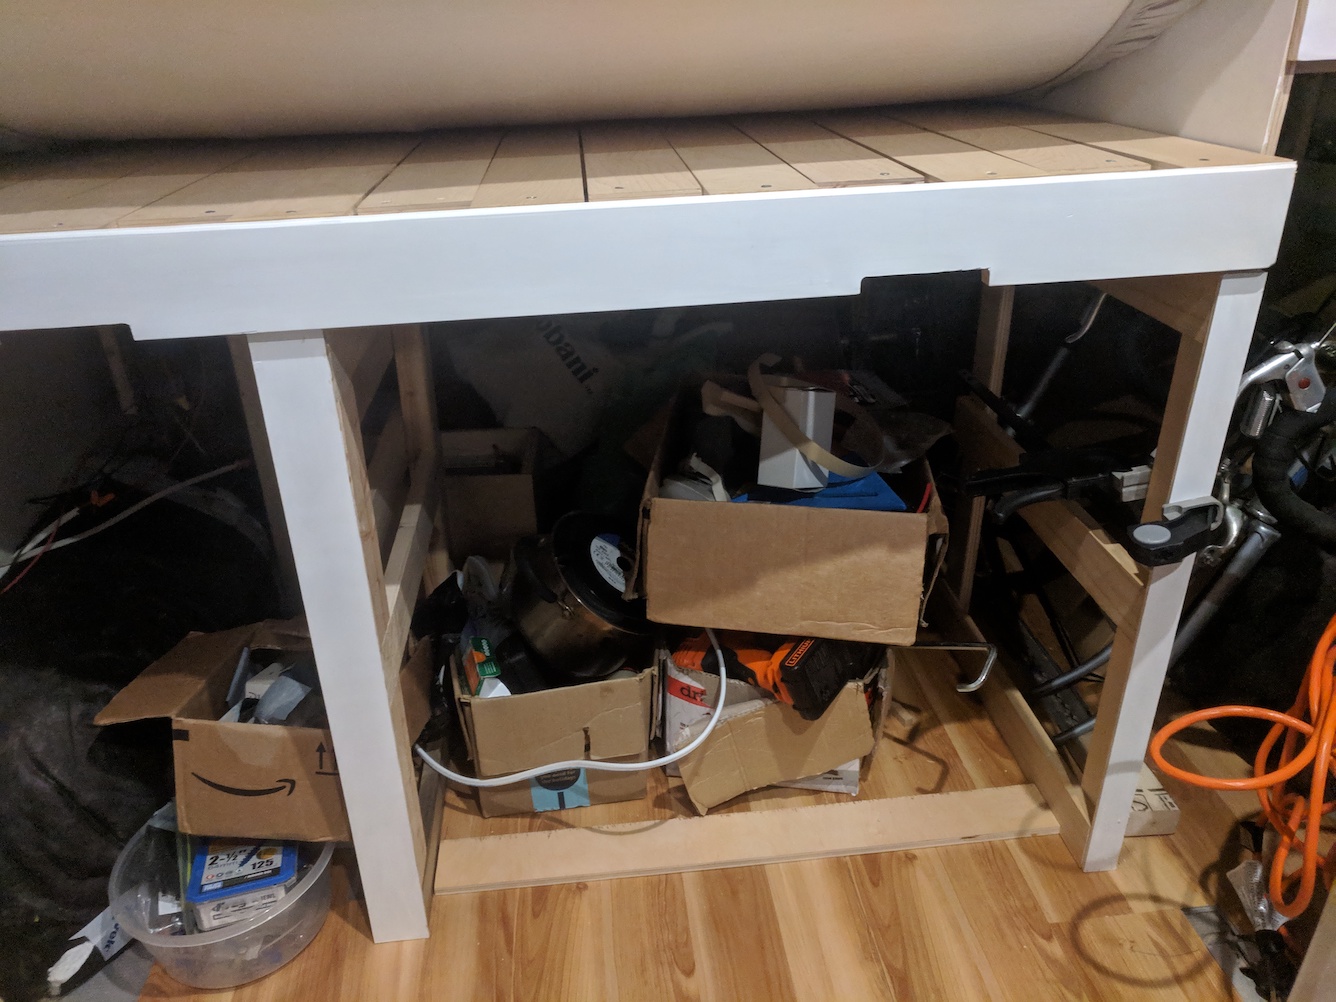
The first step was to build a frame on top of which the bedside cabinets could sit. This frame was built to be high enough so that I could fit my bicycle underneath the cabinet without too much trouble.
I used a series of 3/4” studs bolted to the L track and connected to the bed frame with pocket screws to form the base of the cabinet frame, which itself is 1/2” birch plywood.
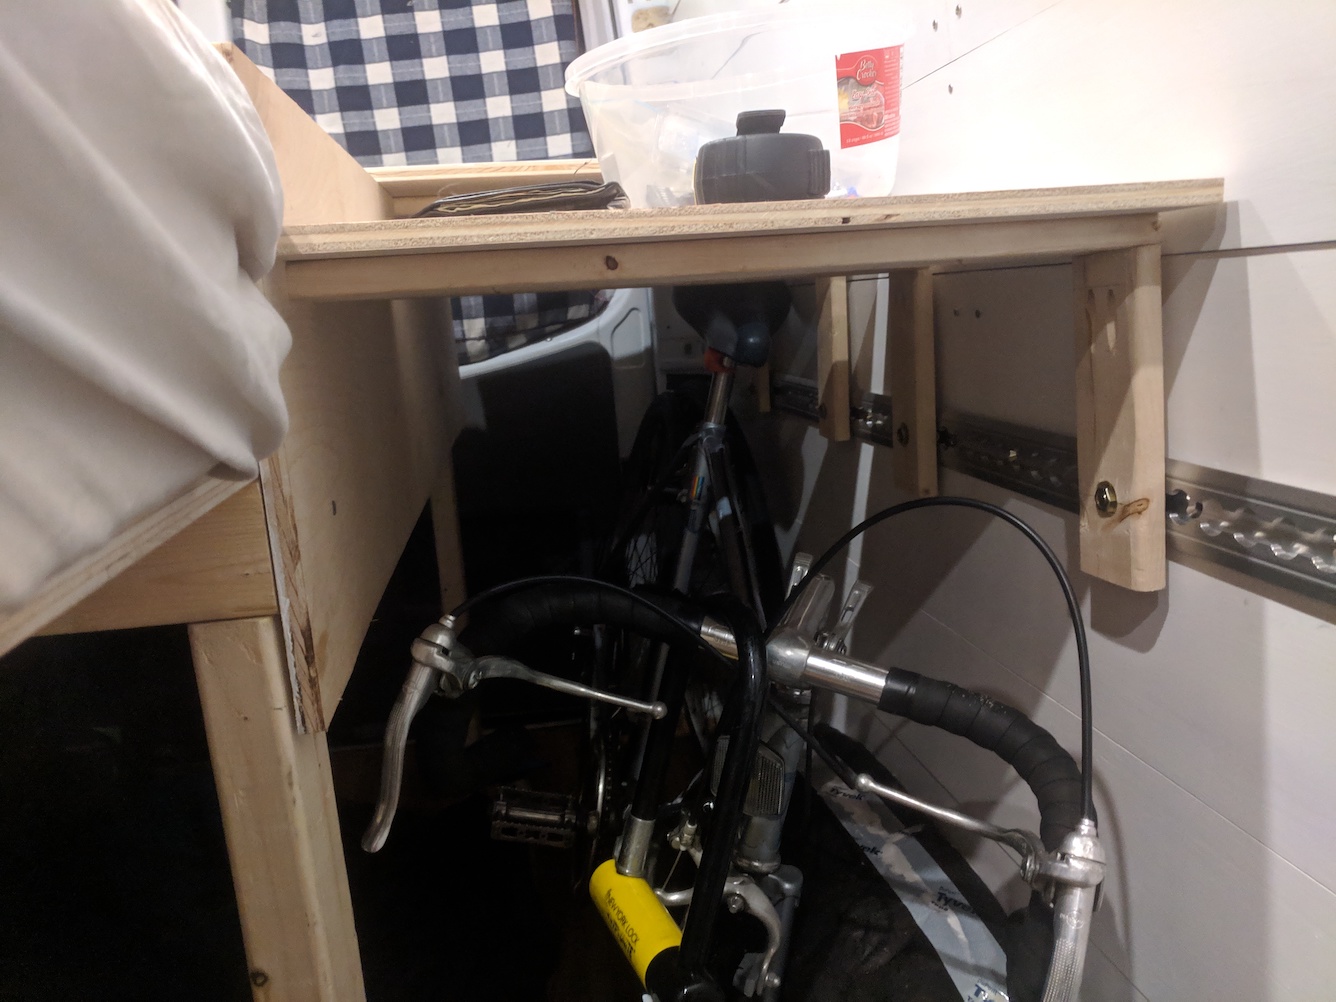 View of frame skeleton bolted to L track, with bicycle for scale
The frame is split into two sections - one about 36” wide and the other about 18” wide. The 18” section sits lower than the 36” section by about three inches. This space I planned to use for a “hidden” compartment in the bottom of the cabinet.
 Installing the bottom of the cabinet. Note the offset
 Cabinet bottoms finished!
The primary challenge was carving the side panels of the wardrobe to match the curved sides of the van. I first cut a piece of cardboard to roughly match the curvature of the van. Then, while holding it perpendicular to and as close to the wall as possible I held a sharpie taped to a wood block in the other hand. By pressing the wood block against the van wall and having the other end (with the sharpie attached) I could traced a line exactly four inches (the size of the wood block) away from the side of the van onto the cardboard piece. This line would follow the curve of the van wall exactly.
Thankfully, I didn’t actually need to be that precise since nothing terrible would happen if these cabinet sides did not perfectly match.
The cabinet body (like almost all the other furniture in the van) is triple coated with water baed polyurethane or primed and painted in glossy white.
 Cabinet partially finished/installed
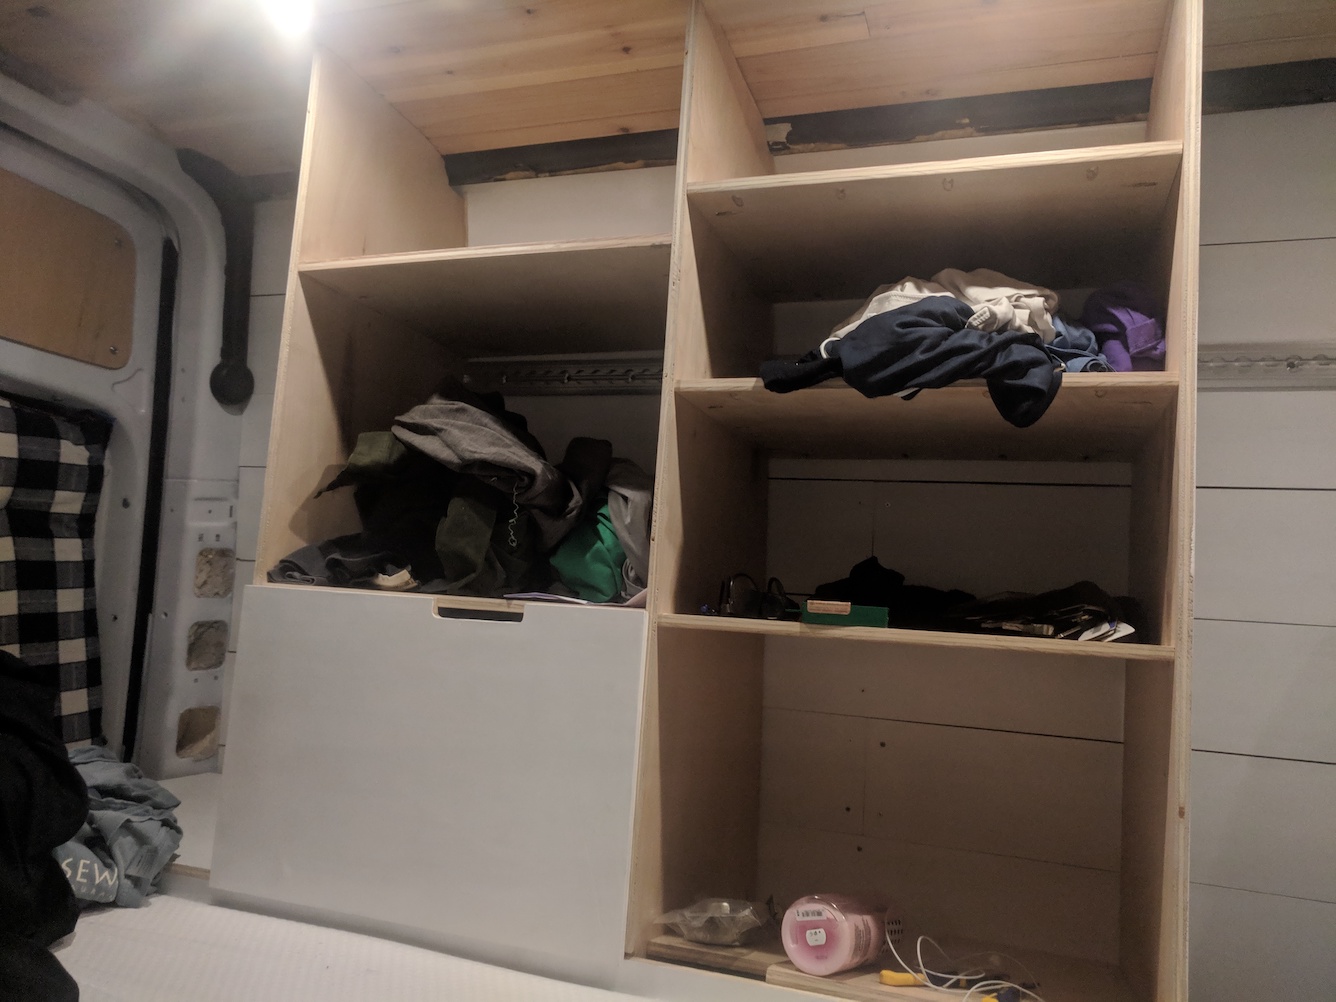
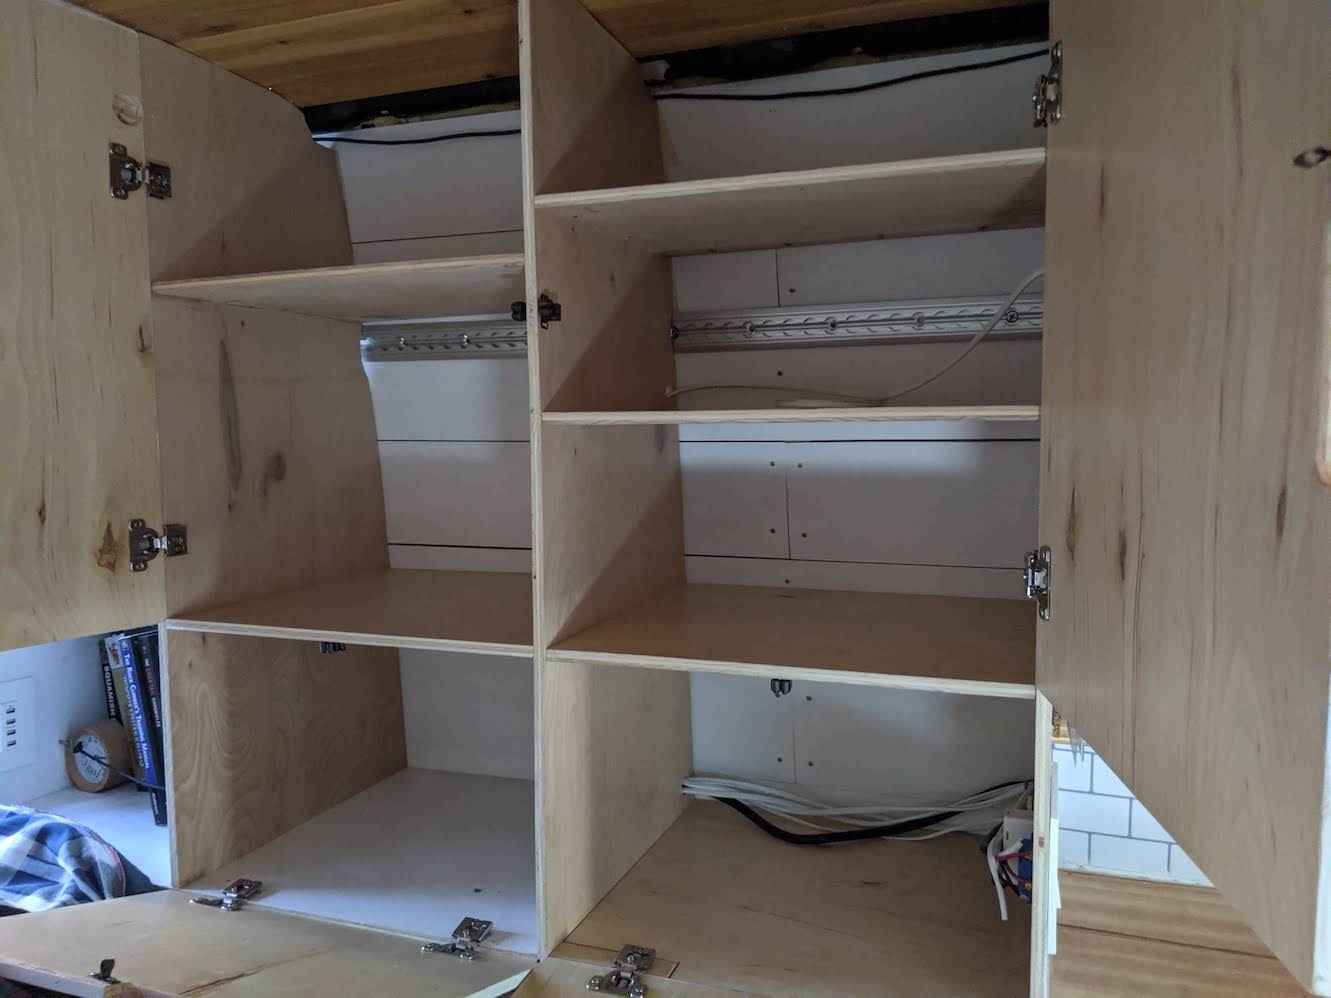
I divided the 36” space into two 18” columns with a variety of shelf heights, from 11” to 7”. This works well enough to hold my clothes, although I think a more efficient layout could use either three 12” columns or two columns of 12” and 24”, and have more shelves in the 7-8” range than the 10-11” range. It seems that most clothes take up about 12” of space when folded, and I also rarely stack clothes higher than 7-8”.
 All shelves finished, cabinet doors partially installed
I used 1/2” overlay cabinet hinges for the cabinet doors with roller catches to keep them from swinging open when driving. It was actually very frustrating to install these cabinet doors since most cabinet hinges are made to be embedded in thicker (5/8”) cabinet doors. I couldn’t believe how much this 1/8” difference made. I had to take the doors back to the shop many times to repaint and fill the spots where the hinge body broke through the other side of the door.
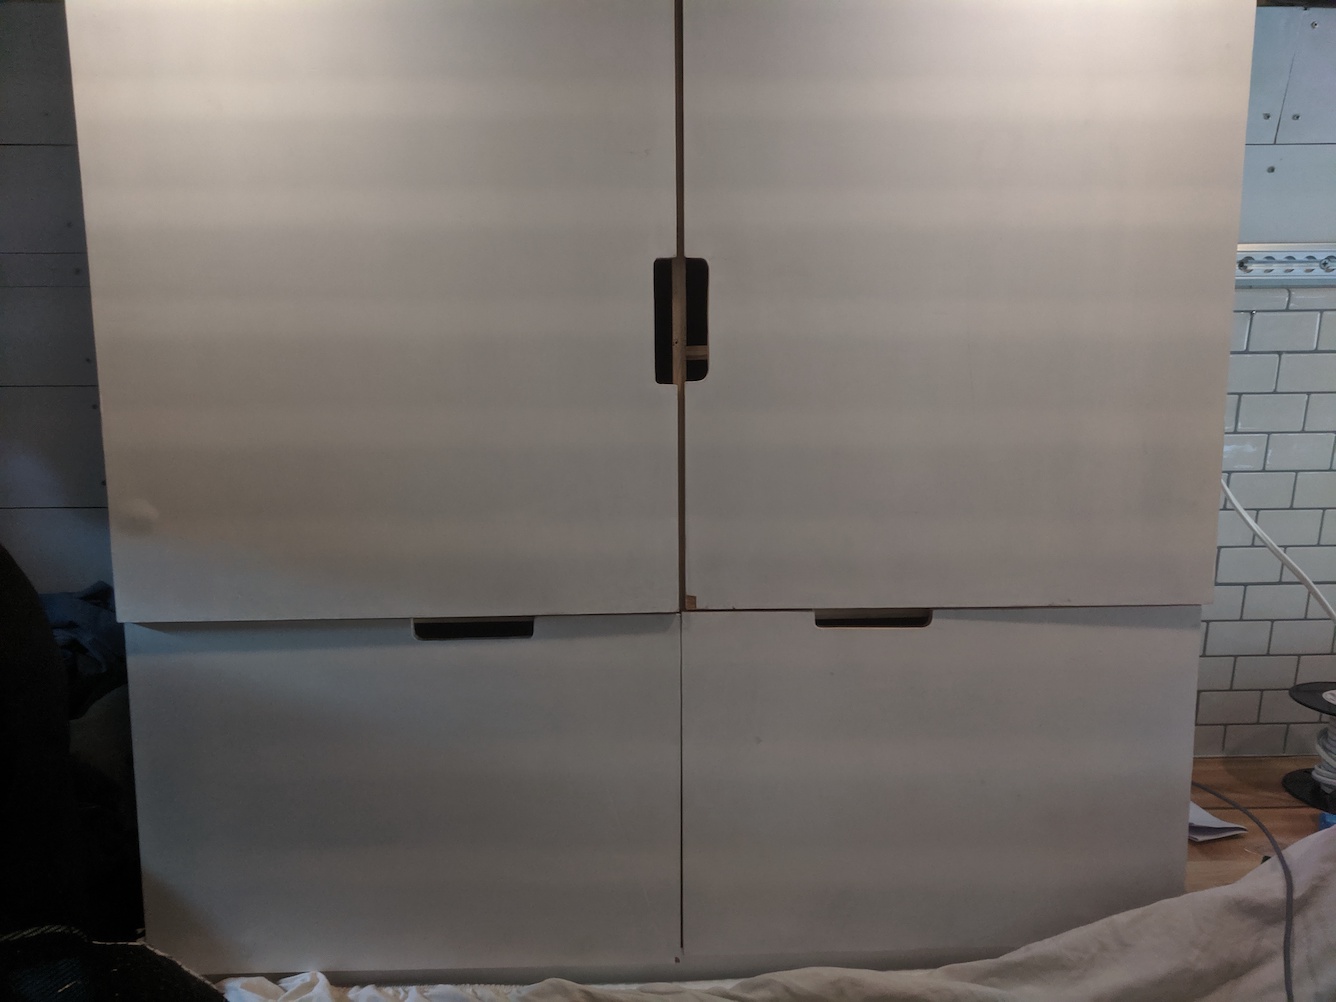 Cabinet doors installed!
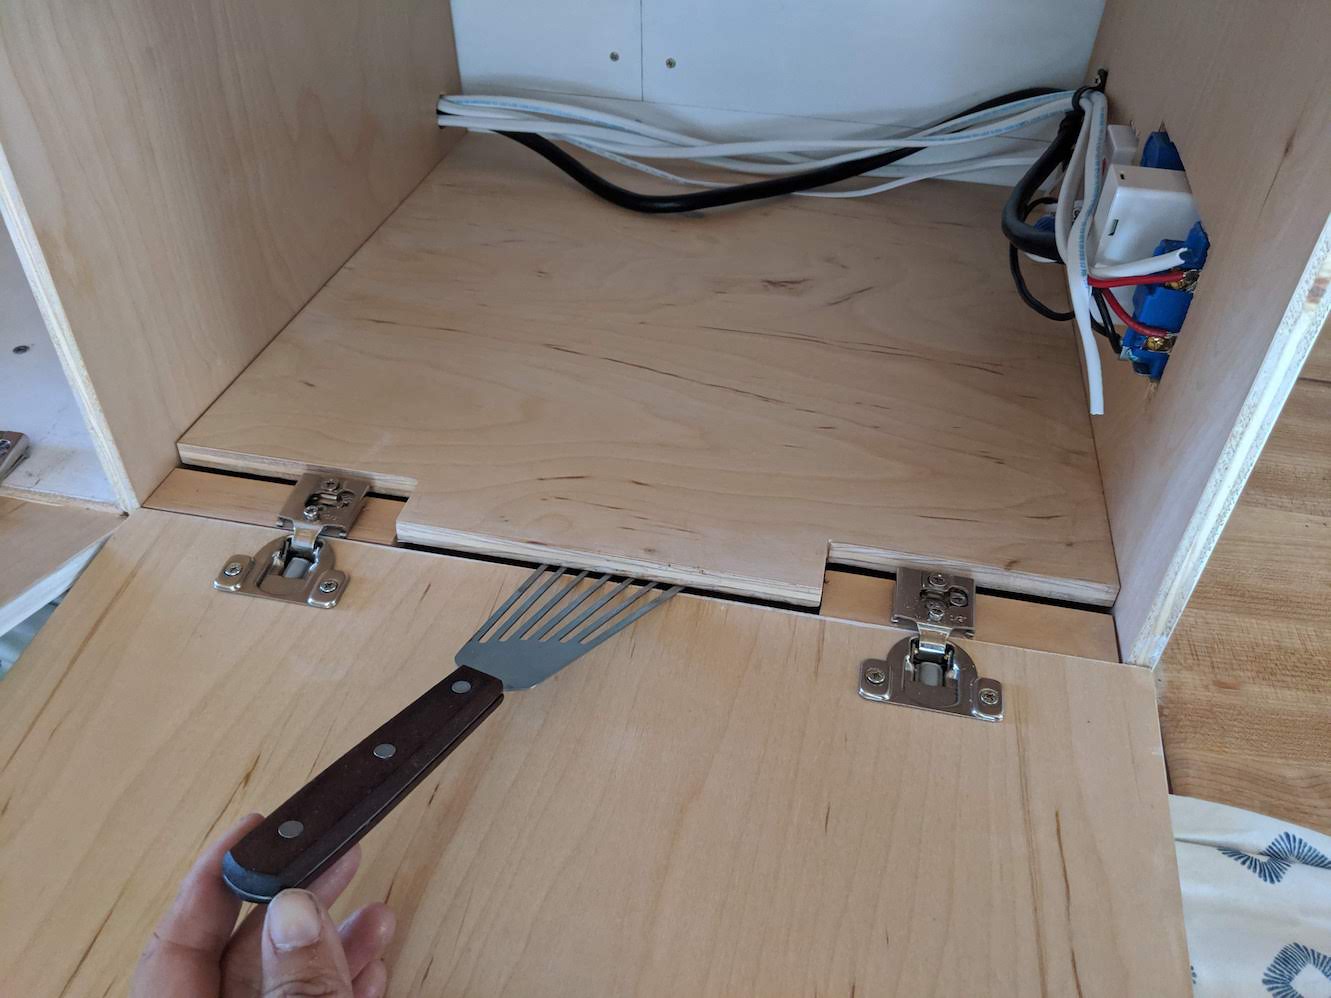
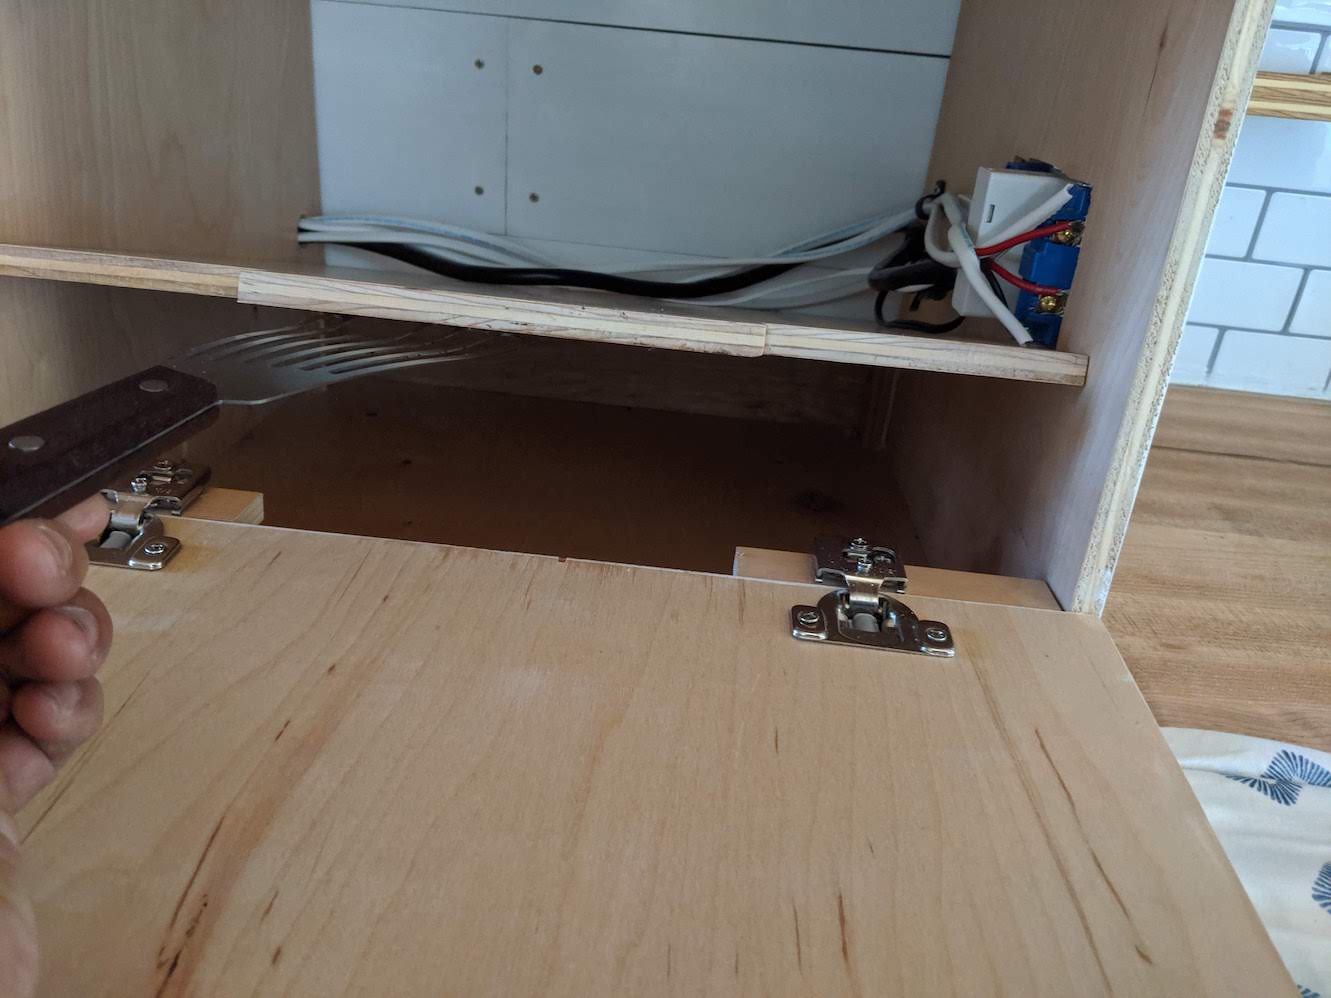
Secret Compartment
I made a false bottom for the right hand wardrobe which can be opened with a fish spatula or other similar flexible-but-rigid material. The underlying space is the perfect size for laptops, passports, and other small valuables.
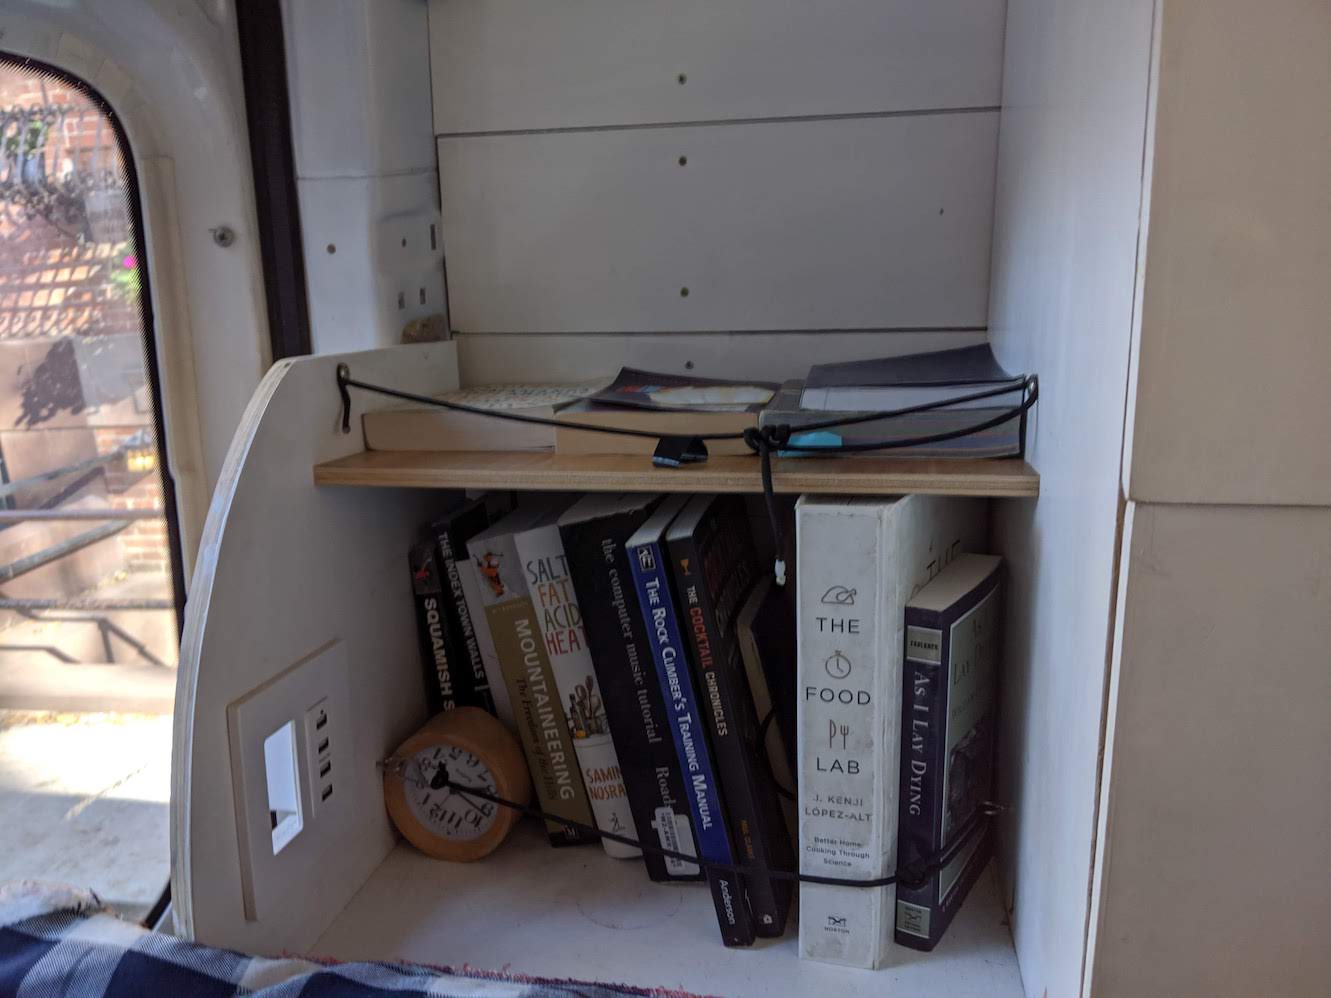
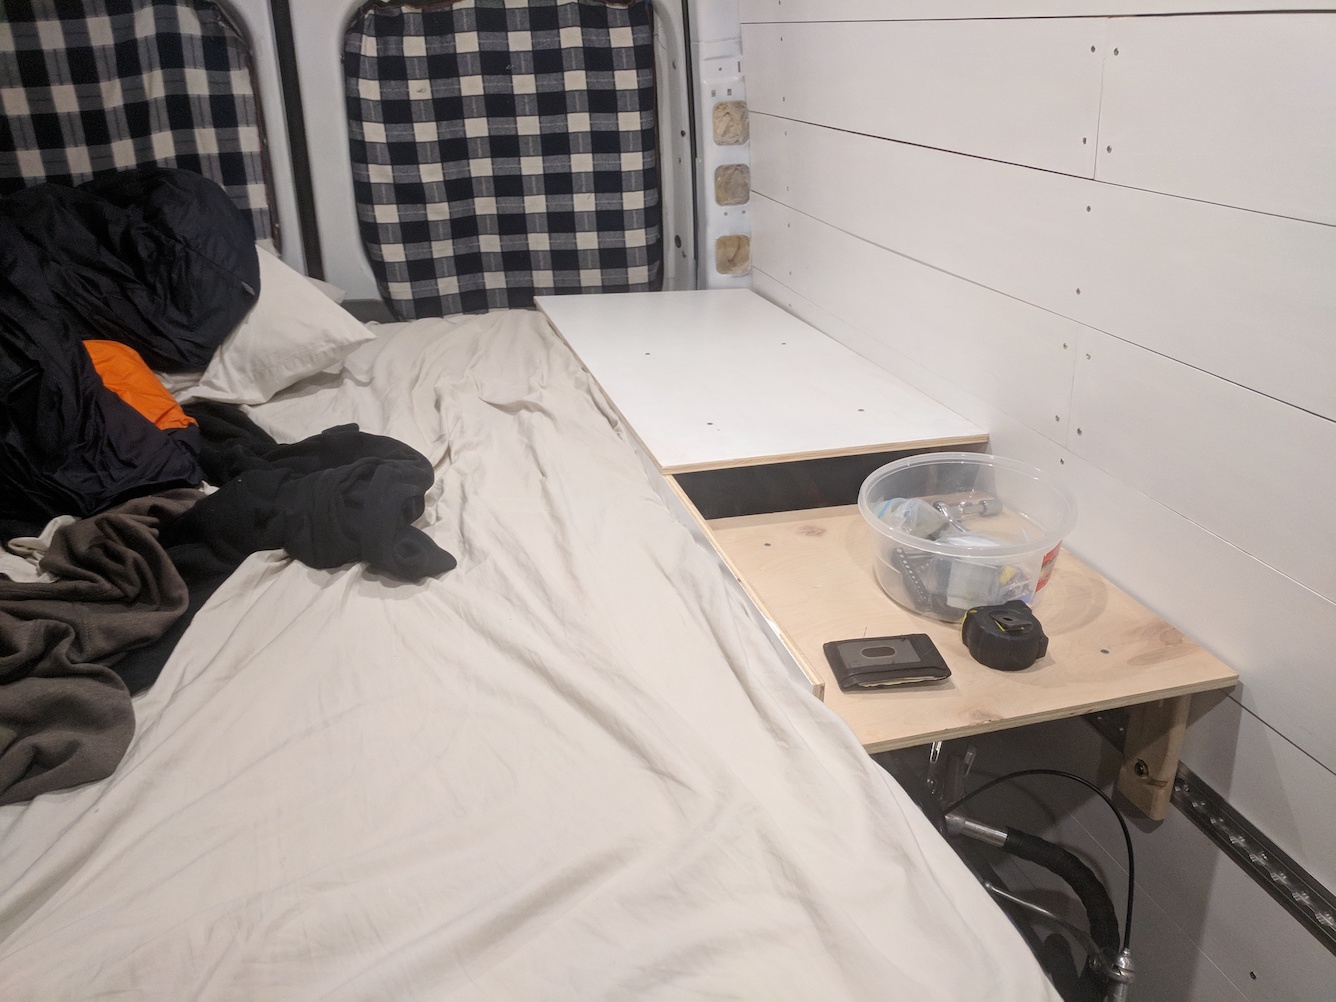
Bookshelf/Nightstand
I made a simple shelf for the remaining 18” of bedside table which is able to hold a few books and other nightstand items.