Chordal Distance - Process
This page serves as the primary process documentation for CHORDAL DISTANCE. See this page for the main project page.
All code for this project can be found here
1. Concept / Ideation
We were initially interested in this idea of combining collaborative, metaphorical friction with music initially articulated here. However, we struggled at first to settle on a physical metaphor that captured this idea elegantly.
Our initial list of ideas included a table you had to push down on, a set of large boxes that needed to be pushed around a space, a rusty turn-crank music box, and a ceiling-to-floor string installation whose strings would be tugged or pulled on by the participants. However after some initial prototyping we realized that many vertically oriented string installations look very much like a harp; a preexisting strong musical concept that people would inevitably be familiar with, a familiarity which lead to confusion in early testing.
We were particularly interested in the simple two player interaction of tug of war, but couldn’t come up with a elegant physical metaphor that allowed more than two players to participate. We decided after a few days of unsuccessful sketching to keep the project minimal and restrict it to two players.
2. Initial Prototype
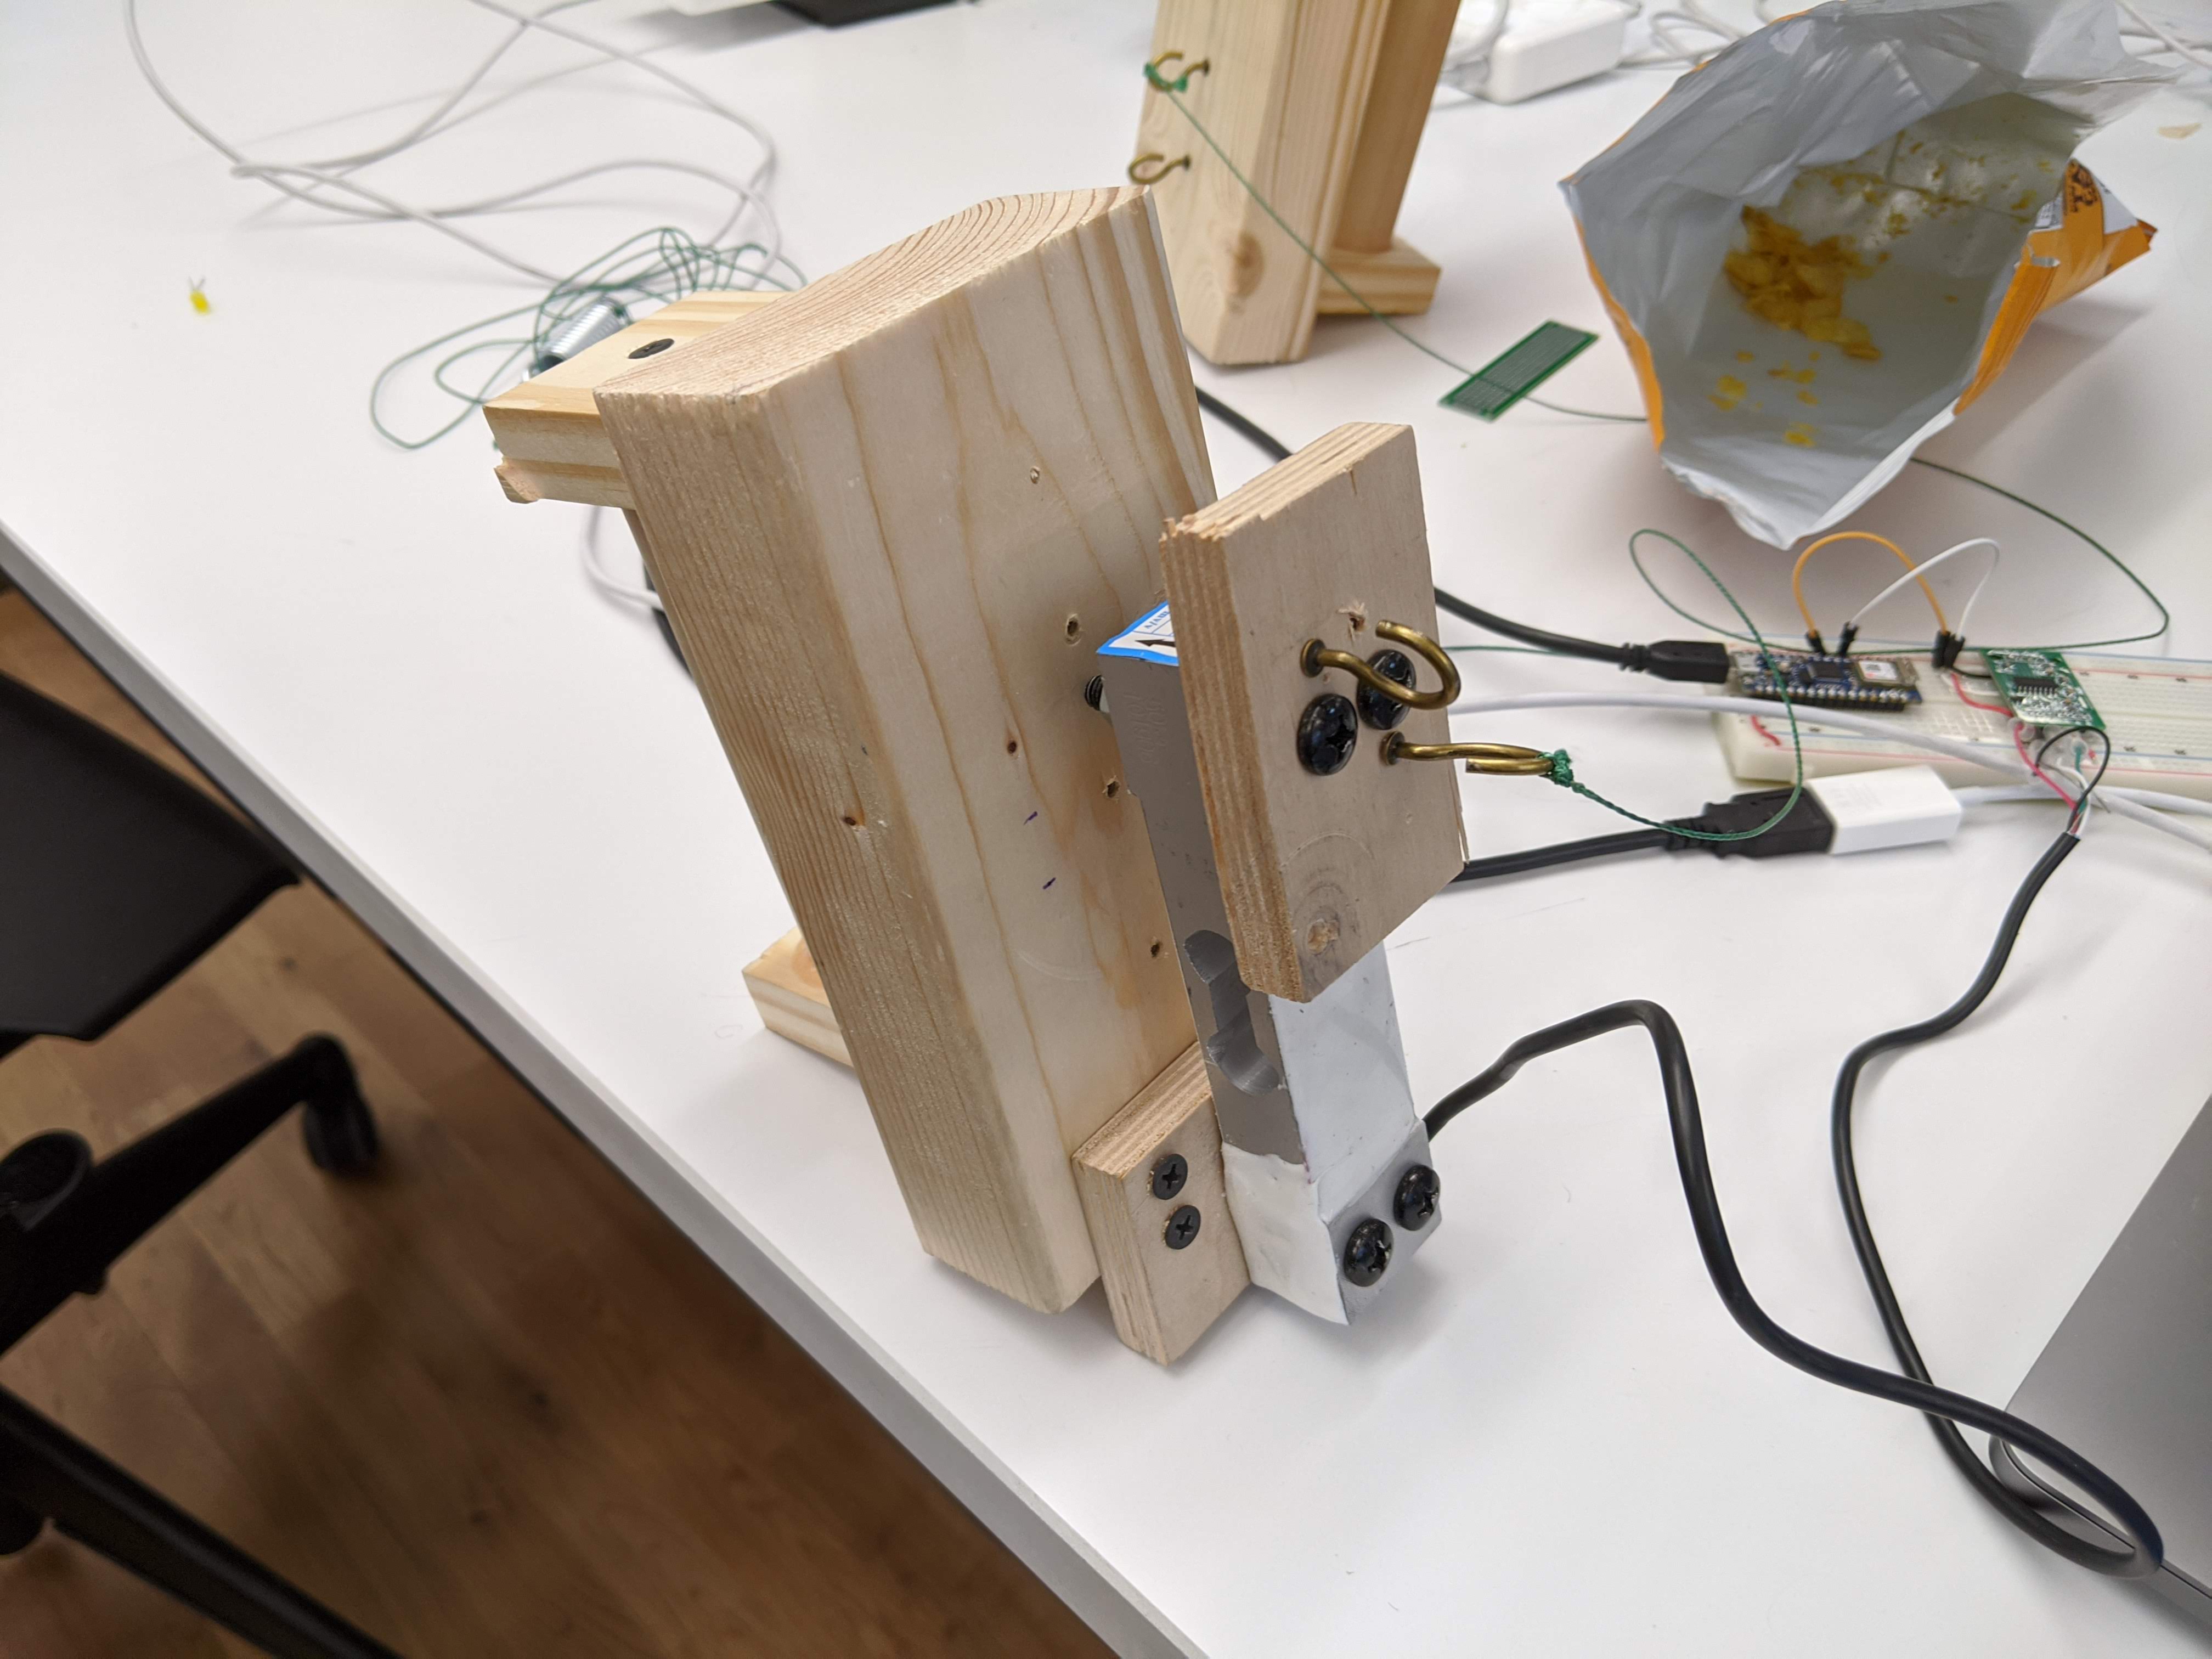
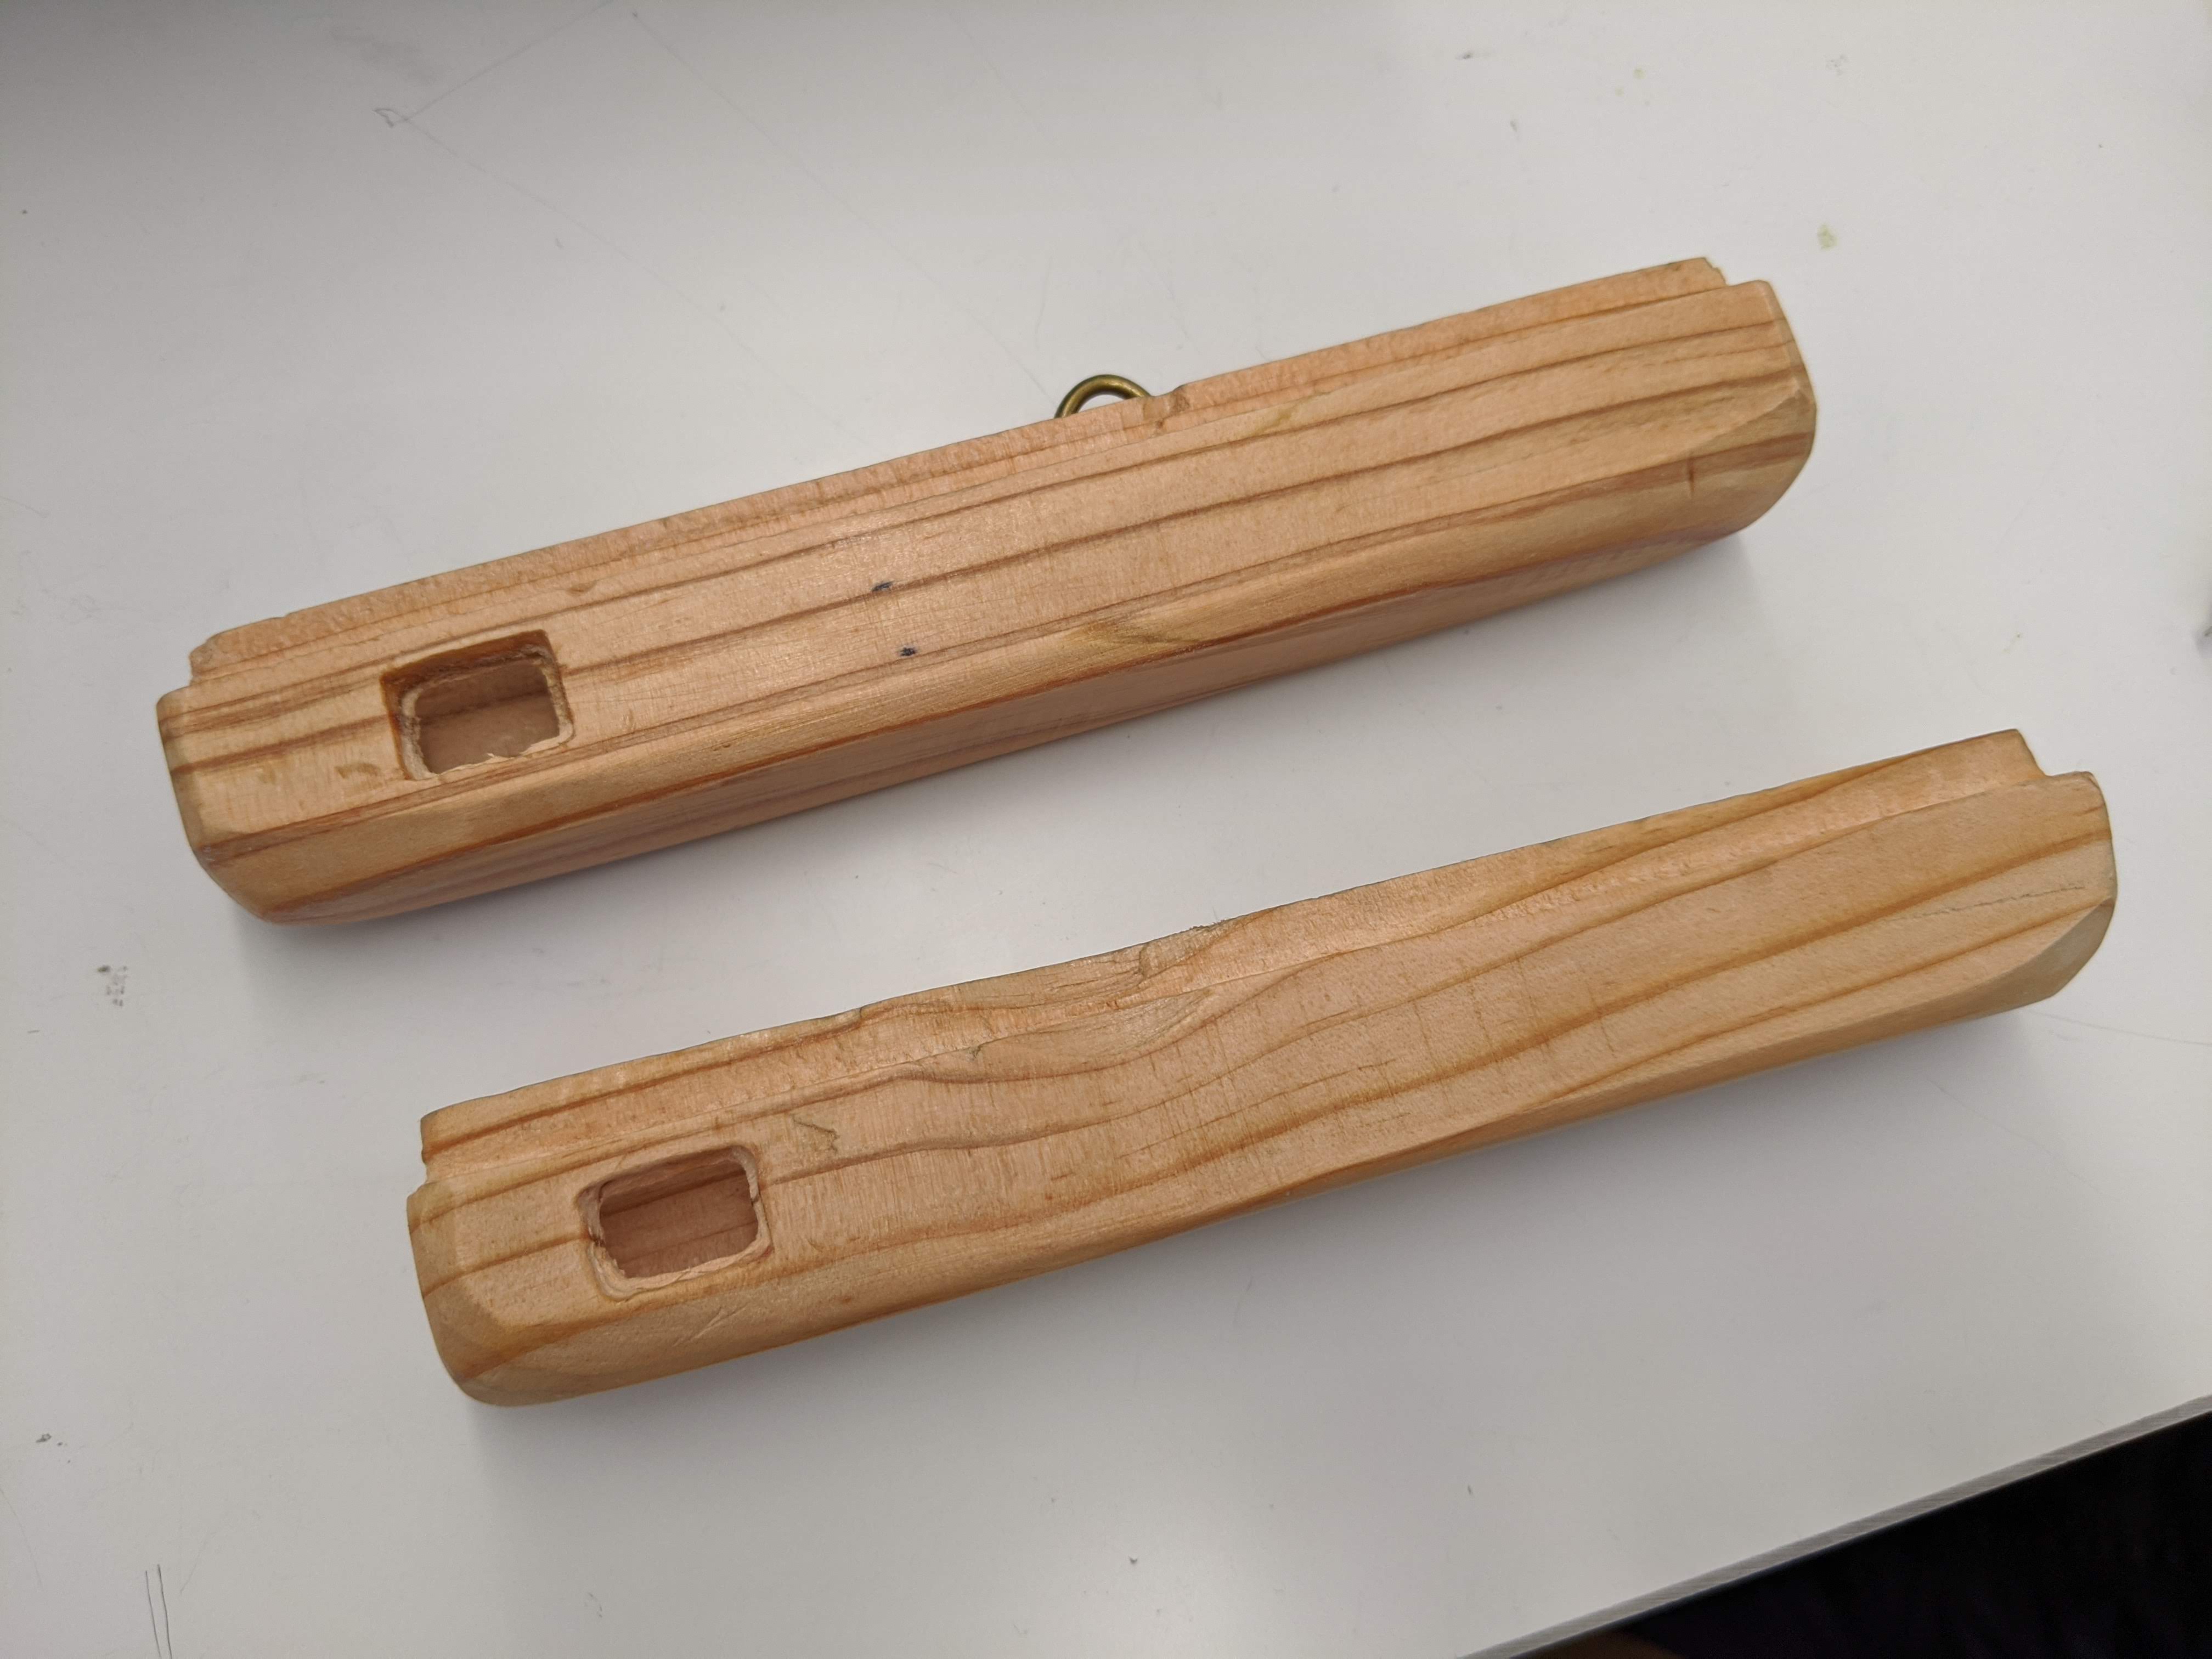
We decided to start with two handles attached by rope. I quickly built a rough pair of handles which we could use for testing.
In our first official playtesting session we confirmed that people really did enjoy the pairwise tension-modulating interaction. We also observed that many people liked to move the handles very quickly in many directions, something that we hadn’t considered. Movement outside of the tension in the connecting band would be something that we logged as something to pay attention to.
Our initial test used a 50kg load cell as we wanted to be sure that our piece could sustain the high level of force that we were hoping people would want to place on it. However, after calibrating the load cell and doing a stress test we found that 10-11kg was already near the maximum amount of force that the two of us could exert on each other. We figured that we would be able to use a much more compact 20kg load cell for our final piece.
3. Enclosure Design
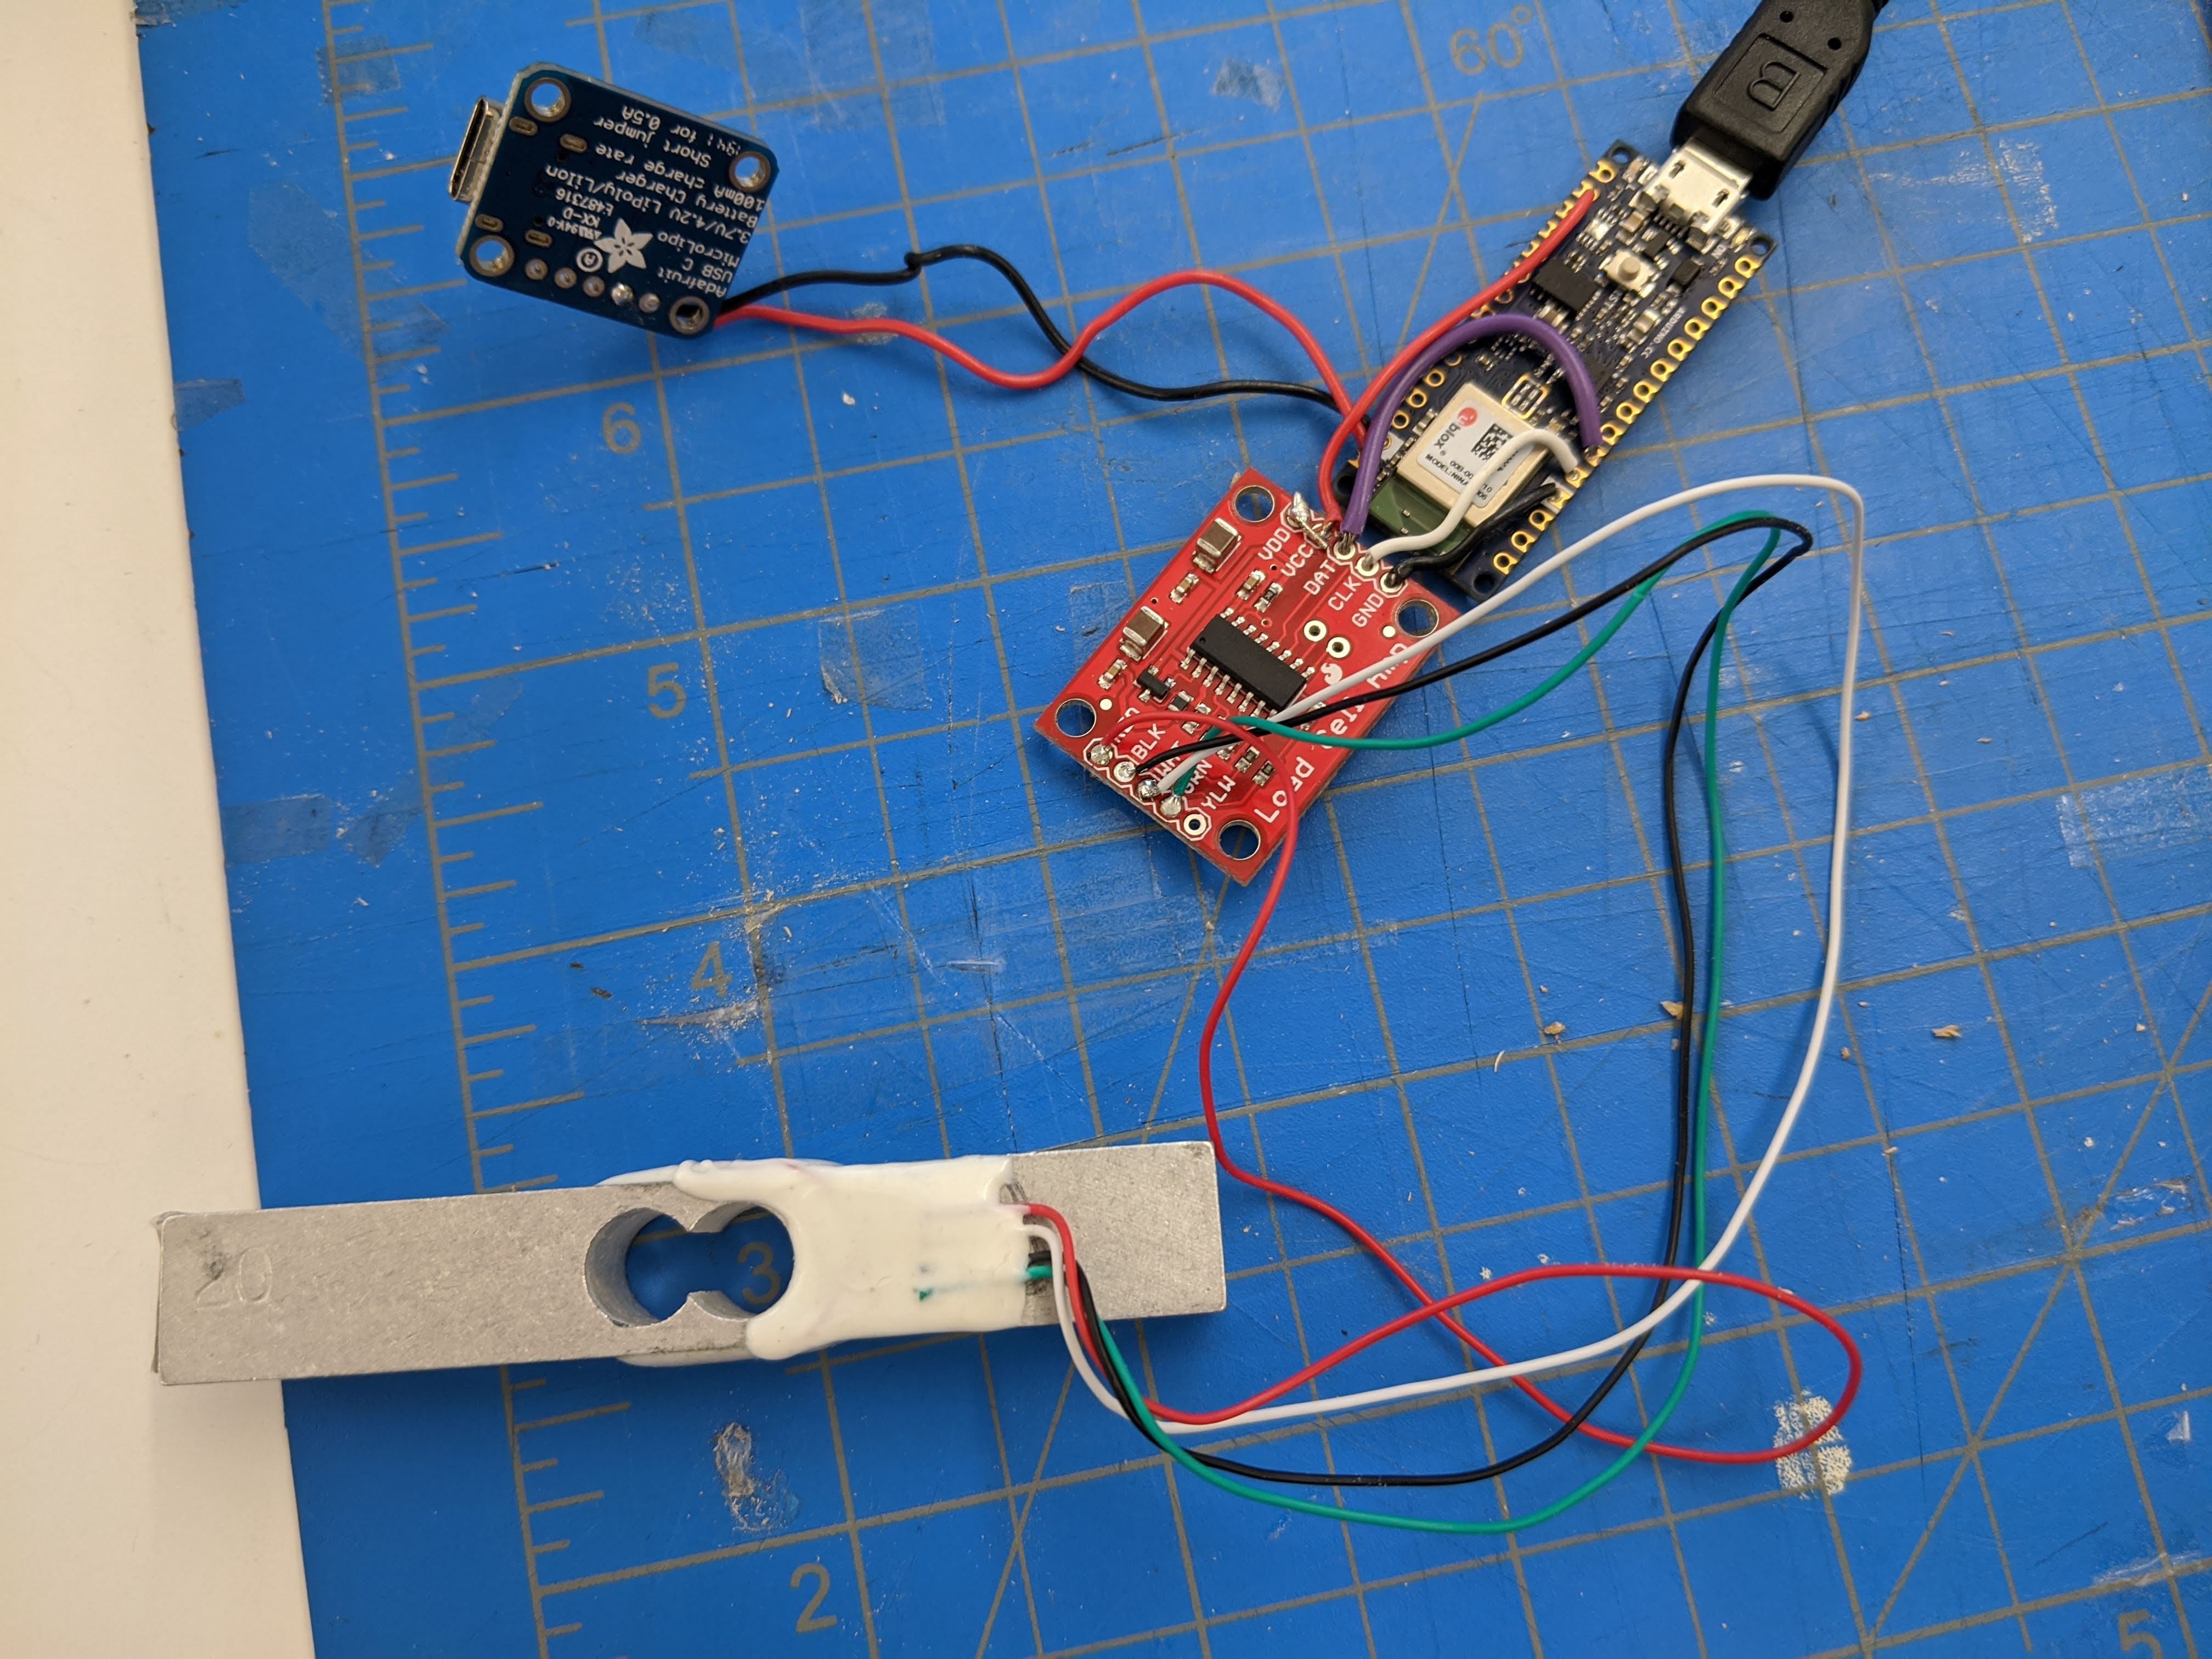
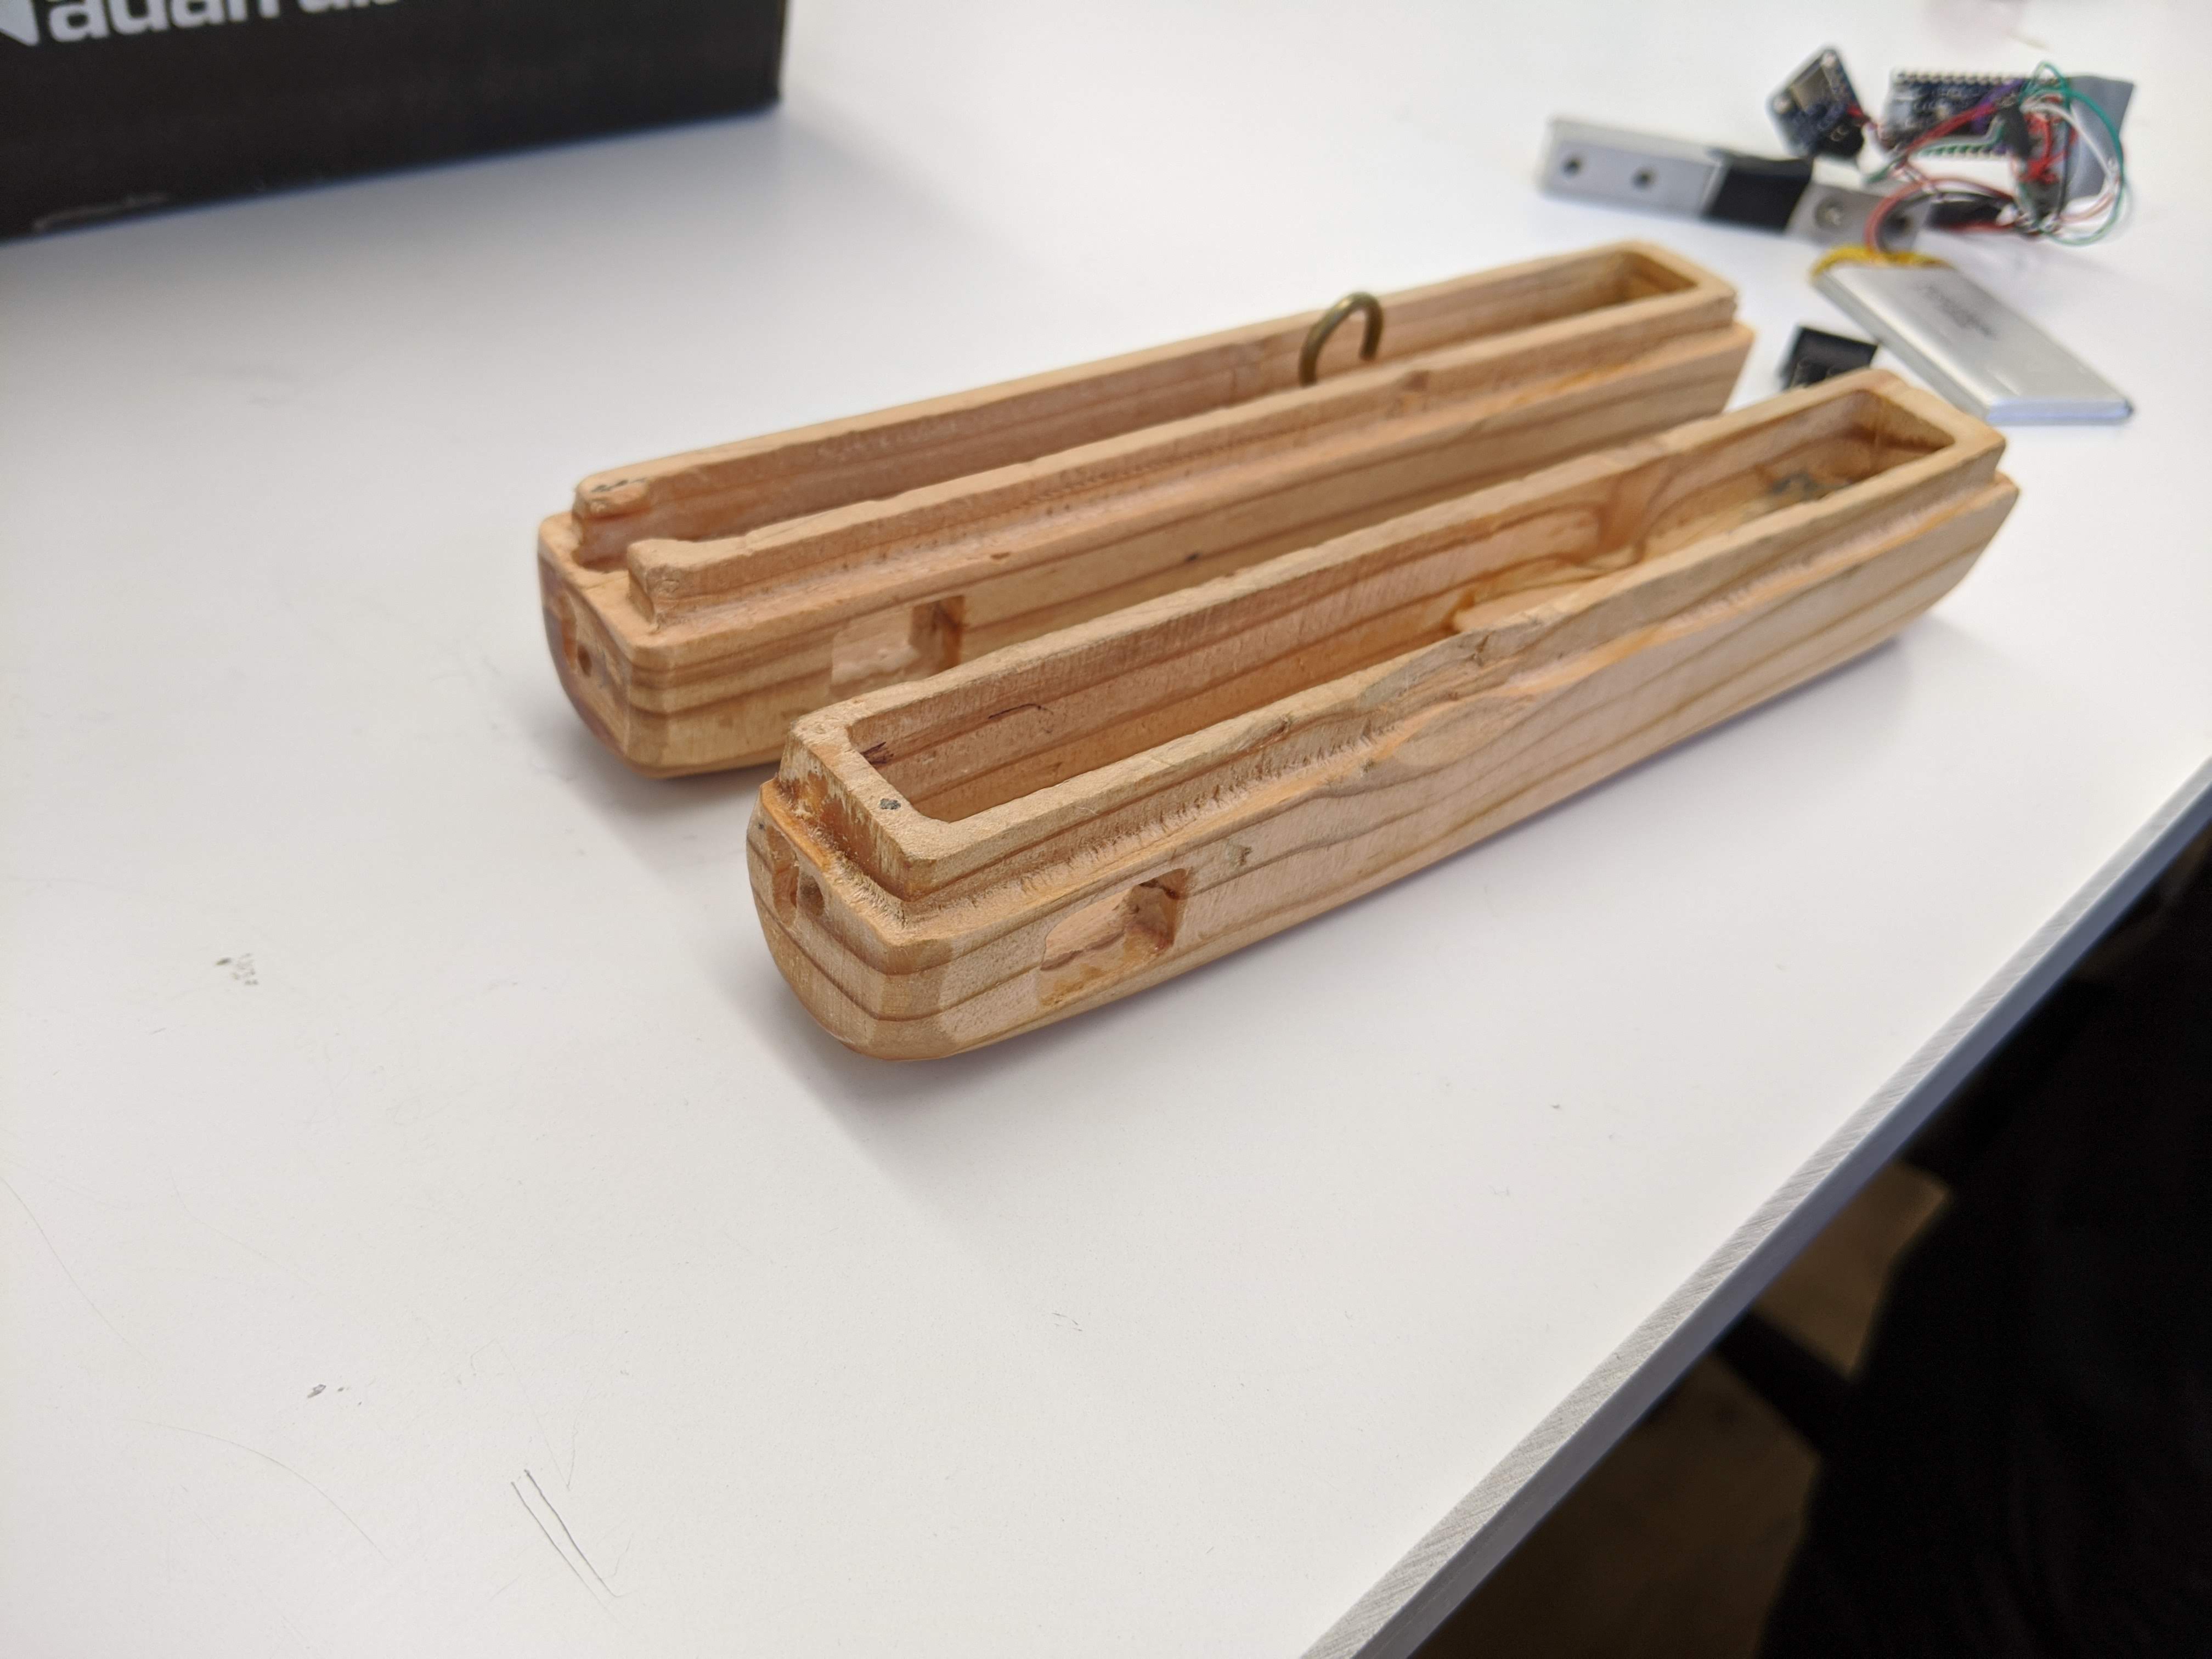
We wanted an enclosure that served several functions at once - it needed to contain at most a 20kg load cell, an HX711 board, an Arduino Nano microcontroller, a 1200mAh LiPo battery, a battery charging port, and a power switch for the whole system. The enclosure also needed to provide a secure mounting point for the string between the two handles as well as overall be sturdy enough to withstand relatively abusive handling. The enclosure also needed to provide a comfortable gripping point. Finally, we also wanted the enclosure to be aesthetically pleasing!
We struggled to come up with a design for an enclosure with an attached handle that didn’t recall pre-existing-but-irrelevant shapes such as telephones, door handles, bananas, or dog leashes. The crude but confident lines of our prototype felt like a package deal - if we slimmed down or refined the shape of the prototype it would immediately bear a stronger resemblance to some designed product-with-handle. We wanted a shape that was elegant, that was comfortable to use and suggested pulling in its own shape. We began to explore the possibility of merging the handle and enclosure together - what if the handle itself was the enclosure?
After many hours of carefully measuring our electronic components and laying out the possibilities in Rhino we felt confident that we would be able to fit all the components inside of a shell that was still comfortable to hold in hand. Youngmin additionally designed a clever attachment mechanism for the handle - to avoid having to unscrew the enclosure each time we needed to access the insides the lid slides onto the body with a simple friction-fit.
We bought a cheap piece of 2x3 red softwood stud to start our second prototype. Aidan Lincoln incredibly generously helped us learn how to use the CNC shopbot to carve out our exact design in the wood.
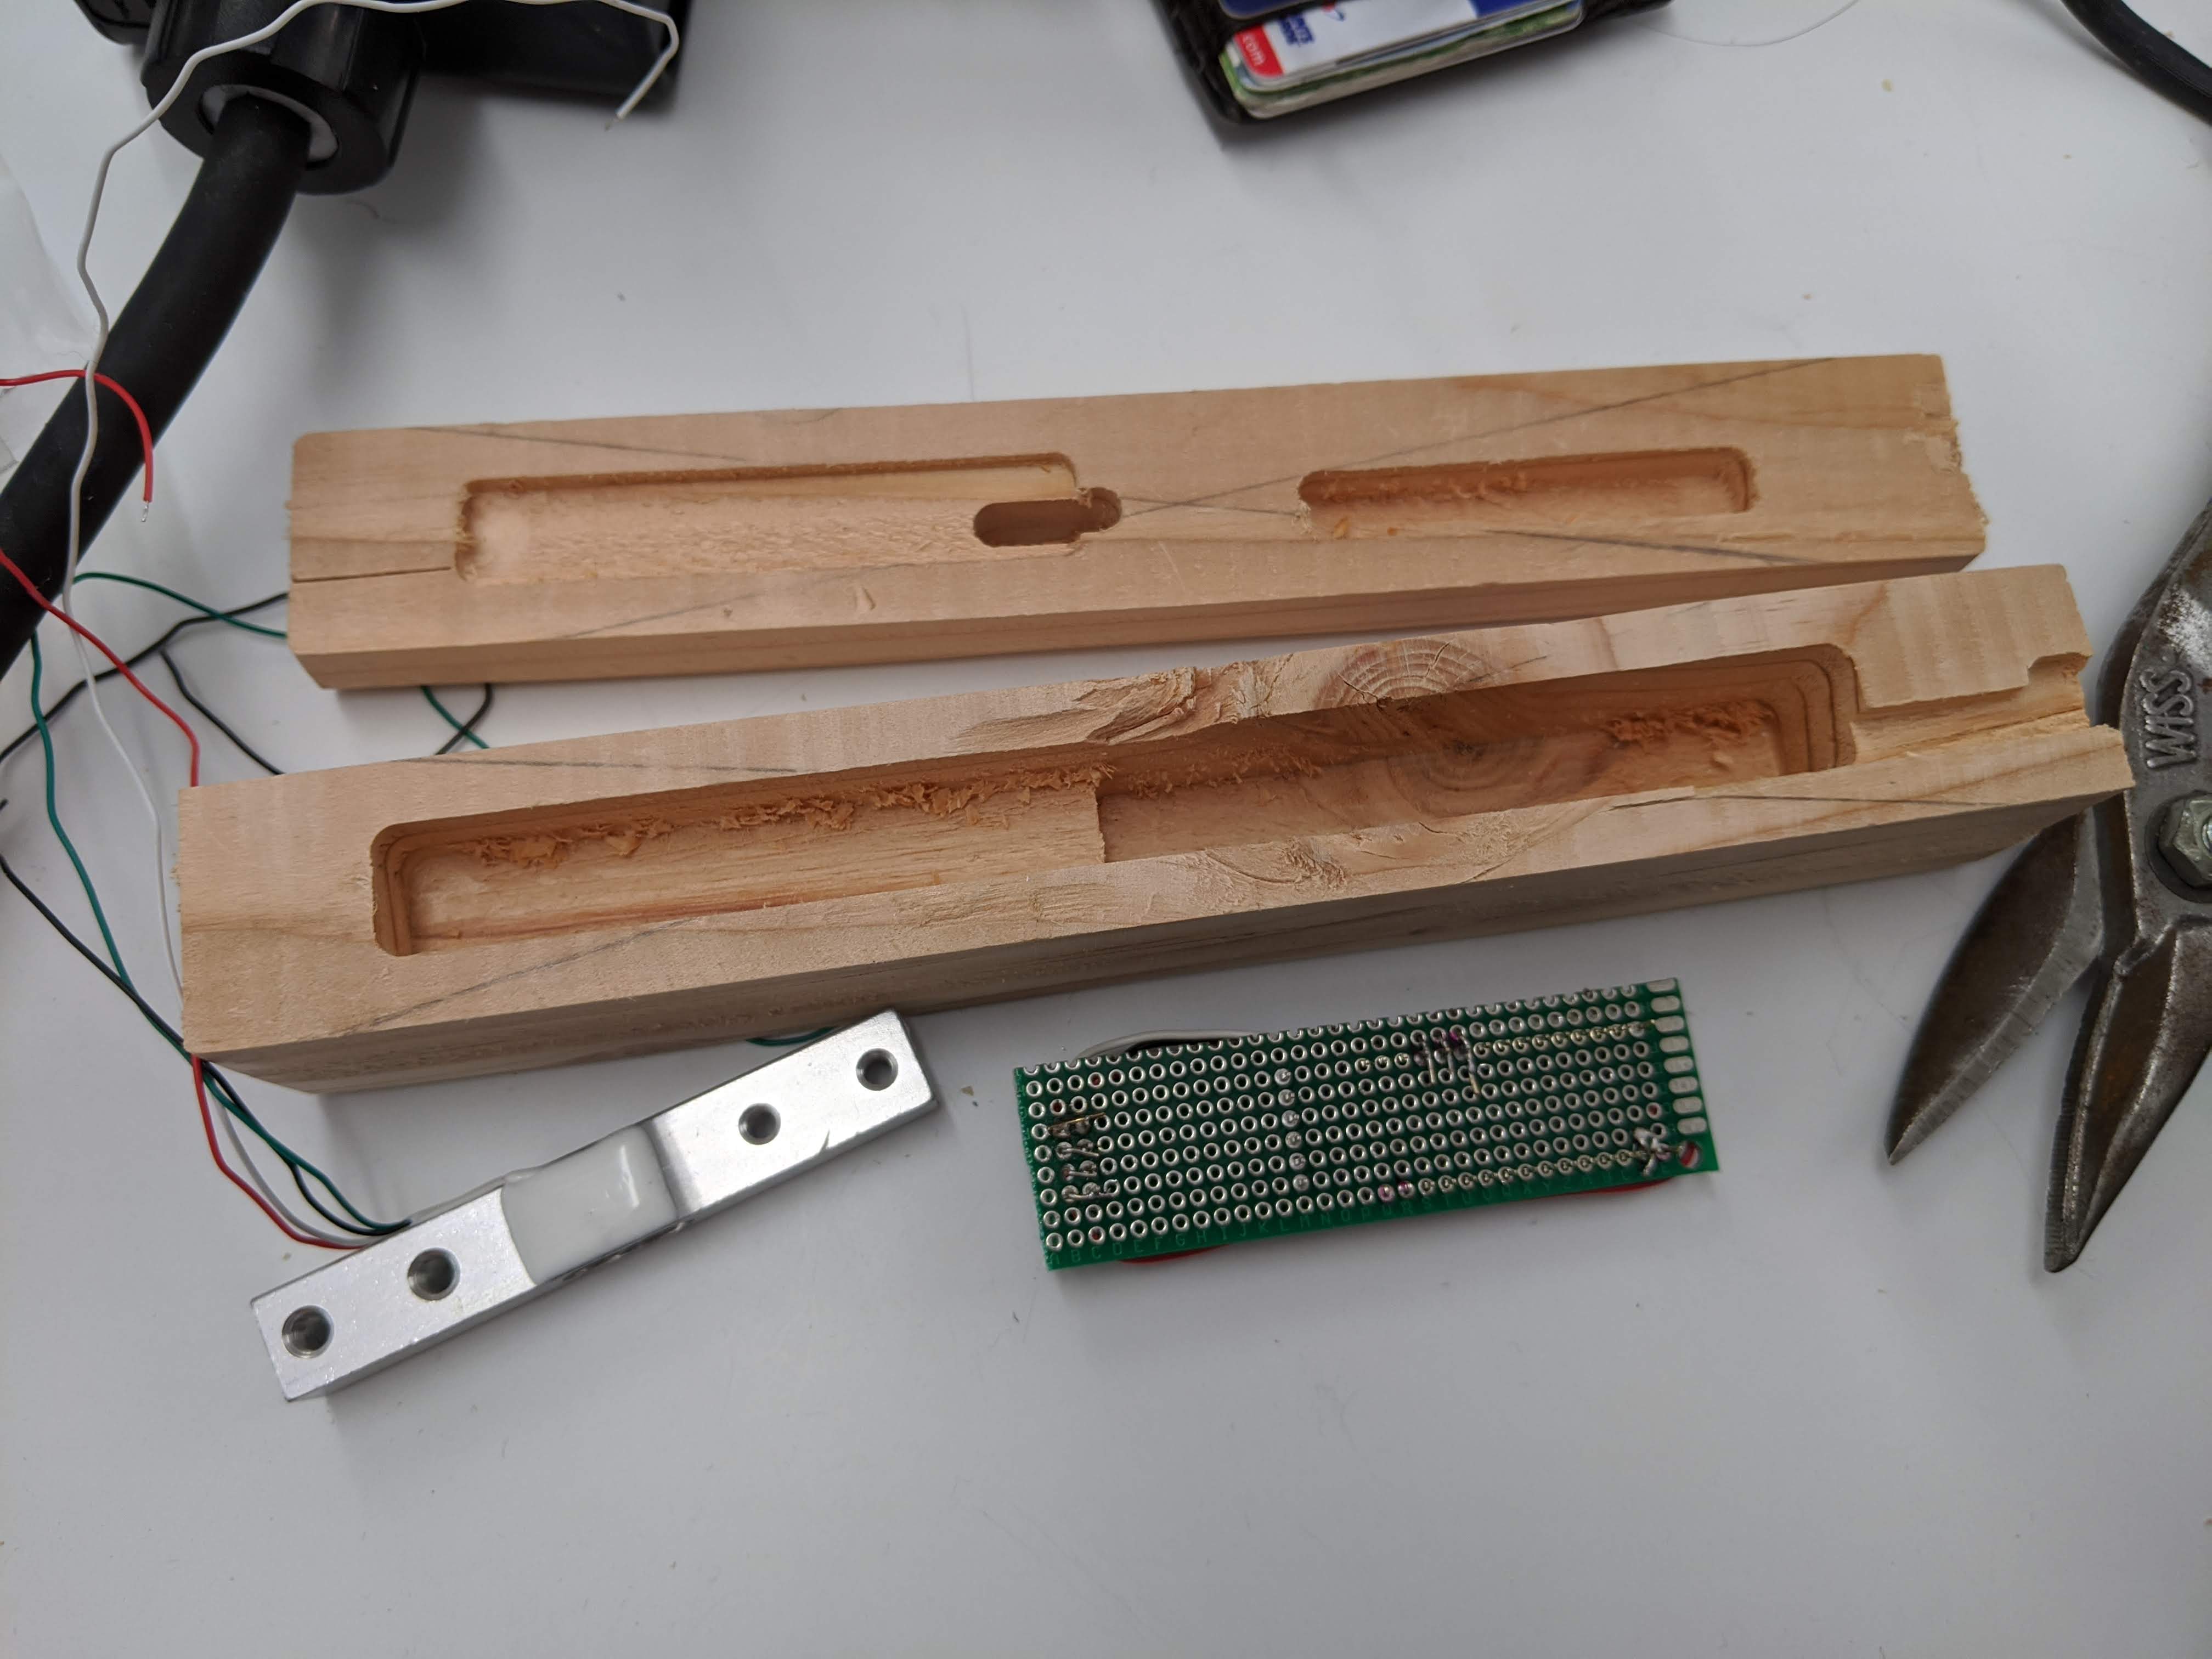
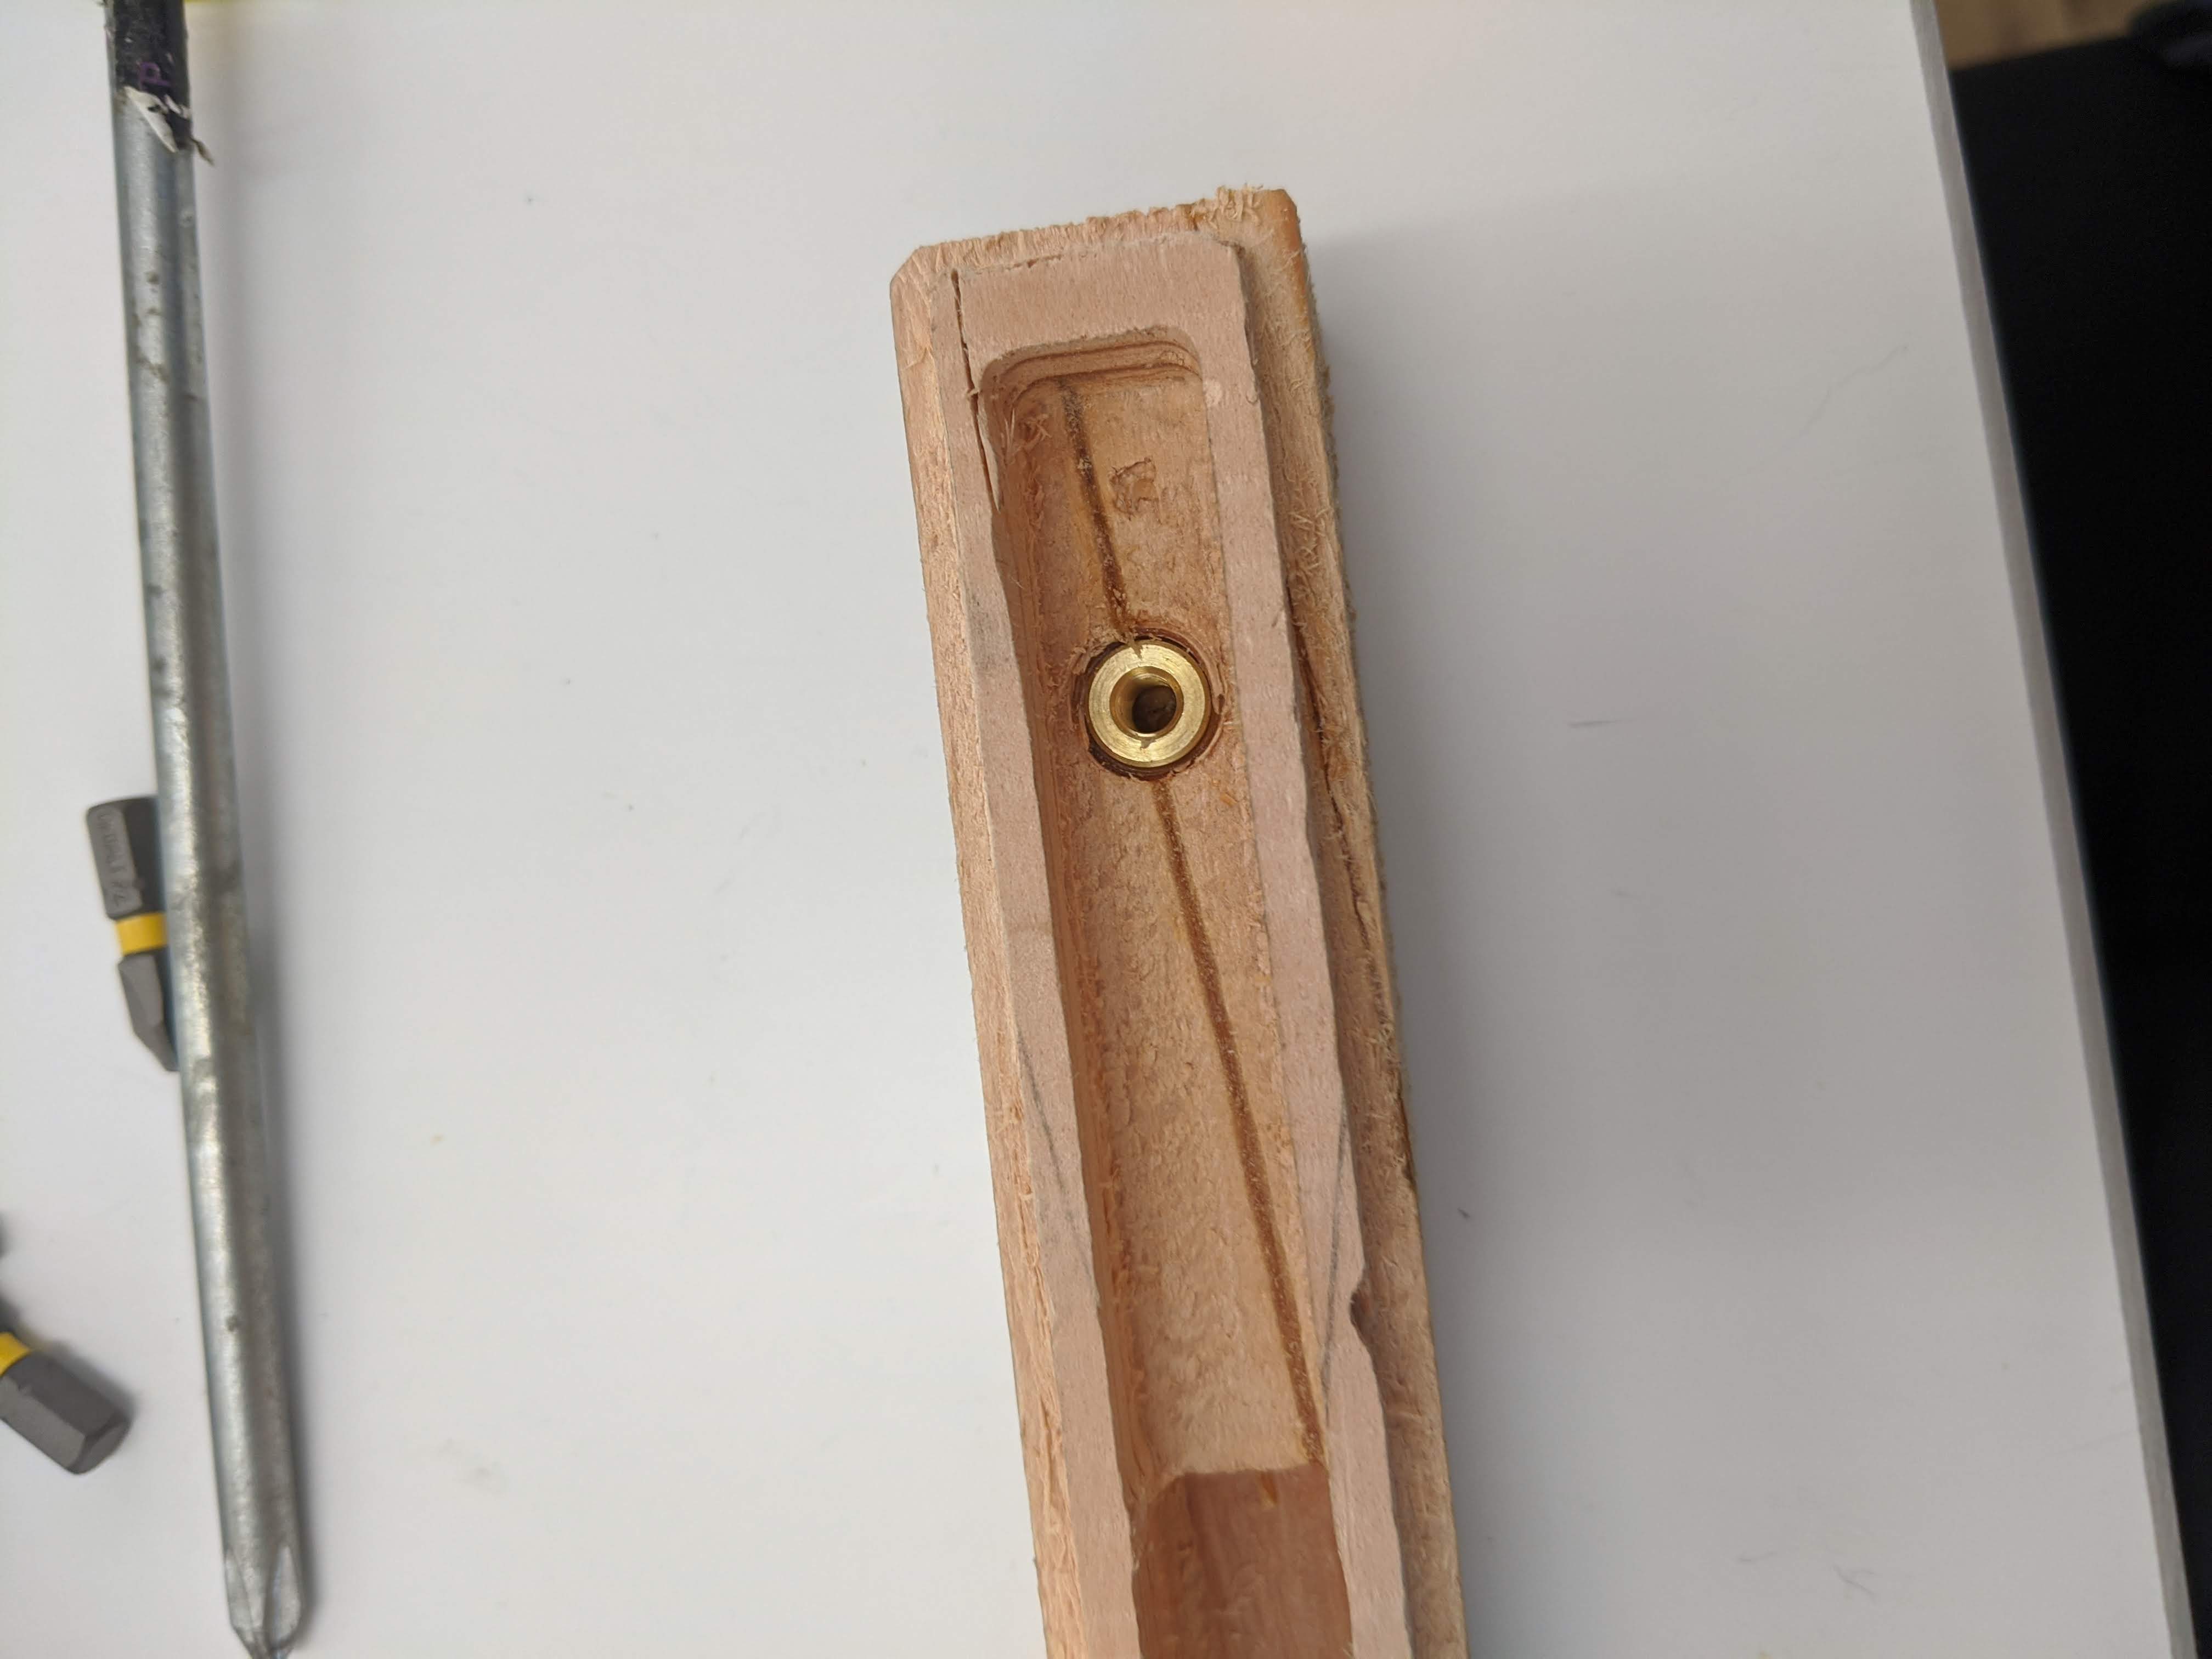
In order to mount the load cell we needed a way for machine screws to secure the load cell to the wood. We used a single brass machine screw insert which is reinforced with epoxy. This method worked well enough, but it was exceedingly tricky to make sure the machine screw hole in the load cell was perfectly aligned with the insert. To avoid this issue for the the second load cell attachment point we secured the second point with a simple #6 wood screw.
We used a dremel tool to carve out basic notches for the charging chip and rocker power switch.
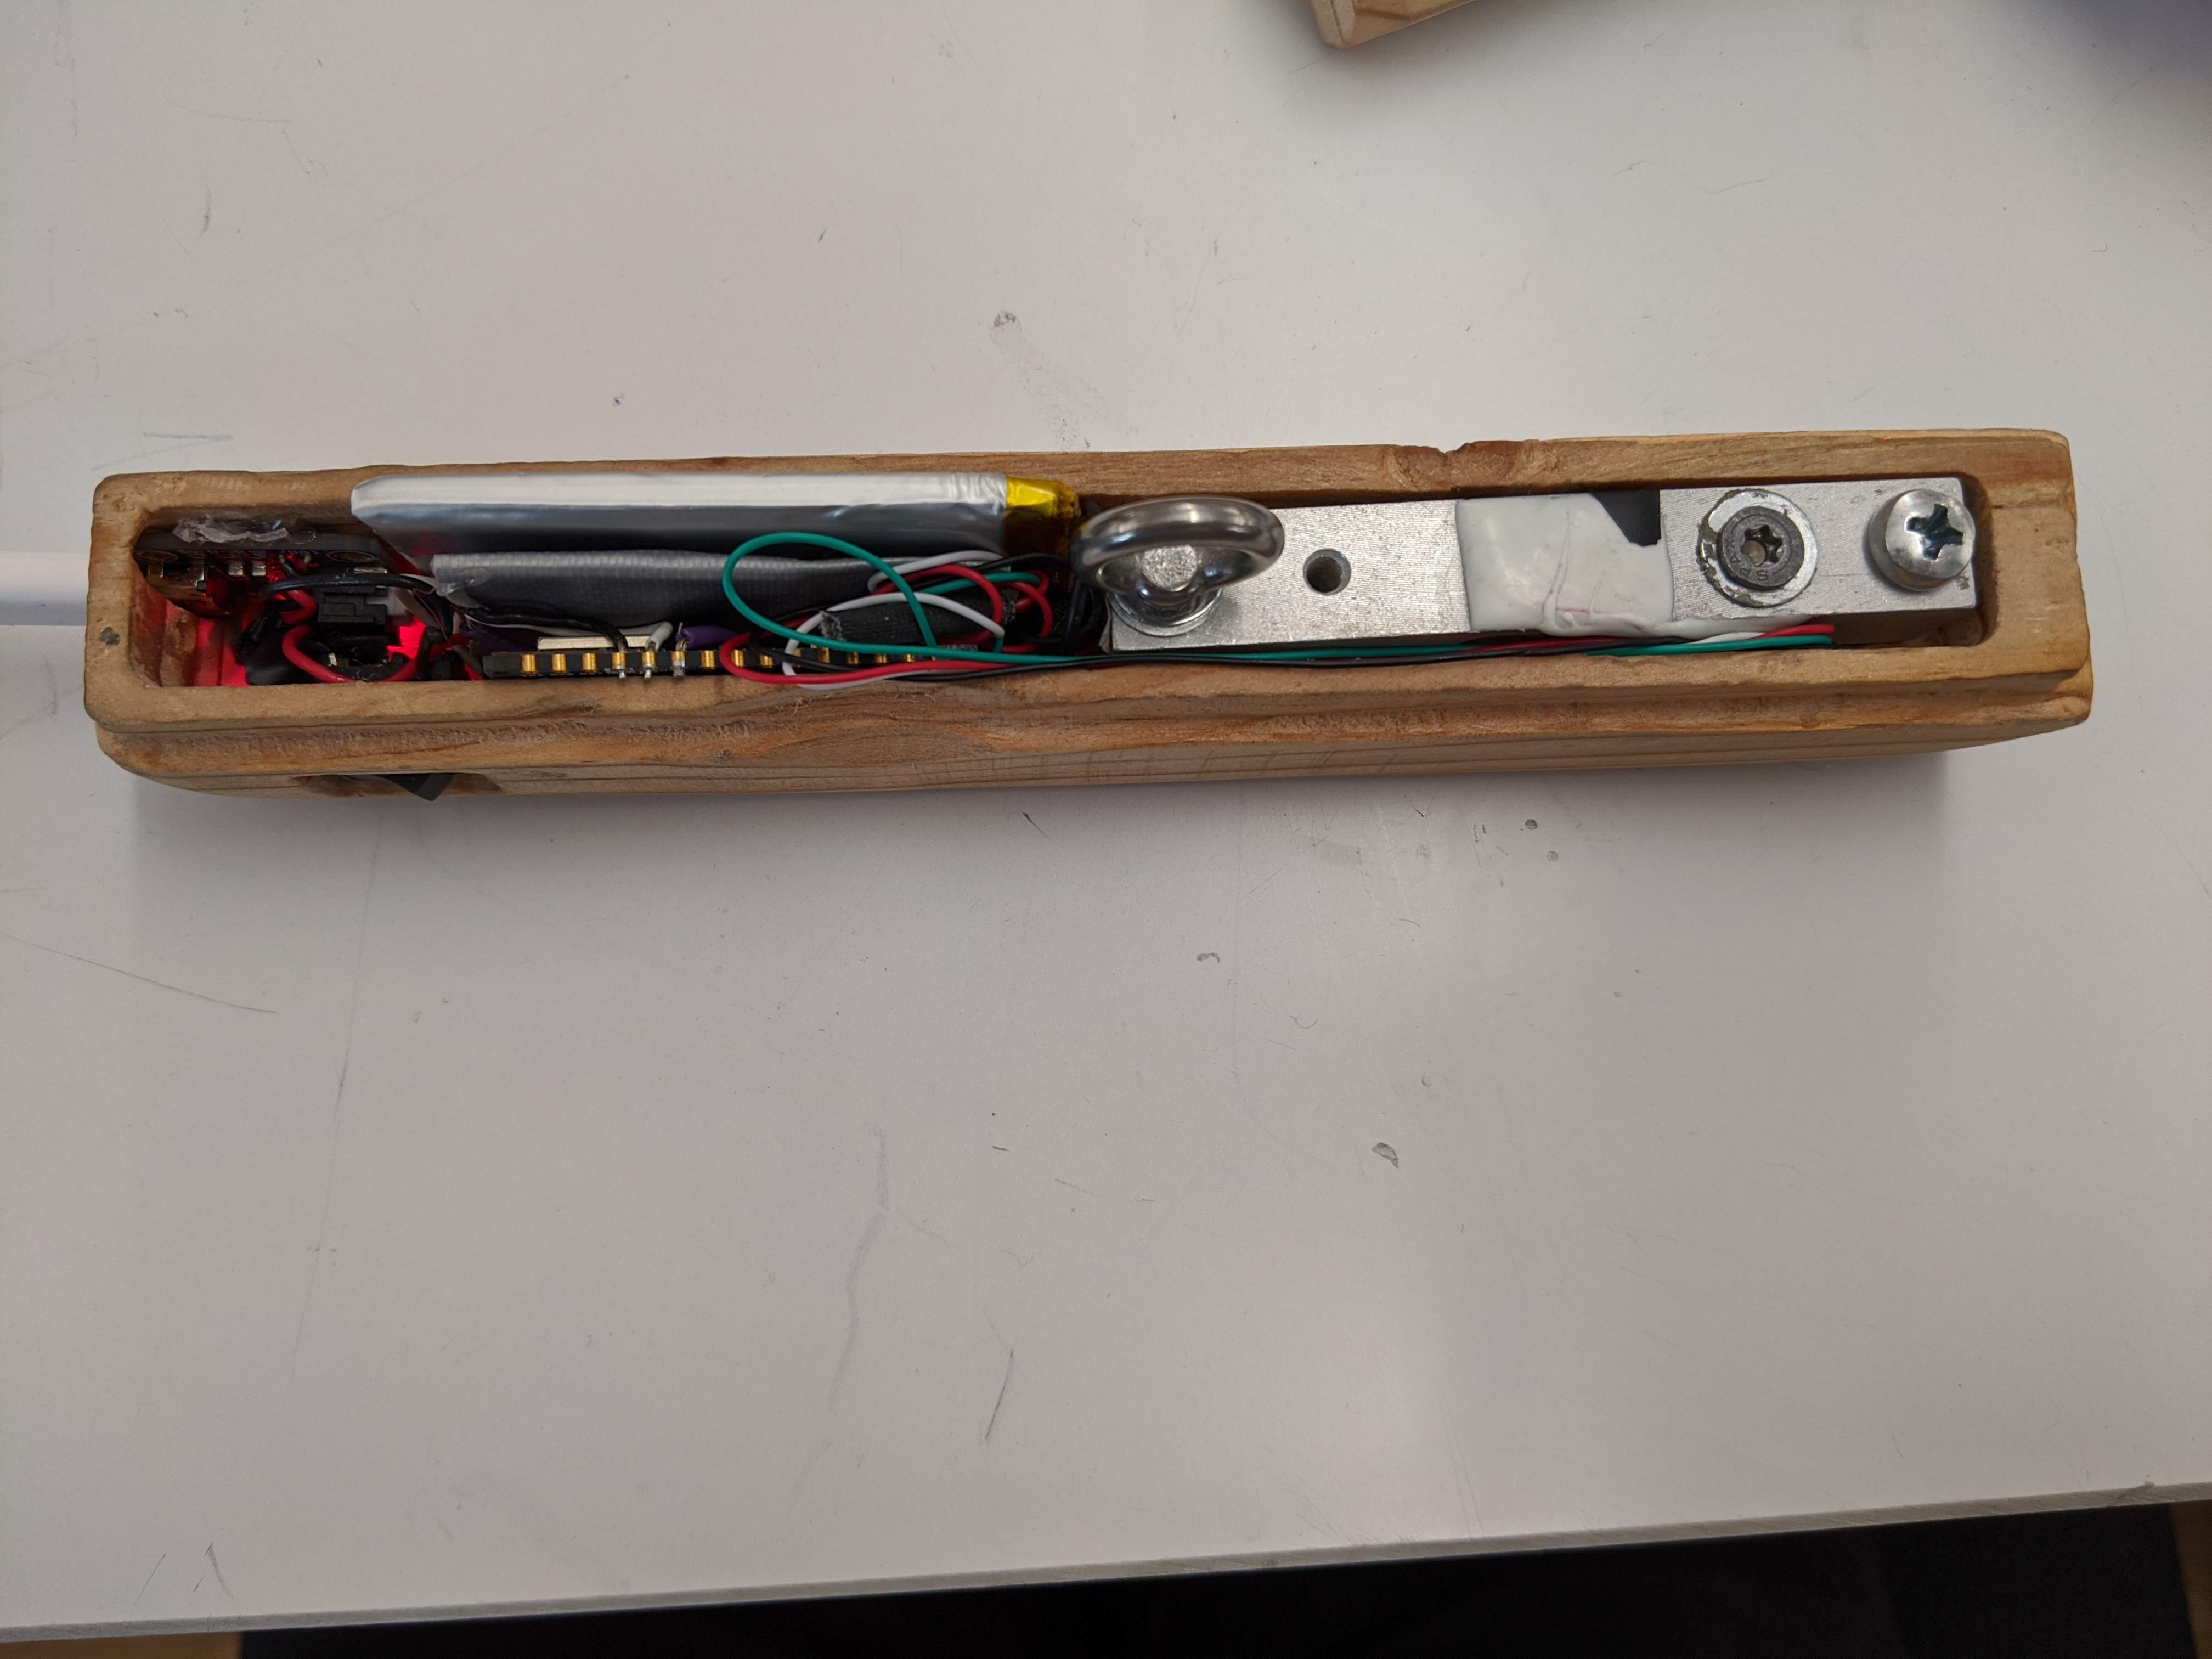
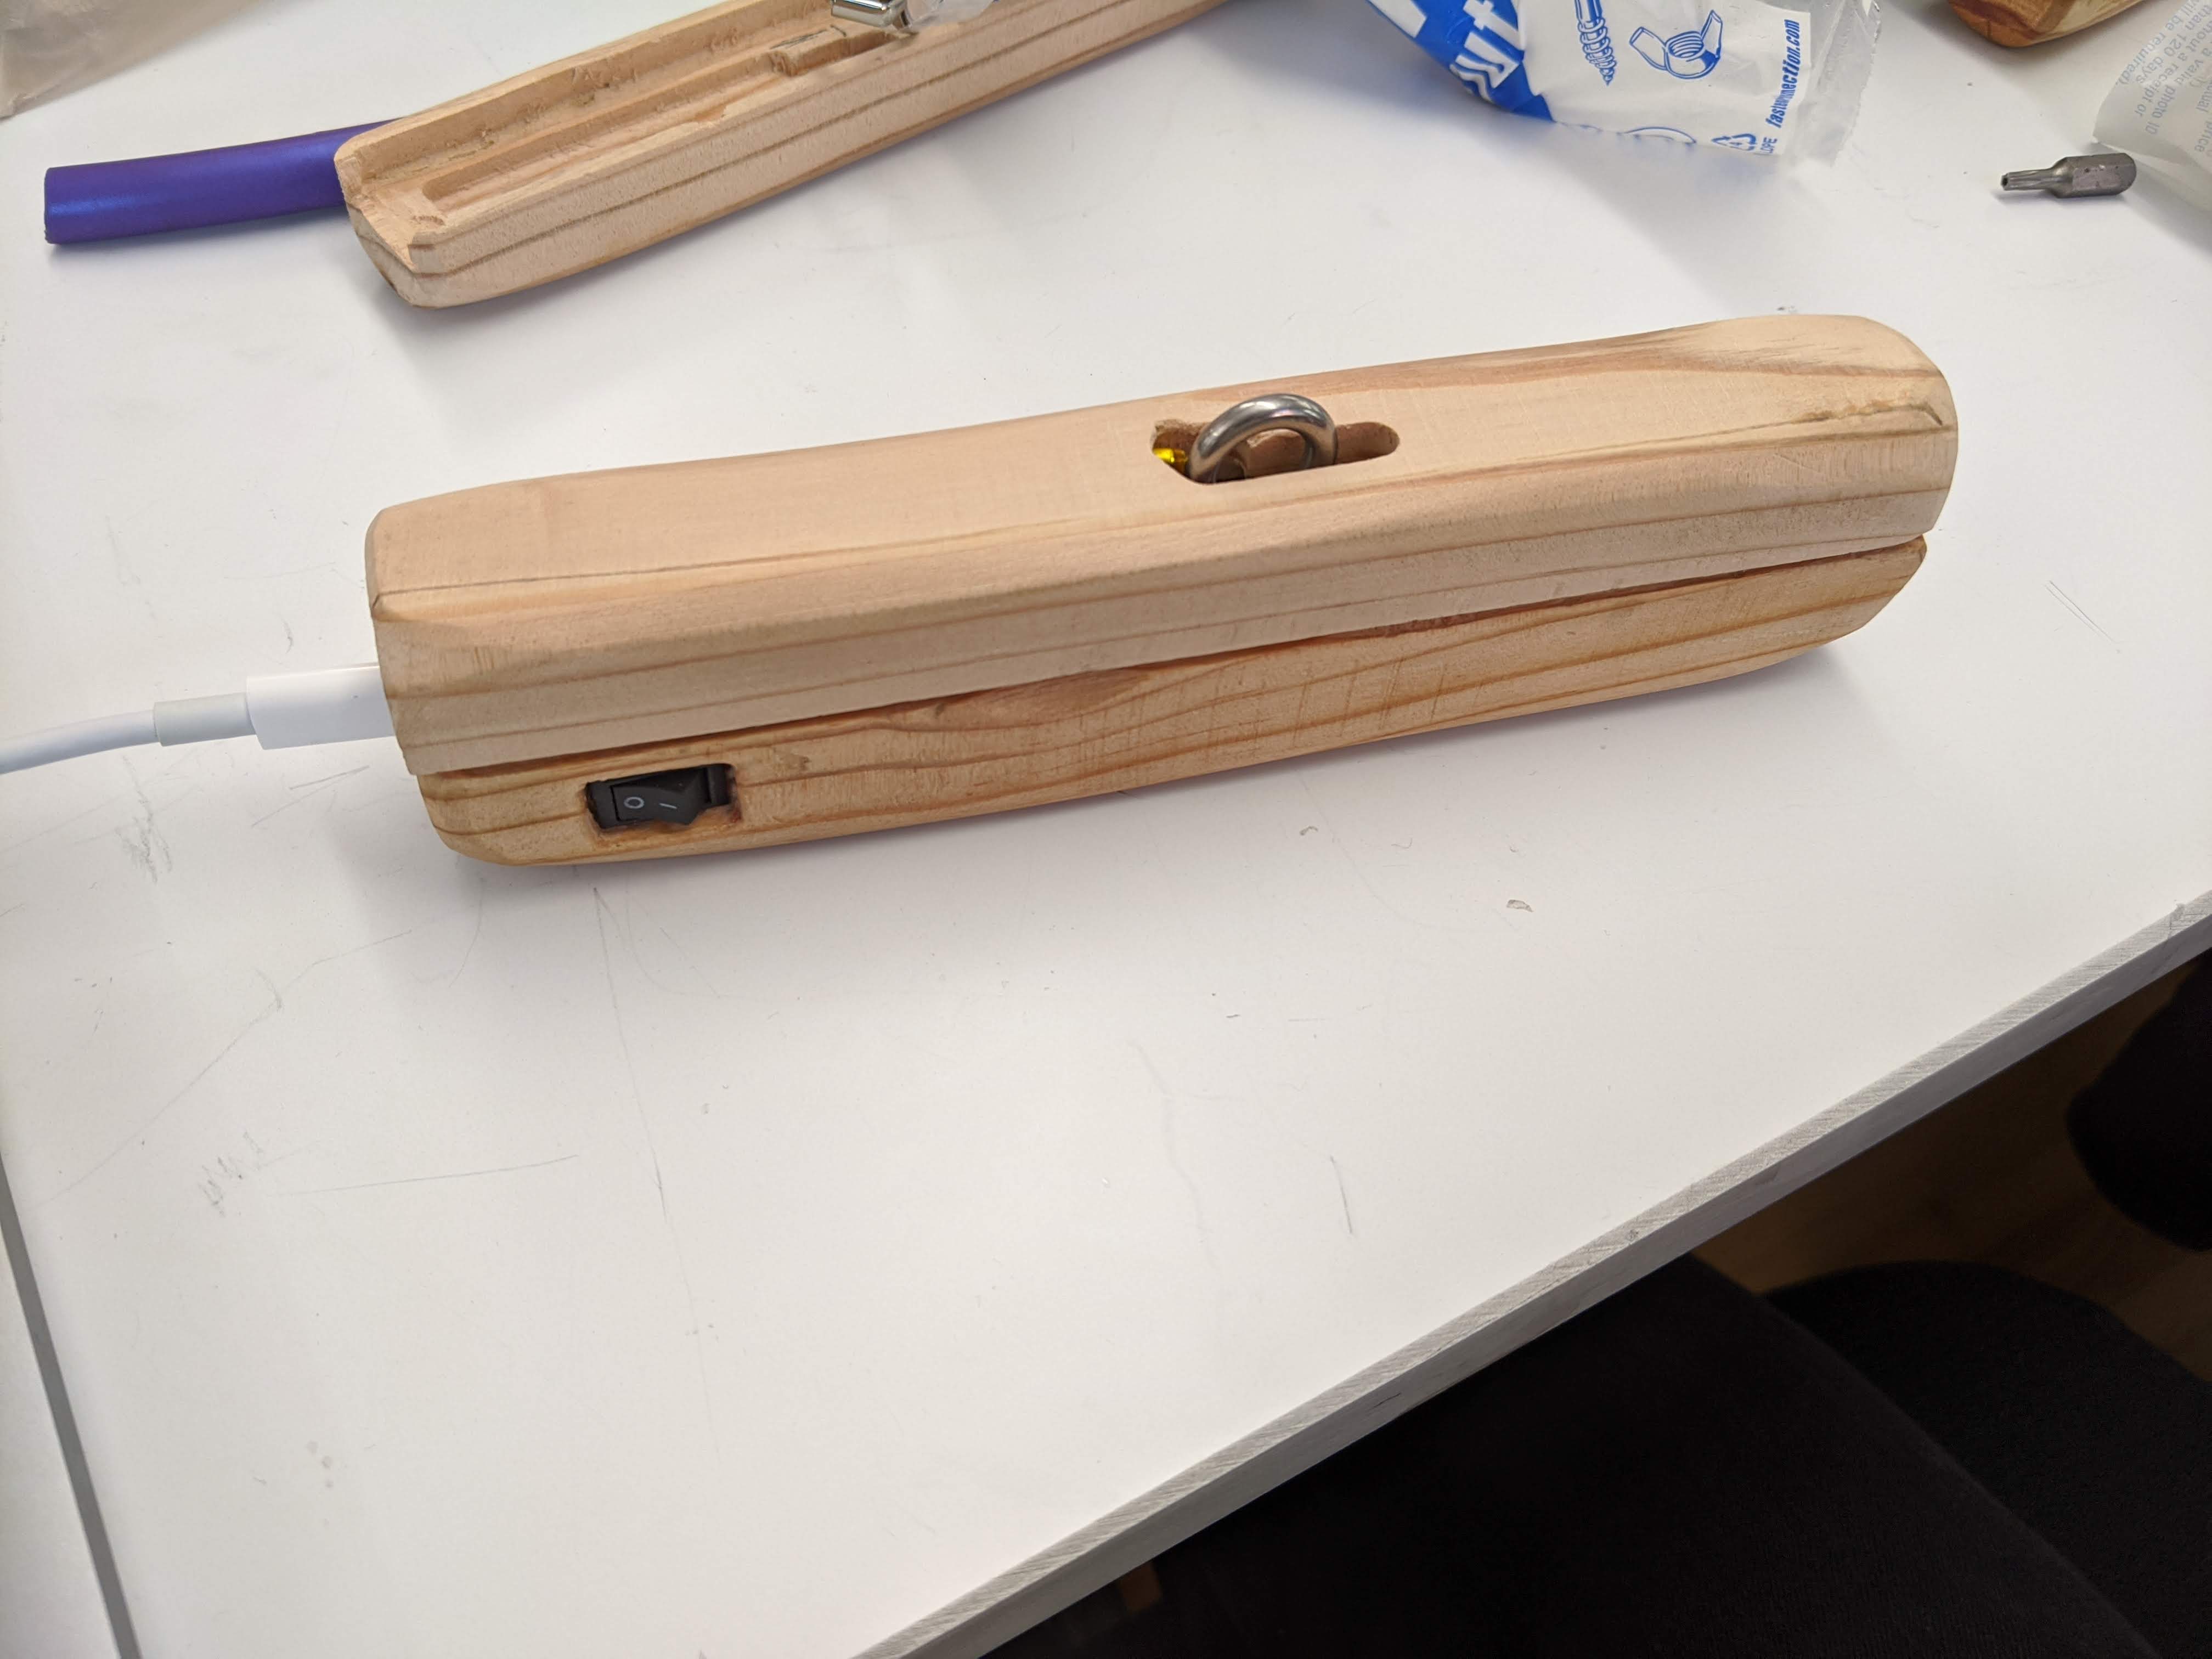
The charge port and power switch are invaluable features - although they don’t play a large role when we show the project, they eased the development process tremendously. The battery can be charged with any USB-C cable and the Arduino can be reset with a flick of a button!
4. Bluetooth / Software Architecture
The Node.JS server receives bluetooth messages before forwarding them through an OSC socket to Max/MSP. Max then performs the relevant processing of the raw sensor data and passes MIDI messages to Ableton Live, which ultimately synthesizes the sounds.
I used @abandonware’s fork of Noble (link) to manage the bluetooth connections. One incredibly time consuming bug is that the bluetooth connection drops out intermittently. We eventually managed to mitigate this by removing all delays from the Arduino controller code, although I’m still not completely sure why this helps.
One feature I am proud of is the automatic reconnection algorithm in the Node server - if it loses connection with one of the bluetooth peripherals (likely because we have reset the power), it automatically attempts to reconnect. A handful of times throughout our playtesting and even during the Winter Show we needed to reset the handles because of a dropped Bluetooth connection. This process was as easy as toggling the power switch on the enclosure and a few seconds later the connection would be automatically restored.
5. Sound Design / Composition
We used a mix of string samples, analog patches, and physical modelling synthesis patches for this iteration of sound. We chose these sounds primarily to match the wood-and-rubber aesthetic of the sculpture.
As the tension increases, many different things happen. The volumes and filters on most of the voices in the Live set are increased and opened at different rates - there are four string voices and four mallets each of which change volume and timbre at different rates. In addition, the speed and detune of mallet hits changes along with the tension, leading to a strong sense of harmonic tension even as the base chord remains stable.
The interplay between mallet speeds and growing tension through volume, timbre, and microharmony serve as the basis for the musical arc of the piece. To enrich this basic pattern we implemented several additional mappings using the accelerometer data from each handle.
The first is rotation - as each player rotates their handle the basic inversion (in a musical sense) of half the voices change - as the primary handle rotates, two string voices and two mallets trade notes and as the secondary handle rotates, the other half of the voices trade their notes. This allows for textural movement within the base chord which is already complex (the base chord is essentially A minor 13, or A minor over G major).
The second is acceleration magnitude - sharp movements of the handle are detected and temporarily increase the speed and pitch of the mallet instruments.
The third is rate of tension increase - rapid increases in tension temporarily lead to more powerful mallet hits.
In general the overall musical experience is very tightly crafted, as opposed to the kind of musical expression that a more traditional instrument might allow. While there is an immense amount of variation or complexity possible within the piece, most interactions produce generally similar musics. The work is more about interacting with a composition than it is a purely expressive instrument.
6. Installation
We wanted our installation to reinforce the sonic, visual, and interaction aesthetics of the piece. The interaction (feeling ebbs and flows in tension), along with the sound (dense layers of organic sounds) is subtle and detailed. While we considered simply presenting the pair of handles on a table, creating a suspended installation helped to frame the piece as a more delicate, intentional artwork as opposed to a purely expressive instrument.
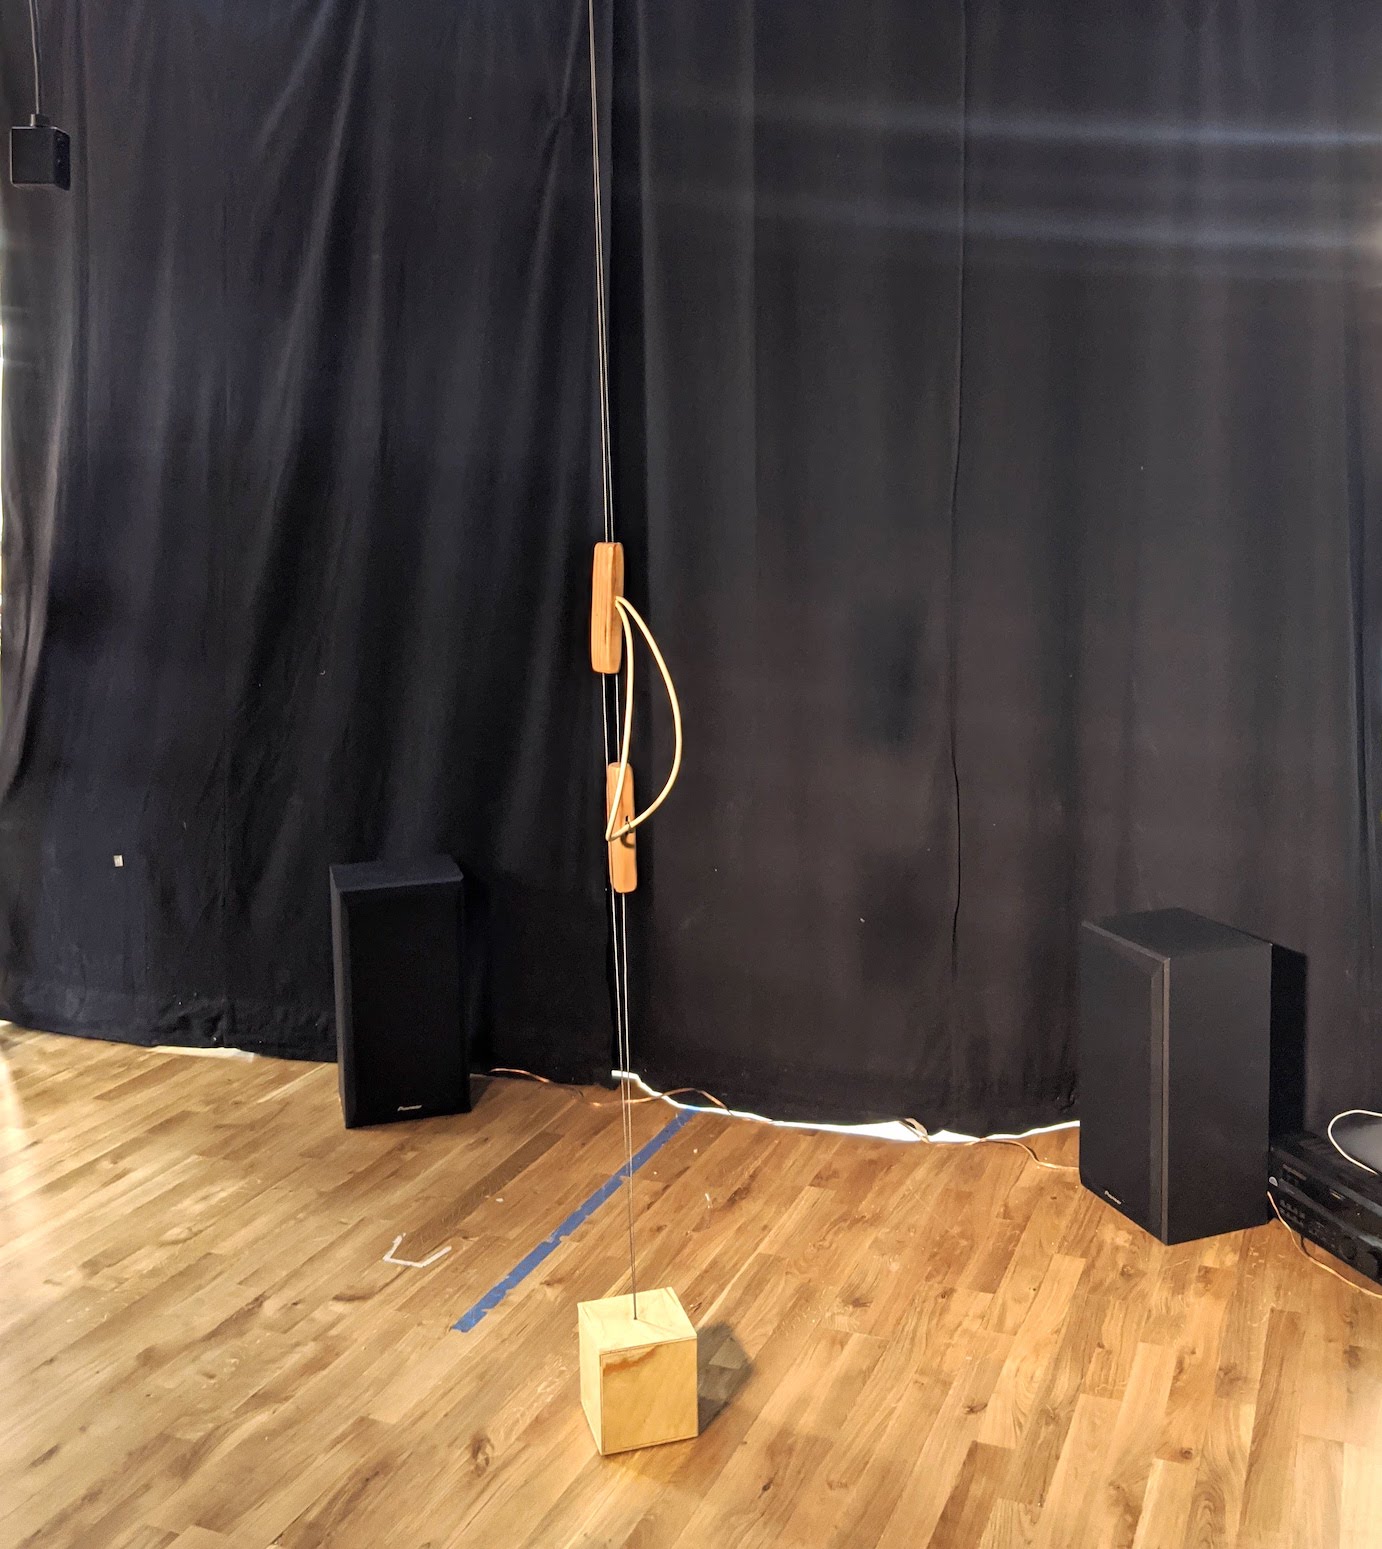
We built simple wooden boxes which each contain a pair of retractable dog leashes. The lower box contains a brick for weight and rubber feet for additional friction.