Physical Computing - Push Button Synthesizer
Basic I/O with the Arduino Nano 33 IOT
I started with wiring a push button and LED - the simplest form of Arduino I/O. The LED is connected to the D3 pin and the push button is wired to the D2 pin. I added a small resistor to the LED to ensure the 3.3V from the board doesn’t burn it out, and a larger 10K resistor from the D2 input pin to ground to ensure the pin has a stable connection to ground while still diverting power to the pin (instead of causing it to go straight to ground).
void setup() {
  pinMode(2, INPUT);
  pinMode(3, OUTPUT);
}

void loop() {
  digitalWrite(3, digitalRead(2));
}
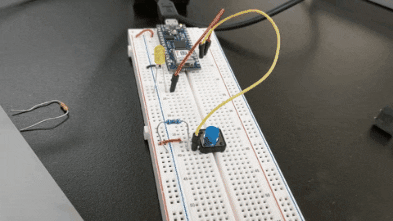
This setup doesn’t preserve state (the LED is only lit while the button is held).
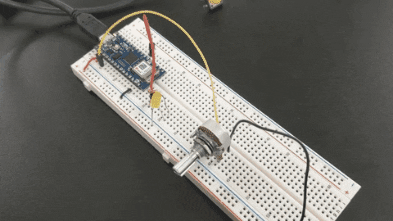
Using analog input
Next, I connected a potentiometer to the A0 input pin to dim the LED as the resistance changes (controlled by the pot).
void setup() {
  pinMode(3, OUTPUT);
}

void loop() {
  digitalWrite(3, analogRead(A0) / 4);
}
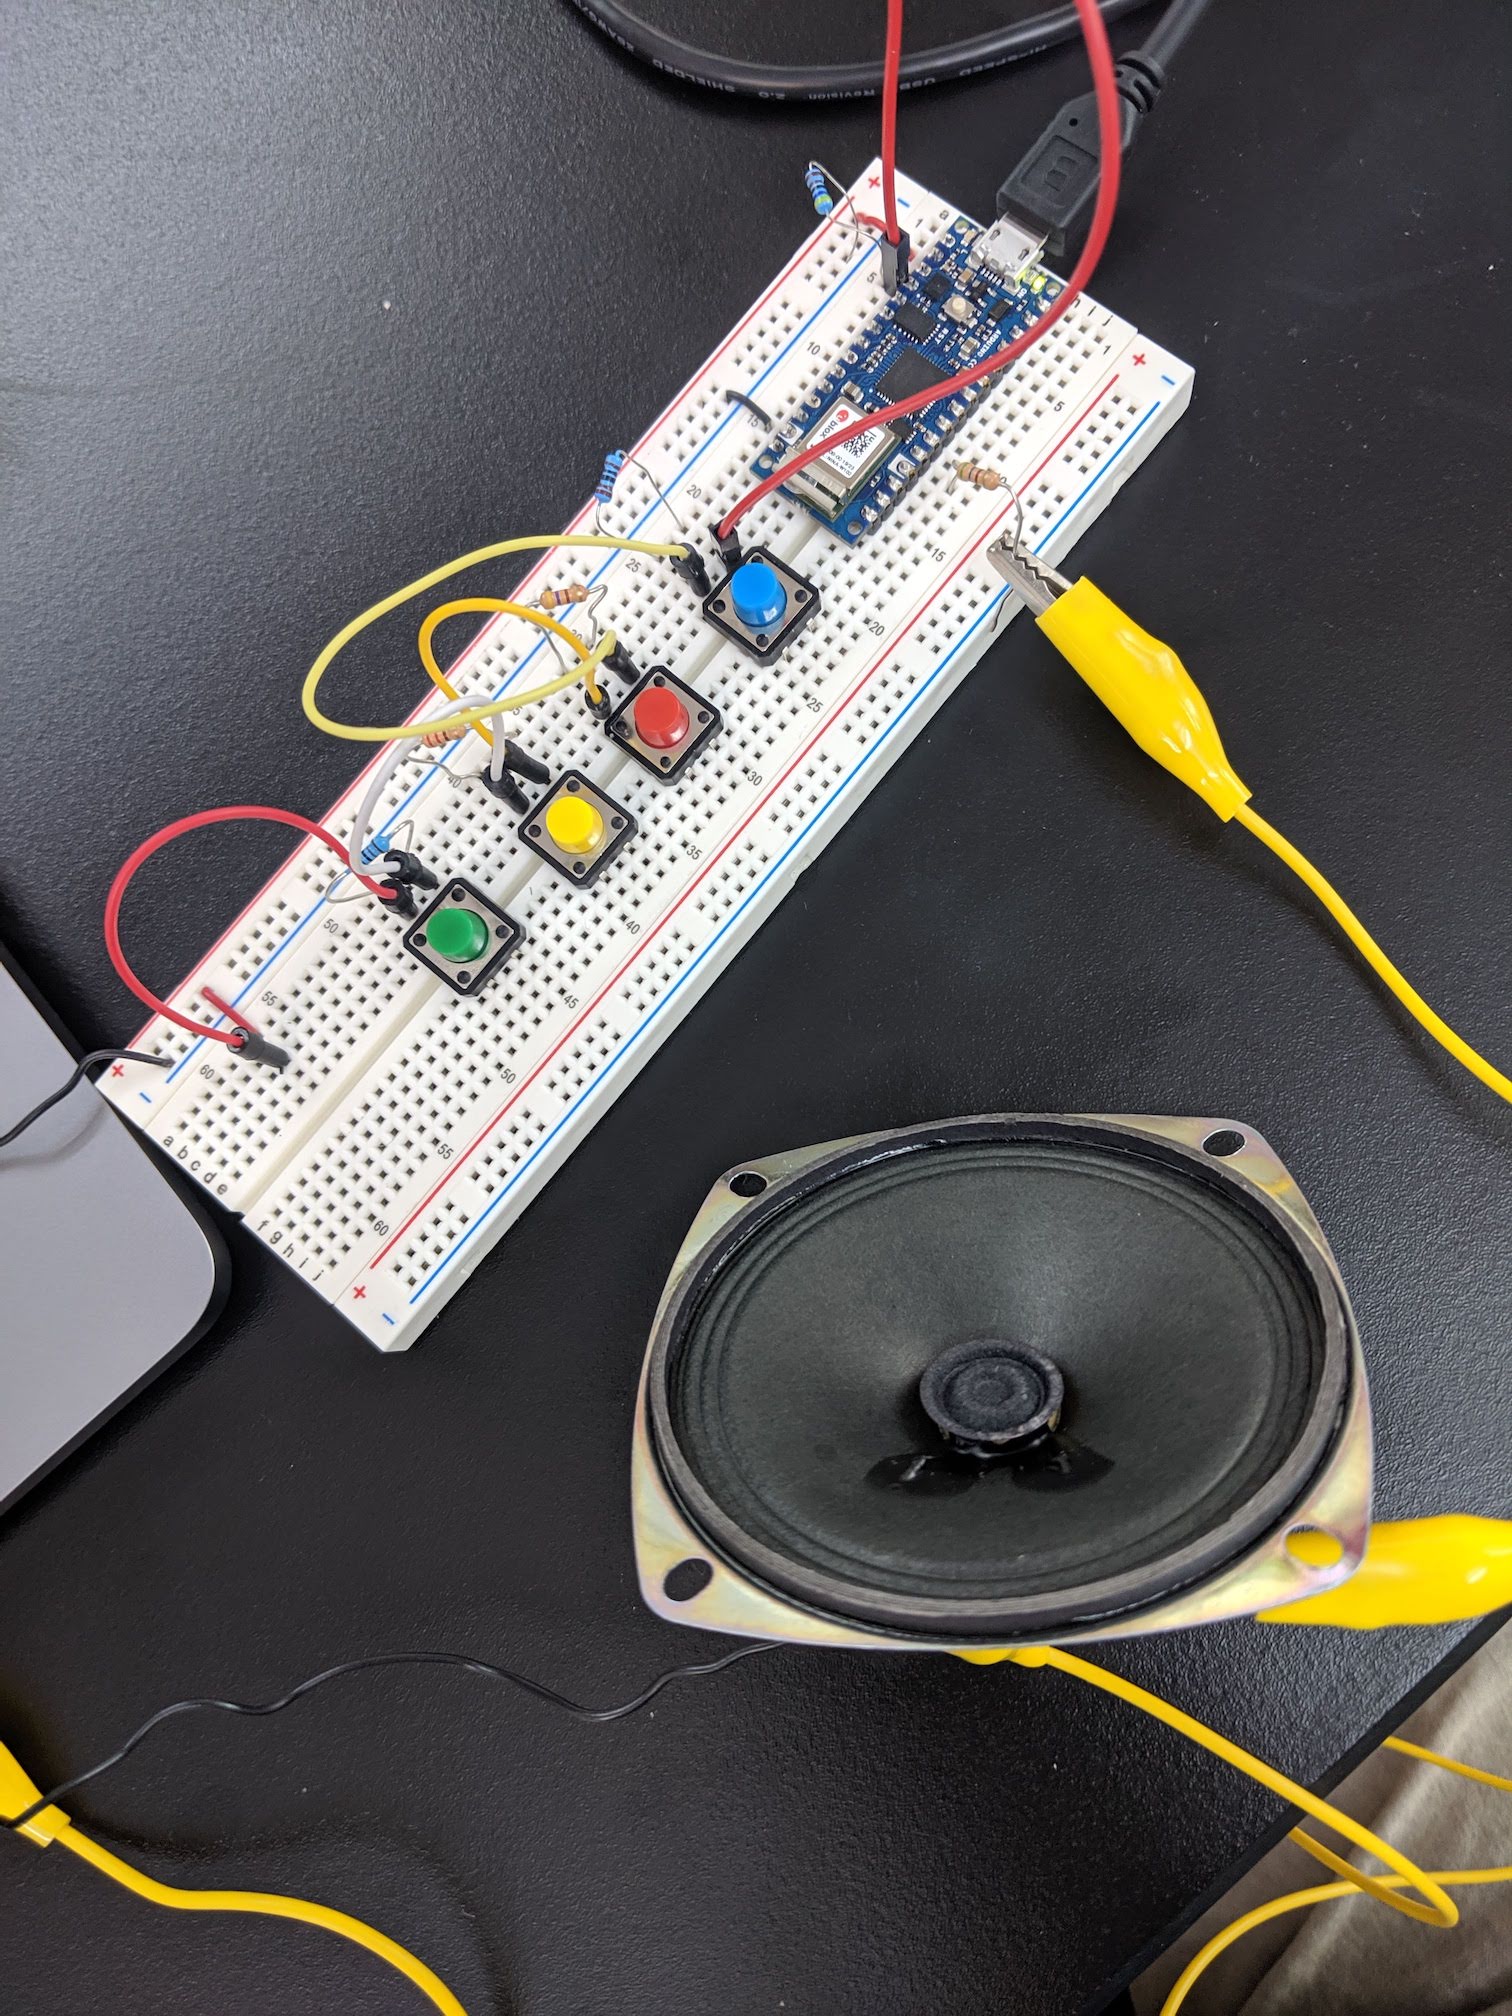
Pushbutton Synthesizer
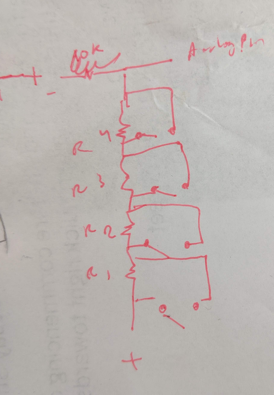
To challenge myself I set the goal of making a basic synthesizer. For bonus points, I wanted to control the notes by wiring several switches into a single analog input (instead of simply reading from multiple digital inputs). Although ultimately I only use four switches, this technique could potentially be useful in a situation where I want to process a ton of inputs without having to get multiple microprocessors. I came up with a circuit design where each of the four switches opens a path to skip an associated resistor. Each of the four resistors is approximately twice the resistance of the last - this way the sum of any group will be unique. This means that each arrangement of the four switches would translate to a specific resistance and specific analog in value, allowing for fifteen individual pitches.
I had a lot of trouble getting the tone() command to work properly, until I realized that I needed to only call it when the frequency value changed (instead of repeatedly calling it with the same arguments every iteration of loop()). To accommodate this I added a simple state-tracking mechanism to only trigger if the last recorded frequency was different from before. I also added smoothing, averaging over the last 16 inputs in order to calm the signal which was quite noisy at the expense of barely noticeable latency.
// Store a circular buffer of the last 16 reads
// which we can then average to smooth the input signal
const int n = 16;
int values[n];
int r_index = 0;
float lastfreq = 0;

int thresholds[15] = {
570,
585,
600,
625,
647,
669,
690,
720,
745,
775,
801,
850,
880,
925,
960
};

float notes[15] = {
  261.63, // D4
  277.18,
  293.66,
  311.13,
  329.63,
  349.23,
  369.99,
  392.00,
  415.30,
  440.00, // A4
  466.16,
  493.88,
  523.25,
  554.37,
  587.33
};

void setup() {
  for (int i = 0; i < n; i++) {
    values[i] = 0;
  }
}


void loop() {
    int val = analogRead(A0);
    values[r_index] = val;
    r_index++;
    if (r_index >= n) {
      r_index = 0;
    }
    int sum = 0;
    for(int i = 0; i < n; i++) {
      sum += values[i];
    }

    int newval = sum / n;
    float freq = 0;
    for(int i = 14; i >= 0; i--) {
      if (newval > thresholds[i]) {
        freq = notes[i];
        break;
      }
    }
    if (freq == 0 && lastfreq != 0) {
      noTone(12);
      lastfreq = freq;
    } else if (freq != lastfreq) {
      tone(12, freq);
      lastfreq = freq;
    }
    delay(1);
}